THE ART OF BOOKBINDING. A PRACTICAL TREATISE.
BY JOSEPH W. ZAEHNSDORF.
TECHNOLOGICAL HANDBOOKS.
ART OF BOOKBINDING.
TECHNOLOGICAL HANDBOOKS.
1. DYEING AND TISSUE-PRINTING. By William Crookes,
F.R.S., V.P.C.S. 5s.
2. GLASS MANUFACTURE.
INTRODUCTORY
ESSAY,
by H. J. Powell, B.A. (Whitefriars Glass Works);
CROWN
AND
SHEET
GLASS,
by Henry Chance, M.A. (Chance Bros., Birmingham);
PLATE
GLASS, by H. G.
Harris, Assoc. Memb. Inst. C.E. 3s. 6d.
3. COTTON SPINNING; Its Development, Principles, and
Practice. By R. Marsden, Editor of the “Textile Mercury.” With an
Appendix on Steam Engines and Boilers. 3rd edition, revised, 6s.
6d.
4. COAL-TAR COLOURS, The Chemistry of. With special
reference to their application to Dyeing, &c. By Dr. R. Benedikt.
Translated from the German by E. Knecht, Ph.D. 2nd edition, enlarged,
6s. 6d.
5. WOOLLEN AND WORSTED CLOTH MANUFACTURE. By Professor
Roberts Beaumont. 2nd edition, revised. 7s. 6d.
6. PRINTING. By C. T. Jacobi, Manager of the Chiswick
Press. 5s.
7. BOOKBINDING. By J. W. Zaehnsdorf.
9. COTTON WEAVING. By R. Marsden. In preparation.
TECHNOLOGICAL HANDBOOKS.
THE ART
OF
BOOKBINDING.
A PRACTICAL TREATISE.
BY
JOSEPH W. ZAEHNSDORF.
WITH
PLATES
AND
DIAGRAMS.
SECOND EDITION, REVISED AND ENLARGED.
LONDON: GEORGE BELL AND SONS,
YORK STREET, COVENT GARDEN.
1890.
CHISWICK PRESS:—C.
WHITTINGHAM AND CO.,
TOOKS COURT, CHANCERY LANE.
DEDICATED TO
HUGH OWEN, ESQ., F.S.A.,
AS A SLIGHT
ACKNOWLEDGMENT OF HIS COUNSEL AND
FRIENDSHIP, AND IN ADMIRATION OF HIS
KNOWLEDGE OF
BOOKBINDING.
PREFACE TO THE SECOND EDITION.
The
first edition of this book was written for the use of
amateurs, but I found that amongst the members of
the trade my little volume had a large sale, and in a short
time the edition became exhausted. Repeated applications
for the book have induced me to issue this second edition.
I have adhered to the arrangement of the first, but a great
deal of fresh matter has been added, which I trust will be
found useful. Should any of my fellow-workmen find
anything new to them I shall be satisfied, knowing that I
have done my duty in spreading such knowledge as may
contribute towards the advancement of the beautiful art of
bookbinding.
I have to record my obligations to those gentlemen who
have assisted me by courteously describing the various
machines of their invention with which the book is illustrated.
The object, however, of illustrating this work with
engravings of machines is simply to recognize the fact that
books are bound by machinery. To a mechanical worker
must be left the task of describing the processes used in
this method.
-
LIST OF PLATES.
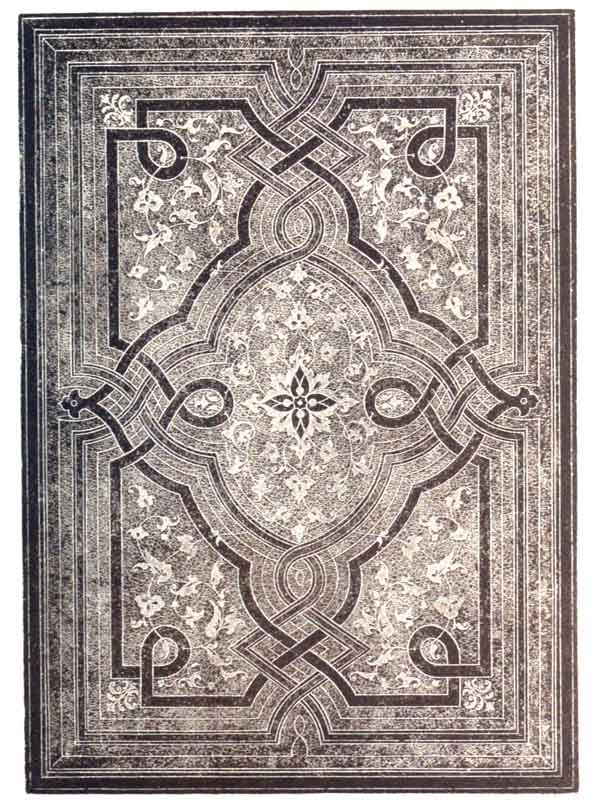
- FLORENTINE …
Frontispiece
-
◊
GROLIER …
-
◊
GASCON …
-
◊
RENAISSANCE …
-
◊
ANTIQUE
WITH
GOLD
LINE …
-
◊
DEROME …
-
◊
GROLIER …
-
◊
MAIOLI …
CONTENTS. |
|---|
PART I.—FORWARDING. |
PAGE |
| CHAPTER
I. Folding: Refolding — Machines — Gathering |
3–8 |
| CHAPTER
II. Beating and Rolling: Machines |
9–12 |
| CHAPTER
III. Collating: Interleaving |
13–19 |
| CHAPTER
IV. Marking up and Sawing in |
20–23 |
| CHAPTER
V. Sewing: Flexible — Ordinary |
23–32 |
| CHAPTER
VI. Forwarding: End Papers — Cobb Paper — Surface
Paper — Marbled Paper — Printed and other Fancy
Paper — Coloured Paste Paper |
33–36 |
| CHAPTER
VII. Pasting up |
36–37 |
| CHAPTER
VIII. Putting on the End Papers |
38–41 |
| CHAPTER
IX. Trimming |
41–44 |
| CHAPTER
X. Gluing up |
45–46 |
| CHAPTER
XI. Rounding |
46–48 |
| CHAPTER
XII. Backing |
48–51 |
| CHAPTER
XIII. Mill-boards |
51–57 |
| CHAPTER
XIV. Drawing-in and Pressing |
57–59 |
| CHAPTER
XV. Cutting |
59–66 |
| CHAPTER
XVI. Colouring the Edges: Sprinkled Edges — Colours
for Sprinkling — Plain Colouring — Marbled Edges — Spot
Marble — Comb or Nonpareil Marble — Spanish
Marble — Edges — Sizing |
67–77 |
| CHAPTER
XVII. Gilt Edges: The Gold Cushion — Gold
Knife — Burnishers — Glaire Water or Size — Scrapers — The
Gold Leaf — Gilt on Red — Tooled Edges — Painted
Edges |
78–83 |
| CHAPTER
XVIII. Head-Banding |
83–86 |
| CHAPTER
XIX. Preparing for Covering: lining up |
87–90 |
| CHAPTER
XX. Covering: Russia — Calf — Vellum or
Parchment — Roan — Cloth — Velvet — Silk
and Satin — Half-bound Work |
90–97 |
| CHAPTER
XXI. Pasting Down: Joints — Calf, Russia, etc. |
97–100 |
| CHAPTER
XXII. Calf Colouring:
Black — Brown — Yellow — Sprinkles — Marbles — Tree-marbles — Dabs |
100–108 |
PART II. — FINISHING.
CHAPTER
XXIII. Finishing:
Tools and Materials required for Finishing — Polishing
Irons — Gold-rag — India-rubber — Gold-cushion — Gold
Leaf — Sponges — Glaire — Cotton
Wool — Varnish — Finishing — Morocco — Gold Work — Inlaid
Work — Porous — Full Gilt Back — Run-up — Mitred
Back — Pressing — Graining — Finishing with Dry
Preparation — Velvet — Silk — Vellum — Blocking |
111–153 |
GENERAL INFORMATION.
CHAPTER
XXIV. Washing and Cleaning:
Requisites — Manipulation — Dust — Water
Stains — Damp Stains — Mud — Fox-marks — Finger-marks, commonly called
“Thumb-marks” — Blood Stains — Ink Stains (writing) — Ink
Stains (Marking Ink, Silver) — Fat Stains — Ink — Reviving
Old Writings — To Restore Writing effaced by
Chlorine — To Restore MSS. faded by time — To Preserve
Drawings or Manuscripts — To fix Drawings or Pencil
Marks — To render Paper Waterproof — To render Paper
Incombustible — Deciphering Burnt Documents — Insects — Glue — Rice
Glue or Paste — Paste — Photographs — Albumen — To
Prevent Tools, Machines, etc., from Rusting — To
Clean Silver Mountings — To Clean Sponges |
157–172 |
| GLOSSARY |
173 |
| INDEX |
181 |
INTRODUCTION.
Bookbinding carries us back to the time when
leaden tablets with inscribed hieroglyphics were
fastened together with rings, which formed what to us
would be the binding of the volumes. We might go even
still further back, when tiles of baked clay with cuneiform
characters were incased one within the other, so that if the
cover of one were broken or otherwise damaged there still
remained another, and yet another covering; by which care
history has been handed down from generation to generation.
The binding in the former would consist of the
rings which bound the leaden tablets together, and in the
latter, the simple covering formed the binding which
preserved the contents.
We must pass on from these, and make another pause,
when vellum strips were attached together in one continuous
length with a roller at each end. The reader
unrolled the one, and rolled the other as he perused the
work. Books, prized either for their rarity, sacred
character, or costliness, would be kept in a round box or
case, so that the appearance of a library in Ancient Jerusalem
would seem to us as if it were a collection of
canisters. The next step was the fastening of separate
leaves together, thus making a back, and covering the
whole as a protection in a most simple form; the only
object being to keep the several leaves in connected
sequence. I believe the most ancient form of books
formed of separate leaves, will be found in the sacred
books of Ceylon which were formed of palm leaves, written
on with a metal style, and the binding was merely a silken
string tied through one end so loosely as to admit of each
leaf being laid down flat when turned over. When the
mode of preserving MS. on animal membrane or vellum in
separate leaves came into use, the binding was at first only
a simple piece of leather wrapped round the book and tied
with a thong. These books were not kept on their edges,
but were laid down flat on the shelves, and had small cedar
tablets hanging from them upon which their titles were
inscribed.
The ordinary books for general use were only fastened
strongly at the back, with wooden boards for the sides, and
simply a piece of leather up the back.
In the sixth century, bookbinding had already taken its
place as an “Art,” for we have the “Byzantine coatings,”
as they are called. They are of metal, gold, silver or
copper gilt, and sometimes they are enriched with precious
stones. The monks, during this century, took advantage
of the immense thickness of the wooden boards and frequently
hollowed them out to secrete their relics in the
cavities. Bookbinding was then confined entirely to the
monks who were the literati of the period. Then the art
was neglected for some centuries, owing to the plunder and
pillage that overran Europe, and books were destroyed to
get at the jewels that were supposed to be hidden in the
different parts of the covering, so that few now remain to
show how bookbinding was then accomplished and to what
extent.
We must now pass on to the middle ages, when samples
of binding were brought from the East by the crusaders,
and these may well be prized by their owners for their
delicacy of finish. The monks, who still held the Art of
Bookbinding in their hands, improved upon these Eastern
specimens. Each one devoted himself to a different branch:
one planed the oaken boards to a proper size, another
stretched and coloured the leather; and the work was thus
divided into branches, as it is now. The task was one of
great difficulty, seeing how rude were the implements then
in use.
The art of printing gave new life to our trade, and,
during the fifteenth century bookbinding made great
progress on account of the greater facility and cheapness
with which books were produced. The printer was then
his own binder; but as books increased in number, bookbinding
became a separate art-trade of itself. This was a
step decidedly in the right direction. The art improved so
much, that in the sixteenth century some of the finest
samples of bookbinding were executed. Morocco having
been introduced, and fine delicate tools cut, the art was
encouraged by great families, who, liking the Venetian
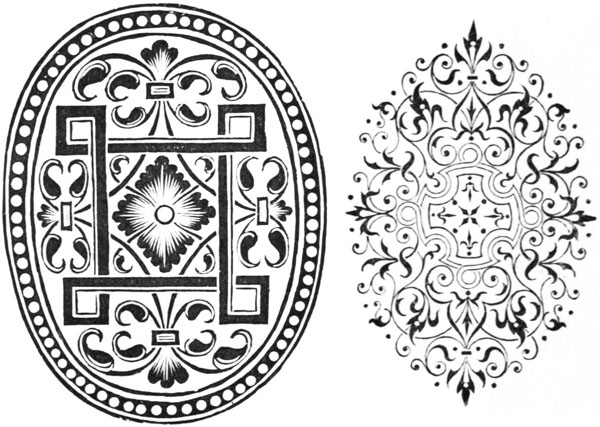
patterns, had their books bound in that style. The annexed
woodcut will give a fair idea of a Venetian tool. During
this period the French had bookbinding almost entirely in
their hands, and Mons. Grolier, who loved the art, had his
books bound under his own supervision in the most costly
manner. His designs consisted of bold gold lines arranged
geometrically with great accuracy, crossing one another and
intermixed with small leaves or sprays. These were in
outlines shaded or filled up with closely worked cross lines.
Not, however, satisfied with these simple traceries, he embellished
them still more by staining or painting them
black, green, red, and even with silver, so that they formed
bands interlacing each other in a most graceful manner.
Opposite is a centre block of Grolier. It will be seen how
these lines entwine, and how the small tools are shaded
with lines. If the reader has had the good fortune to see
one of these specimens, has he not wondered at the taste
displayed? To the French must certainly be given the
honour of bringing the art to such a perfection. Francis I.
and the succeeding monarchs, with the French nobility,
placed the art on such a high eminence, that even now we
are compelled to look to these great masterpieces as models
of style. Not only was the exterior elaborate in ornament,
but the edges were gilded and tooled; and even painted.
We must wonder at the excellence of the materials and the
careful workmanship which has preserved the bindings,
even to the colour of the leather, in perfect condition to
the present day.
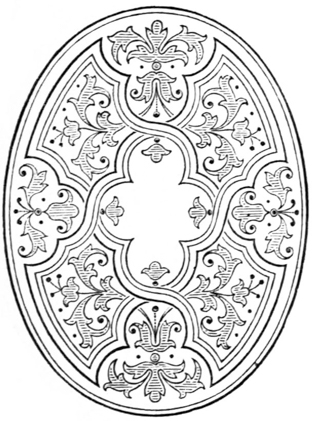
Grolier.
There is little doubt that the first examples of the style
now known as “Grolier” were produced in Venice, under
the eye of Grolier himself, and according to his own
designs; and that workmen in France, soon rivalled and
excelled the early attempts. The work of Maioli may be
distinctly traced by the bold simplicity and purity of his
designs; and more especially by the broader gold lines
which margin the coloured bands of geometric and
arabesque ornamentation.
All books, it must be understood, were not bound in so
costly a manner, for we find pigskin, vellum and calf in
use. The latter was especially preferred on account of its
peculiar softness, smooth surface, and great aptitude for
receiving impressions of dumb or blind tooling. It was
only towards the latter part of the sixteenth century that
the English binders began to employ delicate or fine
tooling.
During the seventeenth century the names of Du Sueil
and Le Gascon were known for the delicacy and extreme
minuteness of their finishing. Not disdaining the bindings
of the Italian school, they took from them new ideas; for
whilst the Grolier bindings were bold, the Du Sueil and
Le Gascon more resembled fine lace work of intricate
design, with harmonizing flowers and other objects, from
which we may obtain a great variety of artistic character.
During this period embroidered velvet was much in use.
Then a change took place and a style was adopted which
by some people would be preferred to the gorgeous bindings
of the sixteenth century. The sides were finished
quite plainly with only a line round the edge of the boards
(and in some instances not even that) with a coat of arms
or some badge in the centre.
Towards the end of the seventeenth century bookbinding
began to improve, particularly with regard to forwarding.
The joints were true and square, and the back was made to
open more freely. In the eighteenth century the names of
Derome, Roger Payne, and others are prominent as masters
of the craft, and the Harleian style was introduced.
The plate facing may be fairly estimated as a good
specimen of Derome. Notice the extreme simplicity and
yet the symmetry of the design; its characteristic feature
being the boldness of the corners and the gradual diminishing
of the scroll work as it nears the centre of the
panel. Morocco and calf were the leathers used for this
binding.
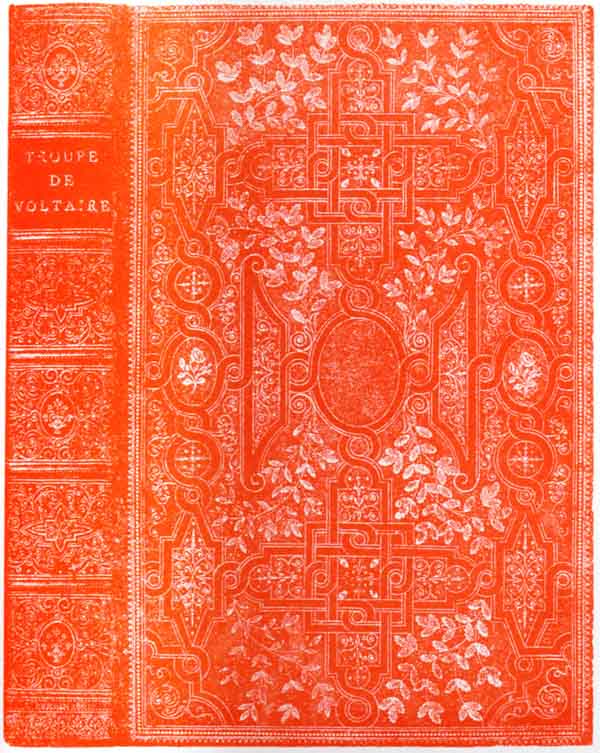
GASCON.
8vo
T. Way, Photo-lith.
Hand coloured calf was at this period at its height, and
the Cambridge calf may be named as a pattern of one of
the various styles, and one that is approved of by many at
the present day—the calf was sprinkled all over, save a
square panel left uncoloured in the centre of the boards.
Harleian.
The Harleian style took its name from Harley, Earl of
Oxford. It was red morocco with a broad tooled border
and centre panels. We have the names of various masters
who pushed the art forward to very great excellence during
this century. Baumgarten and Benedict, two Germans of
considerable note in London; Mackinly, from whose house
also fine work was sent out, and by whom good workmen
were educated whose specimens almost equal the work of
their master. There were two other Germans, Kalthoeber
and Staggemeier, each having his own peculiar style.
Kalthoeber is credited with having first introduced painting
on the edges. This I must dispute, as it was done in the
sixteenth century. To him, however, must certainly be
given the credit of having discovered the secret, if ever
lost, and renewing it on his best work. We must now
pass on to Roger Payne, that unfortunate and erring man
but clever workman, who lived during the latter part of
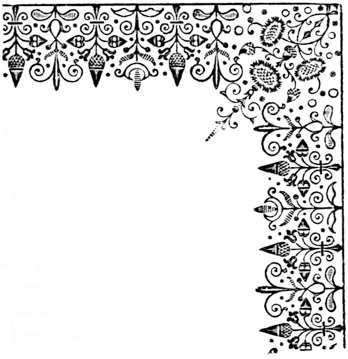
the eighteenth century. His taste may be seen from the
woodcut. He generally used small tools, and by combining
them formed a variety of beautiful designs. He cut most
of these tools himself, either because he could not find a
tool cutter of sufficient skill, or that he found it difficult to
pay the cost. We are told by anecdote, that he drank
much and lived recklessly; but notwithstanding all his
irregular habits, his name ought to be respected for the
work he executed. His backs were firm, and his forwarding
excellent; and he introduced a class of finishing that was
always in accordance with the character or subject of the
book. His only fault was the peculiar coloured paper with
which he made his end papers.
Roger Payne.
Coloured or fancy calf has now taken the place of the
hand-coloured. Coloured cloth has come so much into use,
that this branch of the trade alone monopolizes nearly
three-fourths of the workmen and females employed in
bookbinding. Many other substitutes for leather have
been introduced, and a number of imitations of morocco
and calf are in the market; this, with the use of machinery,
has made so great a revolution in the trade, that it is now
divided into two distinct branches—cloth work and extra
work.
I have endeavoured in the foregoing remarks to raise
the emulation of my fellow craftsmen by naming the most
famous artists of past days; men whose works are most
worthy of study and imitation. I have refrained from
any notice or criticism of the work of my contemporaries;
but I may venture to assure the lover of good bookbinding
that as good and sound work, and as careful finish, may be
obtained in a first-rate house in London as in any city in
the world.
In the succeeding chapters, I will endeavour in as plain
and simple a way as I can to give instructions to the
unskilled workman how to bind a book.
PART I.
FORWARDING.
|3|
THE ART OF BOOKBINDING.
CHAPTER I.
FOLDING.
We commence
with folding. It is generally the first thing
the binder has to do with a book. The sheets are either
supplied by the publisher or printer (mostly the printer);
should the amateur wish to have his books in sheets,
he may generally get them by asking his bookseller for
them. It is necessary that they be carefully folded, for
unless they are perfectly even, it is impossible that the
margins (the blank space round the print) can be uniform
when the book is cut. Where the margin is small, as in
very small prayer books, a very great risk of cutting into
the print is incurred; besides, it is rather annoying to see
a book which has the folio or paging on one leaf nearly at
the top, and on the next, the print touching the bottom;
to remedy such an evil, the printer having done his
duty by placing his margins quite true, it remains with the
binder to perfect and bring the sheet into proper form by
folding. The best bound book may be spoilt by having
the sheets badly folded, and the binder is perfectly justified
in rejecting any sheets that may be badly printed, that is,
not in register. |4|
The sheets are laid upon a table with the signatures
(the letters or numbers that are at the foot of the first
page of each sheet when folded) facing downwards on the
left hand side. A folding-stick is held in the right hand, and
the sheet is brought over from right to left, the folios being
carefully placed together; if the paper is held up to the
light, and is not too thick, it can be easily seen through.
Holding the two together and laying them on the table the
folder is drawn across the sheet, creasing the centre; then,
holding the sheet down with the folder on the line to be
creased, the top part is brought over and downwards till
the folios or the bottom of the letterpress or print is again
even. The folder is then drawn across, and so by bringing
each folio together the sheet is completed. The process is
extremely simple. The octavo sheet is generally folded
into 4 folds, thus giving 8 leaves or 16 pages; a quarto,
into 2, giving 4 leaves or 8 pages, and the sheets properly
folded, will have their signatures outside at the foot of the
first page. If the signature is not on the outside, one
may be certain that the sheet has been wrongly folded.
I say generally; at one time the water or wire mark on
the paper and the number of folds gave the size of the
book.
There are numerous other sizes, but it is not necessary
to give them all; the process of folding is in nearly all
cases the same; here are however, a few of the sizes given
in inches.
| Foolscap 8vo. |
6 5 ⁄ 8 |
× |
4 1 ⁄ 8 |
| Demy 12mo. |
7 3 ⁄ 8 |
× |
4 3 ⁄ 8 |
| Crown 8vo. |
7 1 ⁄ 2 |
× |
5 |
| Post 8vo. |
8 |
× |
5 |
| Demy 8vo. |
9 |
× |
5 1 ⁄ 2 |
| Medium 8vo. |
9 5 ⁄ 8 |
× |
5 3 ⁄ 4 |
| Small Royal 8vo. |
10 |
× |
6 1 ⁄ 4 |
| Large Royal 8vo. |
10 1 ⁄ 2 |
× |
6 3 ⁄ 4 |
| Imperial 8vo. |
11 |
× |
7 1 ⁄ 2 |
| Demy 4to. |
11 |
× |
9 |
| Medium 4to. |
11 3 ⁄ 4 |
× |
9 5 ⁄ 8 |
| Royal 4to. |
12 1 ⁄ 2 |
× |
10 |
| Imperial 4to. |
15 |
× |
11 |
| Crown Folio. |
15 |
× |
10 |
| Demy Folio |
18 |
× |
11 |
As a final caution, the first and last sheets must be carefully
examined; very often the sheet has to be cut up or
divided, and the leaf or leaves placed in various positions
in the book.
It is also advisable to cut the head of the sheets, using
the folding-stick, cutting just beyond the back or middle
fold; this prevents the sheet running into a side crease
when pressing or rolling. Should such a crease occur the
leaf or sheet must be damped by placing it between wet
paper and subjecting it to pressure; no other method is
likely to erase the break.
Refolding.—With regard to books that have been issued
in numbers, they must be pulled to pieces or divided. The
parts being arranged in consecutive order, so that not so
much difficulty will be felt in collating the sheets, the
outside wrapper is torn away, and each sheet pulled singly
from its neighbour, care being taken to see if any thread
used in sewing is in the centre of the sheet at the back;
if so, it must be cut with a knife or it will tear the paper.
As the sheets are pulled they must be laid on the left hand
side, each sheet being placed face downwards; should they
be placed face upwards the first sheet will be the last and the
whole will require rearranging. All advertisements may be
placed away from the sheets into a pile; these will be found
very handy for lining boards, pasting on, or as waste.
The title and contents will generally be found in the last
part; place them in their proper places. The sheets must
now be refolded, if improperly folded in the first instance. |6|
Turn the whole pile (or book now) over, and again go
through each sheet; alter by refolding any sheet that may
require it. Very often the sheets are already cut, and in this
case the section must be dissected and each leaf refolded
and reinserted in proper sequence, and placed carefully
head-line to head-line. Great care must be exercised, as
the previous creasings render the paper liable to be torn
in the process.
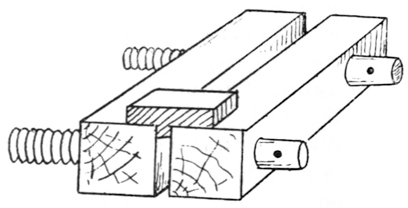
Knocking-down Iron screwed into Press.
Books that have been bound and cut would be rendered
often worse by refolding, and as a general rule they are left
alone. Bound books are pulled to pieces in the same
manner, always taking care that the thread is cut or
loose before tearing the sheet away; should trouble arise
through the glue, etc., not coming away easily, the back
may be damped with a sponge lightly charged with water,
or perhaps a better method is to place the book or books
in a press, screw up tightly, and soak the backs with thin
paste, leaving them soaking for an hour or two; they will
want repasting two or three times during the period; the
whole of the paper, glue, and leather can then be easily
scraped away with a blunt knife; a handful of shavings
rubbed over the back will make it quite clean, and no difficulty
will be met with if the sections are taken apart while
damp. The sections must, as pulled, be placed evenly one on |7|
the other, as the paper at back retains sufficient glue to cause
them to stick together if laid across one another; the whole
must then be left to dry. When dry the groove should be
knocked down on a flat surface, and for this the knocking-down
iron screwed up in the lying press is perhaps the
best thing to use. The groove is the projecting part of the
book close to the back, caused by the backing, and is the
groove for the back edge of the mill-board to work in by
a hinge; this hinge is technically called the “joint.”
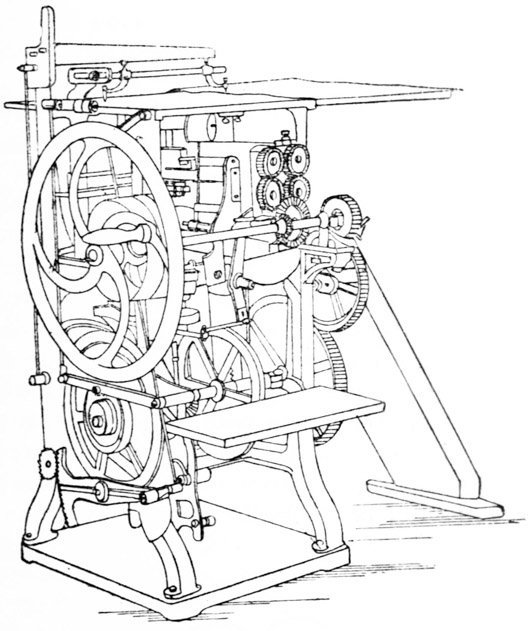
Martini’s Folding Machine.
Machines.—There are many folding machines made by
the various machinists; the working of them, however, is
in nearly all cases identical. The machine is generally |8|
fed by a girl, who places the sheet to points, the arm
lifting up at given periods to allow placing the sheet.
Another arm carrying a long thin blade descends, taking
the sheet through a slot in the table, where it is passed
between rollers; another set of rollers at right angles
creases it again. The rollers are arranged for two, three, or
more creasings or folds. The sheets are delivered at the
side into a box, from which they are taken from time to
time. The cut is one of Martini’s, and is probably the
most advanced.
Gathering.—A gathering machine has been patented which
is of a simple but ingenious contrivance for the quick
gathering of sheets. The usual way to gather, is by laying
piles of sheets upon a long table, and for the gatherer to
take from each pile a sheet in succession. By the new
method a round table is made to revolve by machinery,
and upon it are placed the piles of sheets. As the table
revolves the gatherer takes a sheet from each pile as it
passes him. It will at once be seen that not only is space
saved, but that a number of gatherers may be placed at the
table; and that there is no possibility of the gatherers
shirking their work, as the machine is made to register
the revolutions. By comparing the number of sheets with
the revolutions of the table, the amount of work done can
be checked.
CHAPTER II.
BEATING
AND
ROLLING.
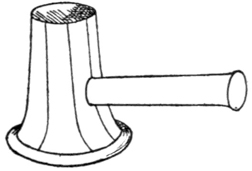
Beating Hammer.
The object of beating or rolling is to make the book as
solid as possible. For beating, a stone or iron slab, used
as a bed, and a heavy hammer, are necessary. The stone
or iron must be perfectly smooth, and should be bedded
with great solidity. I have in use an iron bed about two feet
square, fitted into a strongly-made box, filled with sand,
with a wooden cover to the iron when not in use. The
hammer should be somewhat bell-shaped,
and weigh about ten
pounds, with a short handle, made
to fit the hand. The face of the
hammer and stone (it is called a
beating-stone whether it be stone
or iron), must be kept perfectly
clean, and it is advisable always to have a piece of paper at
the top and bottom of the sections when beating, or the
repeated concussion will glaze them.
The book should be divided into lots or sections of about
half an inch thick, that will be about fifteen to twenty sheets,
according to the thickness of paper. A section is now to
be held on the stone between the fingers and thumb
of the left hand; then the hammer, grasped firmly in
the right hand, is raised, and brought down with rather
more than its own weight on the sheets, which must
be continually moved round, turned over and changed
about, in order that they may be equally beaten all over. |10|
By passing the section between the finger and thumb, it
can be felt at once, if it has been beaten properly and
evenly. Great care must be taken that in each blow of
the hammer it shall have the face fairly on the body of
the section, for if the hammer is so used that the greatest
portion of the weight should fall outside the edge of the
sheets the concussion will break away the paper as if cut
with a knife. It is perhaps better for a beginner to practise
on some waste paper before attempting to beat a book; and
he should always rest when the wrist becomes tired. When
each section has been beaten, supposing a book has been
divided into four sections, the whole four should be beaten
again, but together.
I do not profess a preference to beating over rolling because
I have placed it first. The rolling machine is one of
the greatest improvements in the trade, but all books should
not be rolled, and a bookbinder, I mean a practical bookbinder,
not one who has been nearly the whole of his lifetime
upon a cutting machine, or at a blocking press, and
who calls himself one, but a competent bookbinder, should
know how and when to use the beating hammer and when
the rolling machine.
There are some books, old ones for instance, that should
on no account be rolled. The clumsy presses used in
printing at an early date gave such an amount of pressure
on the type that the paper round their margins has sometimes
two or three times the thickness of the printed
portion. At the present time each sheet after having been
printed is pressed, and thus the leaf is made flat or nearly
so, and for such work the rolling machine is certainly better
than the hammer.
To roll a book, it is divided into sections as in beating,
only not so many sheets are taken—from six upwards,
according to the quality of the work to be executed. The
sheets are then placed between tins, and the whole passed |11|
between the rollers, which are regulated by a screw, according
to the thickness of sections and power required.
The workman, technically called “Roller,” has to be very
careful in passing his books through, that his hand be
not drawn in as well, for accidents have from time to
time occurred through the inattention of the Roller
himself, or of the individual who has the pleasure of
applying his strength to turning the handle.
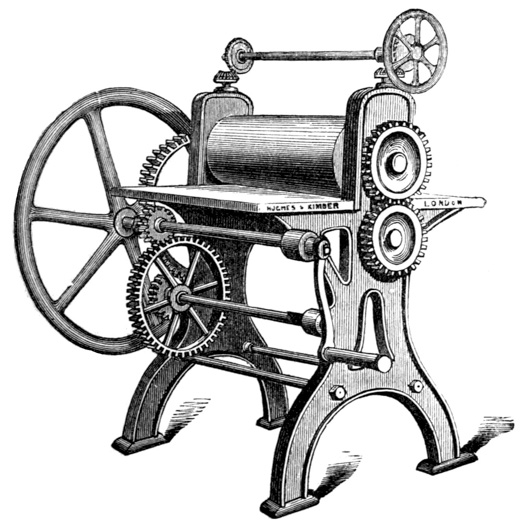
Rolling Machine.
I never pass or hear a rolling machine revolving very
rapidly without having vividly brought to my mind a very
serious accident that happened to my father. He was
feeling for a flaw on one of the rollers, and whilst his hands
|12|
were at the edge of the rollers the man turned the handle,
drawing the whole hand between the heavy cylinders. The
accident cost him many months in the hospital, and he
never regained complete use of his right hand.
Great care must be used not to pass too many sheets
through the machine at one time; the same applies to the
regulating screw. The amount of damage that can be done
to the paper by too heavy a pressure is astonishing, as
the paper becomes quite brittle, and may perhaps even be
cut as with a knife.
Another caution respecting new work. Recently printed
books, if submitted to heavy pressure, either by the beating
hammer or machine, are very likely to “set off,” that is,
the ink from one side of the page will be imprinted to its
opposite neighbour; indeed, under very heavy pressure,
some ink, perhaps many years old, will “set off;” this is
due in a great measure to the ink not being properly
prepared.
Machines.—Of the many rolling machines in the market
the principle is in all the same. A powerful frame, carrying
two heavy rollers or cylinders, which are set in motion,
revolving in the same direction, by means of steam or by
hand. In many, extra power is supplied by the use of extra
cog-wheels; the power is, however, gained at an expense
of speed. The pressure is regulated by screws at the top.
CHAPTER III.
COLLATING.
To collate, is to ensure that each sheet or leaf is in its
proper sequence. Putting the sheets together and placing
plates or maps requires great attention. The sheets must
run in proper order by the signatures: letters are mostly
used, but numbers are sometimes substituted. When letters
are used, the alphabet is repeated as often as necessary,
doubling the letter as often as a new alphabet is used, as
B, C, with the first
alphabet,1
and AA, BB, CC or Aa, Bb,
Cc, with the second repetition, and three letters with the
third, generally leaving out J, V, W. Plates must be
trimmed or cut to the proper size before being placed in
the book, and maps that are to be folded must be put on
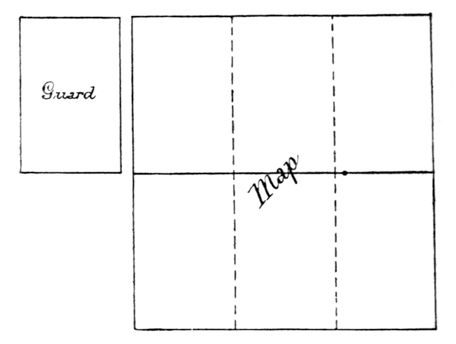
guards. By mounting a map on a guard the size of the
page, it may be kept open on the table beside the book,
which may be opened at any part without concealing the
map: by this method the map will remain convenient for
constant reference. This is technically called “throwing
out” a map.
To collate a book, it is to be held in the right hand, at
the right top corner, then, with a turn of the wrist, the
back must be brought to the front. Fan the sections out,
then with the left hand the sheets must be brought back
to an angle, which will cause them when released to
spring forward, so that the letter on the right bottom |14|
corner of each sheet is seen, and then released, and the
next brought into view. When a work is completed in
more than one volume, the number of the volume is indicated
at the left hand bottom corner of each sheet. I
need hardly mention that the title should come first, then
the dedication (if one), preface, contents, then the text,
and finally the index. The number on the pages will,
however, always direct the binder as to the placing of the
sheets. The book should always be beaten or rolled before
placing plates or maps, especially coloured ones.
Presuming that we have a book with half a dozen plates,
the first thing after ascertaining that the letter-press is
perfect, is to see that all the plates are there, by looking
to the “List of Plates,” printed generally after the contents.
The plates should then be squared or cut truly,
using a sharp knife and straight edge. When the plates
are printed on paper larger than the book, they must be
cut down to the proper size, leaving a somewhat less
margin at the back than there will be at the foredge when
the book is cut. Some plates have to face to the left,
|15|
some to the right, the frontispiece for instance; but as a
general rule, plates should be placed on the right hand, so
that on opening the book they all face upwards. When
plates consist of subjects that are at a right angle with
the text, such as views and landscapes, the inscription
should always be placed to the right hand, whether the
plate face to the right or to the left page. If the plates
are on thick paper they should be guarded, either by
adding a piece of paper of the same thickness or by cutting
a piece from the plate and then joining the two again
together with a piece of linen, so that the plate moves on
the linen hinge: the space between the guard and plate
should be more than equal to the thickness of the paper.
If the plate is almost a cardboard, it is better and stronger
if linen be placed both back and front. Should the book
consist of plates only, sections may be made by placing two
plates and two guards together, and sewing through the
centre between the guards, leaving of course a space between
the two guards, which will form the back.
With regard to maps that have to be mounted, it is
better to mount them on the finest linen, as it takes up
the least room in the thickness of the book. The linen
should be cut a little larger than the map itself, with a
further piece left, on which to mount the extra piece of
paper, so that the map may be thrown out as before
described. The map should first be trimmed at its back,
then pasted with rather thin paste; the linen should then be
laid carefully on, and gently rubbed down and turned over,
so that the map comes uppermost; the pasted guard should
then be placed a little away from the map, and the whole
well rubbed down, and finally laid out flat to dry. To do this
work, the paste must be clean, free from all lumps, and
used very evenly and not too thickly, or when dry every
mark of the brush will be visible. When the map is dry
it should be trimmed all round and folded to its proper |16|
size, viz.—a trifle smaller than the book will be when cut.
If it is left larger the folds will naturally be cut away, and
the only remedy will be a new map, which means a new
copy of the work. For all folded maps or plates a corresponding
thickness must be placed in the backs where
the maps go, or the foredge will be thicker than the back.
Pieces of paper called guards, are folded from
1 ⁄ 4
inch to 1 inch in width, according to the size of the book, and
placed in the back, and sewn through as a section. Great
care must be taken that these guards are not folded too
large, so as to overlap the folds of the map, if they do so,
the object of their being placed there to make the thickness
of the back and foredge equal will be defeated.
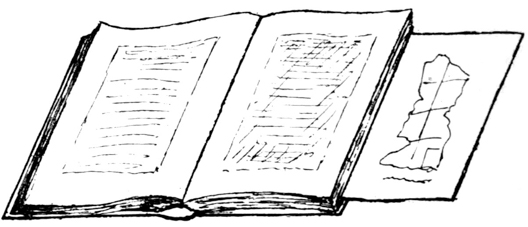
Shewing Book with Map thrown out.
In a great measure, the whole beauty of the inside work
rests in properly collating the book, in guarding maps,
and in placing the plates. When pasting in any single
leaves or plates, a piece of waste paper should always be
placed on the leaf or plate the required distance from the
edge to be pasted, so that the leaf is pasted straight. It
takes no longer to lay the plate down upon the edge of a
board with a paper on the plate, than it does to hold the
plate in the left hand, and apply the paste with the right
hand middle finger; by the former method a proper amount
of paste is deposited evenly on the plate and it is pasted
in a straight line; by the latter method, it is pasted in some |17|
places thickly, and in some places none at all. I have
often seen books with the plates fastened to the book
nearly half way up to its foredge, and thus spoilt, only
through the slovenly way of pasting. After having placed
the plates, the collater should go through them again when
dry, to see if they adhere properly, and break or fold them
over up to the pasting, with a folding stick, so that they
will lie flat when the book is open. I must again call
attention to coloured plates. They should be looked to
during the whole of binding, especially after pressing.
The amount of gum that is put on the surface, which is
very easily seen by the gloss, causes them to stick to the
letter-press: should they so stick, do not try to tear them
apart, but warm a polishing iron and pass it over the plate
and letter-press, placing a piece of paper between the iron
and the book to avoid dirt. The heat and moisture will
soften the gum, and the surfaces can then be very easily
separated. By rubbing a little powdered French chalk over
the coloured plates before sticking them in, these ill effects
will be avoided.
It sometimes happens that the whole of a book is composed
of single leaves, as the “Art Journal.” Such a book
should be collated properly, and the plates placed to their
respective places, squared and broken over, by placing a
straight edge or runner about half an inch from its back
edge, and running a folder under the plate, thus lifting it to
the edge of the runner. The whole book should then be
pressed for a few hours, taken out, and the back glued up;
the back having been previously roughed with the side
edge of the saw. To glue such a back, the book is placed
in the lying press between boards, with the back projecting
about an eighth of an inch, the saw is then drawn over
it, with its side edge, so that the paper is as it were rasped.
The back is then sawn in properly, as explained in the
next chapter, and the whole back is glued. When dry, the |18|
book is separated into divisions or sections of four, six, or
eight leaves, according to the thickness of the paper, and
each section is then overcast or over sewn along its whole
length, the thread being fastened at the head and tail (or
top and bottom); thus each section is made independent of
its neighbour. The sections should then be gently struck
along the back edge with a hammer against a knocking-down
iron, so as to imbed the thread into the paper, or the
back will be too thick. The thread should not be struck so
hard as to cut the paper, or break the thread, but very
gently. Two or three sections may be taken at a time.
After having placed the plates, the book should be put
into the press (standing or otherwise) for a few hours. A
standing press is used in all good bookbinding shops.
The Paris houses have a curious way of pressing their
books. The books are placed in the standing press; the
top and bottom boards are very thick, having a groove cut
in them in which a strong thin rope is placed. The press
is screwed down tightly, when, after some few minutes has
elapsed, the cord or rope is drawn together and fastened.
The pressure of the screw is released, the whole taken out
en bloc, and allowed to remain for some hours, during which
time a number of other batches are passed through the
same press.
When taken out of the press the book is ready for
“marking up” if for flexible sewing, or for being sawn in
if for ordinary work.
Interleaving.—It is sometimes required to place a piece
of writing paper between each leaf of letter-press, either for
notes or for a translation: in such a case, the book must be
properly beaten or rolled, and each leaf cut up with a hand-knife,
both head and foredge; the writing paper having
been chosen, must be folded to the size of the book and
pressed. A single leaf of writing paper is now to be
fastened in the centre of each section, and a folded leaf |19|
placed to every folded letter-press leaf, by inserting the one
within the other, a folded writing paper being left outside
every other section, and all being put level with the head;
the whole book should then be well pressed.
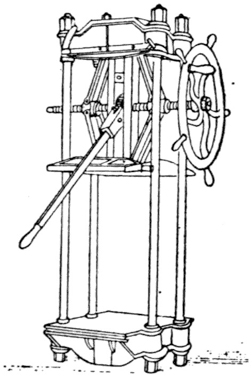
Boomer Press.
If by any chance there should be one sheet in duplicate
and another missing, by returning the one to the publisher
of the book the missing sheet is generally replaced; this,
of course, has reference only to books of a recent date.
There is a new press of American
invention that has come under my
notice. It will be seen that it acts
on an entirely new principle, having
two horizontal screws instead of one
perpendicular. The power is first
applied by hand and finally by a
lever and ratchet-wheel in the centre.
A pressure guage is affixed to
each press, so that the actual power
exerted may be ascertained as the
operation proceeds. The press can
be had from Messrs. Ladd and Co.,
116, Queen Victoria Street, E.C.;
and they claim that it gives a pressure equal to the hydraulic
press, without any of the hydraulic complications.
CHAPTER IV.
MARKING
UP
AND
SAWING
IN.
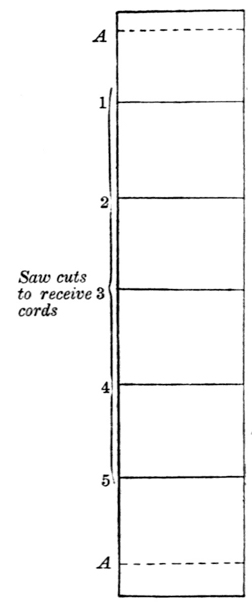
A.
Saw marks for catch-up stitch.
The books having been in the press a sufficient time, say
for a night, they are taken out, and run through again
(collated) to make sure that they are all correct. A book
is then taken and knocked straight both head and back
and put in the lying press between boards, projecting from
them about
1 ⁄ 8
inch; some binders prefer cutting boards, I
prefer pressing boards, and I should advise the use of
them, as the whole can be knocked up together. They
should be held between the fingers of each hand, and the
back and head knocked alternately on the cheek of the
press. The boards are then drawn back the required
distance from the back of the book: the book and boards
must now be held tightly with the left hand, and the
whole carefully lowered into the press; the right hand
regulating the screws, which should then be screwed up
tightly. The book is now quite straight, and firmly fixed
in the press, and we have to decide if it is to be sewn
flexibly or not. If for flexible binding the book is not to
be sawn in, but marked; the difference being, that with
the latter the cord is outside the sheets; with the former
the cord is imbedded in the back, in the cut or groove made
by the saw. We will take the flexible first, and suppose
that the book before us is an ordinary 8vo. volume, and
that it is to be cut all round.
The back should be divided into six equal portions,
leaving the bottom, or tail, half an inch longer than the
rest, simply because of a curious optical illusion, by which,
|21|
if the spaces were all equal in width, the bottom one would
appear to be the smallest, although accurately of the same
width as the rest. This curious
effect may be tested on any framed
or mounted print. A square is now
to be laid upon the back exactly to
the marks, and marked pretty black
with a lead pencil; the head and
tail must now be sawn in to imbed
the chain of the kettle stitch, at a
distance sufficient to prevent the
thread being divided by accident in
cutting. In flexible work great
accuracy is absolutely necessary
throughout the whole of the work,
especially in the marking up, as the
form of the bands will be visible
when covered. It will be easily
seen if the book has been knocked
up straight by laying the square at
the head when the book is in the
press, and if it is not straight, it
must be taken out and corrected.
If the book is very small, as for
instance a small prayer book, it is
usually marked up for five bands, but only sewed on three;
the other two being fastened on as false bands when the
book is ready for covering. There would be no gain in
strength by sewing a small book on five bands.
When the book is to be “sawn in,” it is marked up as
for flexible work, but the back is sawn, both for the bands and
kettle stitch, with a tennon saw. In choosing the saw, it
should be one with the teeth not spread out too much; and
it is advisable to have two of different widths. Care must
be taken that the saw does not enter too deeply, and one |22|
must, in all cases, be guided in the depth by the thickness of
the cord to be used. The size of the book should determine
the thickness of the cord, as the larger the book, the
stronger and thicker must be the cord. Suitable cord is
to be purchased at all the bookbinder’s material shops,
and it is known by the size of the book, such as 12mo.,
8vo., 4to. cord.
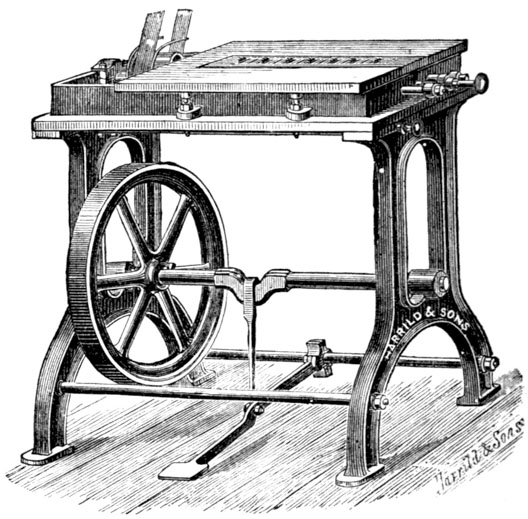
Sawing-in Machine.
I think nothing looks worse than a book with great
holes in the back, sometimes to be seen when the book is
opened, which are due to the inattention of the workmen.
Besides, it causes great inconvenience to the forwarder if
the cords are loose, and the only thing he can do in such a
case is to cram a lot of glue into the grooves to keep the
cord in its place. If, on the other hand, the saw cuts are |23|
not deep enough, the cord will stand out from the back,
and be distinctly seen when the book is finished, if not
remedied by extra strips of leather or paper between the
bands when lining up. It is better to use double thin
cord instead of one thick one for large books, because the
two cords will lie and imbed themselves in the back,
whereas one large one will not, unless very deep and wide
saw cuts be made. Large folios should be sawn on six or
seven bands, but five for an 8vo. is the right number, from
which all other sizes can be regulated.
Saw benches have been introduced by various firms.
They can be driven either by steam or foot. It will be
seen that the saws are circular, and can be shifted on the
spindle to suit the various sized books. As the books
themselves are slid along the table on the saws, the advantage
is very great in a large shop where much work
of one size is done at a time.
CHAPTER V.
SEWING.
Flexible Work.—The
“sewing press” consists of a bed,
two screws, and a beam or cross bar, round which are fastened
five or more cords, called lay cords. Five pieces of cord
cut from the ball, in length, about four times the thickness
of the book, are fastened to the lay cords by slip knots;
the other ends being fastened to small pieces of metal called
keys, by twisting the ends round twice and then a half
hitch. The keys are then passed through the slot in the
bed of the “press,” and the beam screwed up rather tightly;
but loose enough to allow the lay cords to move freely |24|
backwards or forwards. Having the book on the bed of
the press with the back towards the sewer, a few sheets
(better than only one) are laid against the cords, and they
are arranged exactly to the marks made on the back of the
sections. When quite true and perpendicular, they should
be made tight by screwing the beam up. It will be better
if the cords are a little to the right of the press, so that
the sewer may get her or his left arm to rest better on the
press.
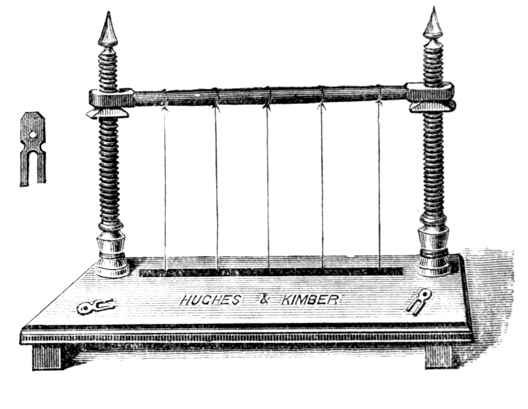
Sewing Press.
If when the press is tightened one of the cords is loose,
as will sometimes happen, a pencil, folding-stick or other
object slipped under the lay cord on the top of the beam
will tighten the band sufficiently. The foreign sewing
presses have screws with a hook at the end to hold the
bands, the screws running in a slot in the beam: in practice
they are very convenient.
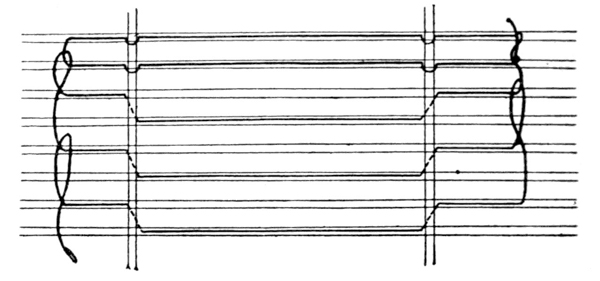
Ordinary sewing. 2 sheets on 2 bands.
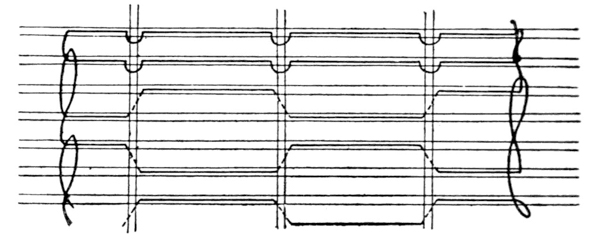
Ordinary sewing. 2 sheets on 3 bands.
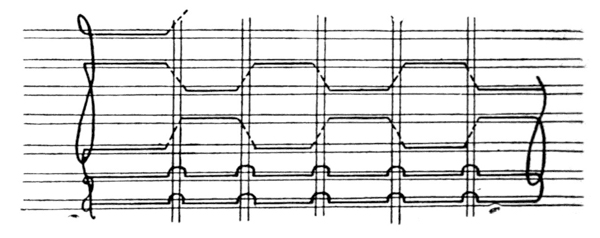
Ordinary sewing. 2 sheets on 5 bands.
The thick lines shewing the direction
of the thread.
The first and last sections are overcast usually with
cotton or very fine thread. The first sheet is now to be
laid against the bands, and the needle introduced through
the kettle stitch hole on the right of the book, which is the
|25|
head. The left hand being within the centre of the sheet,
the needle is taken with it, and thrust out on the left of the
mark made for the first band; the needle being taken with
the right hand, is again introduced on the right of the
same band, thus making a complete circle round it. This
is repeated with each band in succession, and the needle
brought out of the kettle stitch hole on the left or tail
of the sheet. A new sheet is now placed on the top, and
treated in a similar way, by introducing the needle at the
left end or tail; and when taken out at the right end or top,
the thread must be fastened by a knot to the end, hanging
from the first sheet, which is left long enough for the purpose.
A third sheet having been sewn in like
manner,2
the needle must be brought out at the kettle stitch, thrust
between the two sheets first sewn, and drawn round the
thread, thus fastening each sheet to its neighbour by a kind
of chain stitch. I believe the term “kettle stitch” is
only a corruption of “catch-up stitch,” as it catches each
section as sewn in succession. This class of work must be
done very neatly and evenly, but it is easily done with a
little practice and patience. This is the strongest sewing
executed at the present day, but it is very seldom done, as
it takes three or four times as long as the ordinary sewing.
The thread must be drawn tightly each time it is passed
round the band, and at the end properly fastened off at the
kettle stitch, or the sections will work loose in course of
time. Old books were always sewn in this manner, and
when two or double bands were used, the thread was
twisted twice round one on sewing one section, and twice
round the other on sewing the next, or once round each
cord. In some cases even the “head-band” was worked at
|27|
the same time, by fastening other pieces of leather for the
head and tail, and making it the catch-up stitch as well.
When the head-band was worked in sewing, the book was,
of course, not afterwards cut at the edges. When this was
done, wooden boards were used instead of mill boards, and
twisted leather instead of cord, and when the book was
covered, a groove was made between each double band.
This way is still imitated by sticking a second band or
cord alongside the one made in sewing, before the book is
covered. The cord for flexible work is called a “flexible
cord,” and is twisted tighter and is stronger than any
other. In all kinds of sewing I advise the use of Hayes’
Royal Irish thread, not because there is no other of good
manufacture, but because I have tried several kinds, and
Hayes’ has proved to be the best. The thickness of the cord
must always be in proportion to the size and thickness of
the book, and the thickness of the thread must depend on
the sheets, whether they be half sheets or whole sheets. If
too thick a thread is used, the swelling (the rising caused in
the back by the thread) will be too much, and it will be impossible
to make a proper rounding or get a right size
“groove” in backing. If the sections are thick or few, a
thick thread must be used to give the thickness necessary
to produce a good groove.
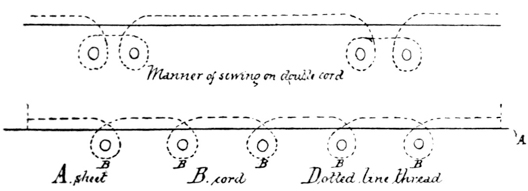
Flexible sewing.
If the book is of moderate thickness, the sections may be
knocked down by occasionally tapping them with a piece |28|
of wood loaded at one end with lead, or a thick folding-stick
may be used as a substitute. I must again call particular
attention to the kettle stitch. The thread must not
be drawn too tight in making the chain, or the thread will
break in backing; but still a proper tension must be kept or
the sheets will wear loose. The last sheet should be fastened
with a double knot round the kettle stitch two or
three sections down, and that section must be sewn all
along. The next style of sewing, and most generally used
throughout the trade, is the ordinary method.
Ordinary Sewing is somewhat different, inasmuch as
the thread is not twisted round the cord, as in flexible work,
when the cord is outside the section. In this method the
cord fits into the saw cuts. The thread is simply passed
over the cord, not round it, otherwise the principle of sewing
is the same, that is, the thread is passed right along the
section, out of the holes made, and into them again; the
kettle stitch being made in the same way. This style of
work has one advantage over flexible work, because the
back of the book can be better gilt. In flexible work, the
leather is attached with paste to the back, and is flexed, and
bent, each time the book is opened, and there is great risk
of the gold splitting away or being detached from the
leather in wear. Books sewn in the ordinary method
are made with a hollow or loose back, and when the
book is opened, the crease in the back is independent of
the leather covering; the lining of the back only is creased,
and the leather keeps its perfect form, by reason of the lining
giving it a spring outwards. Morocco is generally used
for flexible work; calf, being without a grain, is not suitable,
as it would show all the creases in the back made by
the opening. This class of sewing is excellent for books
that do not require so much strength, such as library bindings,3
but for a dictionary or the like, where constant |29|
reference or daily use is required, I should sew a book flexibly.
Some binders sew their books in the ordinary way, and
paste the leather directly to the back, and thus pass it for
flexible work; but I do not think any respectable house
would do so. A book that has been sewed flexibly will not
have any saw cut in the back, so that on examination, by
opening it wide, it will at once be seen if it is a real flexible
binding or not.
Intelligence must, however, be used; a book that has
already been cased (or bound and sewn on cords) must of
necessity have the saw cuts or holes, and such a book
would show the cuts.
There is another mode called “flexible not to show.”
The book is marked up in the usual way as for flexible,
and is also slightly scratched on the band marks with the
saw; but not deep enough to go through the sections. A
thin cord is then taken doubled for each band, and the
book is sewn the ordinary flexible way; the cord is knocked
into the back in forwarding, and the leather may be stuck
on a hollow back with bands, or it may be fastened to the
back itself without bands.4
However simple it may appear in description to sew a
book, it requires great judgment to keep down the swelling
of the book to the proper amount necessary to form a good
backing groove and no more. In order to do this, the
sheets must from time to time be gently tapped down with
a piece of wood or a heavy folding-stick, and great care
must be observed to avoid drawing the fastening of the
kettle stitch too tight, or the head and tail of the book will
be thinner than the middle; this fault once committed has
no remedy.
If the sections are very thin, or in half sheets, they may,
if the book is very thick, be sewn “two sheets on.” The
needle is passed from the kettle stitch to the first band of |30|
the first sheet and out, then another sheet is placed on the
top, and the needle inserted at the first band and brought
out at band No. 2, the needle is again inserted in the first
sheet and in at the second band and out at No. 3, thus
treating the two sections as one; in this way it is obvious
that only half as much thread will be in the back. With
regard to books that have had the heads cut, it will be necessary
to open each sheet carefully up to the back before it is
placed on the press, otherwise the centre may not be
caught, and two or more leaves will be detached after the
book is bound.
The first and last sections of every book should be overcast
for strength. With regard to books that are composed
of single leaves, they are treated of in Chapter III. They
are to be overcast, and each section treated as a section of
an ordinary book, the only difference being, that a strong
lining of paper should be given to the back before covering,
so that it cannot “throw up.”
When a book is sewn, it is taken from the sewing press
by slackening the screws which tighten the beam, so that
the cord may be easily detached from the keys and lay
cords. The cord may be left at its full length until the
end papers are about to be put on, when it must be reduced
to about three inches.
Brehmer’s patent wire book and pamphlet sewing
machine is an introduction well adapted to the use of the
stationer, where thick and hand-made paper will bear such
a method. It will not, in my opinion, ever be found
eligible for library or standard books. Its high price will
debar it from the trade generally; but it is to be feared
that a sufficient number of really good books may be sewn
with it to cause embarrassment to the first-rate binder,
who will be baffled in making good work of books which
may have been damaged by the invention of sewing books
with wire. |31|
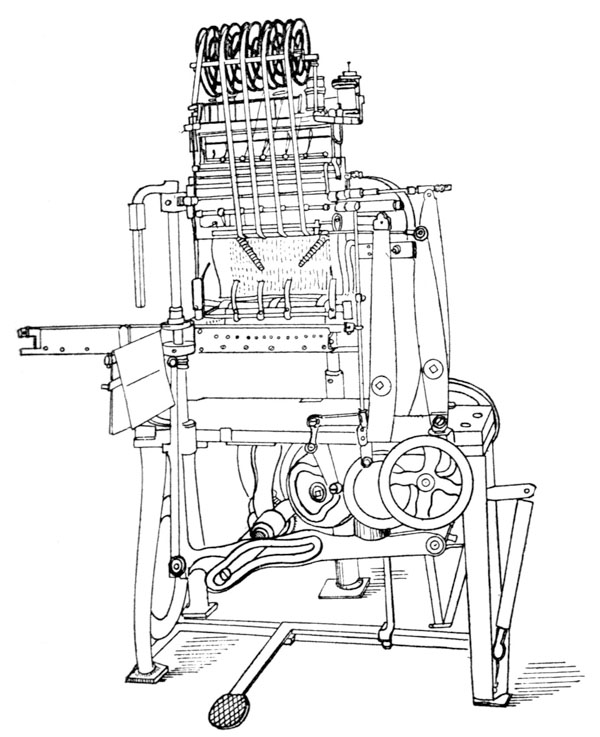
Smythe’s Sewing Machine.
The novelty of this machine is, that the book is sewn
with wire instead of thread. The machine is fed with
wire from spools by small steel rollers, which at each
revolution supply exactly the length of wire required to
form little staples with two legs. Of these staples, the
machine makes at every revolution as many as are required |32|
for each sheet of the book that is being sewn—generally
two or three, or more, as necessary. These wires or staples
are forced through the sections from the inside of the
folds; and as the tapes are stretched, and held by clasps
exactly opposite to each staple-forming and inserting apparatus,
the legs of each staple penetrate the tapes, and
project through them to a sufficient distance to allow of
their being bent inwards towards each other, and pressed
firmly against the tapes. With pamphlets, copy-books,
catalogues, &c., no tape is used, the staples themselves
being sufficient. About two thousand pamphlets or sheets
can be sewn in one hour.
Another machine, and I believe the latest, is the “Smythe.”
The sewer sits in front of the machine and places the
sheets, one at a time, on radial arms which project from a
vertical rod. These arms rotate, rise, and adjust the
sheets, so as to bring them in their proper position under
the curved needles. As each arm rises, small holes are
pierced, by means of punches in the sheets, from the
inside, to facilitate the entrance and egress of the needles.
The loopers then receive a lateral movement to tighten
the stitch, and this movement is made adjustable, in order
that books may be sewn tight or loose, as required. About
20,000 sheets can be sewn in a day, and no previous sawing
is required. Thread is used with this machine.
CHAPTER VI.
FORWARDING.
End Papers.—The end papers should always be made,
that is, the coloured paper pasted to a white one; the
style of binding must decide what kind of ends are to be
used. I give a slight idea of the kinds of papers used and
the method of making them.
Cobb Paper is a paper used generally for half-calf bindings,
with a sprinkled edge, or as a change, half-calf, gilt
top. The paper is stained various shades and colours in
the making, and I think derives its name from a binder
who first used it. Being liked by the trade, they have
distinguished the paper by calling it “Cobb paper,” which
name it has kept.
Surface Paper.—This is a paper, one side of which is
prepared with a layer of colour, laid on with a brush very
evenly. Some kinds are left dull and others are glazed.
The darker colours of this paper are generally chosen for
Bibles or books of a religious character, and the lighter
colours for the cloth or case work. There are many other
shades which may be put into extra bindings with very good
effect, and will exercise the taste of the workman. For
example, a good cream, when of fine colour and good
quality, will look very well in a morocco book with either
cloth or morocco joints.
Marbled Paper.—This paper has the colour disposed
upon it in imitation of marble; hence its name. It is
produced by sprinkling properly prepared colours upon
the surface of a size, made either of a vegetable emulsion, |34|
or of a solution of resinous gum. It is necessary, in
either preparing an original design or in matching an
example, to remember that the veins are the first splashes
of colour thrown on the size, and assume that form in
consequence of being driven back by the successive colours
employed.
We have it on the authority of Mr. Woolnough,5
that the
old Dutch paper was wrapped round toys in order to evade
the duty imposed upon it. After being carefully smoothed
out, it was sold to bookbinders at a very high price, who
used it upon their extra bindings, and if the paper was not
large enough they were compelled to join it. After a time
the manufacture was introduced into England, but either
the colours are not prepared the same way, or the paper
itself may not be so suitable, the colours are not brought
out with such vigour and beauty, nor do they stand so well,
as on the old Dutch paper. Some secret of the art has
been lost, and it baffles our ablest marblers of the present
day to reproduce many of the beautiful examples that may
be seen in some of the old books.
For further remarks on marbled paper and marbling see
chapter on colouring edges.
Printed and other Fancy Paper may be bought at fancy
stationers; the variety is so great that description is impossible,
but good taste and judgment should always be
used by studying the style and colour of binding. Of late
years a few firms have paid some attention to this branch,
and have placed in the market some very pretty patterns
in various tints.
The foreign binders are very fond of papers printed in
bronze, and some are certainly of a most elaborate and
gorgeous description. Many houses have their own
favourite pattern and style. All papers having bronze on |35|
them should be carefully selected and the cheaper kinds
eschewed, the bronze in a short time going black.
Coloured Paste Paper.—This kind the binder can easily
make for himself. Some colour should be mixed with paste
and a little soap, until it is a little thicker than cream. It
should then be spread upon two sheets of paper with a paste
brush. The sheets must then be laid together with their
coloured surfaces facing each other, and when separated they
will have a curious wavy pattern on them. The paper should
then be hung up to dry on a string stretched across the room,
and when dry glazed with a hot iron. A great deal of it
is used in Germany for covering books. Green, reds, and
blues have a very good effect.
There are many other kinds of paper that may be used,
but the above five different varieties will give a very good
idea and serve as points to work from. The many bookbinders’
material dealers send out pattern books, and in
them some hundreds of patterns are to be found.
Before leaving the subject of ends, it may be as well to
mention that morocco, calf, russia, silk, etc., are often used
on whole bound work; these must, however, be placed in
the book when has been covered.
After having decided upon what kind of paper is to be
used, two pieces are cut and folded to the size of the book,
leaving them a trifle larger, especially if the book has been
already cut. Two pieces of white paper must be prepared
in the same way. Having them ready, a white paper is
laid down, folded, on a pasting board (any old mill-board
kept for this purpose), and pasted with moderately thin
paste very evenly; the two fancy papers are laid on the
top quite even with the back or folded edge; the top fancy
paper is now to be pasted, and the other white laid on that:
they must now be taken from the board, and after a squeeze
in the press between pressing boards, taken out, and hung
up separately to dry. This will cause one half of the white |36|
to adhere to one half of the marble or fancy paper. When
they are dry, they should be refolded in the old folds and
pressed for about a quarter of an hour. When there are
more than one pair of ends to make, they need not be
made one pair at a time, but ten or fifteen pairs may be
done at once, by commencing with the one white, then two
fancy, two white, and so on, until a sufficient number have
been made, always pressing them to ensure the surfaces
adhering properly; then hang them up to dry. When dry
press again, to make them quite flat. As this is the first
time I speak about pasting, a few hints or remarks on the
proper way will not be out of place here. Always draw
the brush well over the paper and away from the centre,
towards the edges of the paper. Do not have too much
paste in the brush, but just enough to make it slide well.
Be careful that the whole surface is pasted; remove all
hairs or lumps from the paper, or they will mark the book.
Finally, never attempt to take up the brush from the paper
before it is well drawn over the edge of the paper, or the
paper will stick to the brush and turn over, with the risk
of the under side being pasted. While the ends are pressing
we will proceed with further forwarding our book.
CHAPTER VII.
PASTING
UP.
The
first and last sheet of every book must be pasted up or
down,—it is called by both terms; and if the book has too
much swelling, it must be tapped down gently with a
hammer. Hold the book tightly at the foredge with the
left hand, knuckles down; rest the back on the press, and hit |37|
the back with the hammer to the required thickness. If
the book is not held tightly, a portion of the back will slip
in and the hollow will always be visible; so I advise that
the back be knocked flat on the “lying press” and placed
in it without boards, so that the back projects. Screw the
press up tightly, so that the sheets cannot slip. A knocking-down
iron should then be placed against the book on its left
side, and the back hammered against it; the “slips” or cords
must be pulled tight, each one being pulled with the right
hand, the left holding the slips tightly against the book so
that they cannot be pulled through. Should it happen that
a slip is pulled out, nothing remains but to re-sew the book,
unless it is a thin one, when it may possibly be re-inserted
with a large needle. But this will not do the book any good.
The slips being pulled tight, the first and last section
should be pasted to those next them. To do this, lay the
book on the edge of the press and throw the top section
back; lay a piece of waste paper upon the next section
about
1 ⁄ 8
or
1 ⁄ 4
inch from the back, according to the size of
the book, and paste the space between the back and the
waste paper, using generally the second finger of the right
hand, holding the paper down with the left. When pasted,
the waste paper is removed, and the back of the section put
evenly with the back of the book, which is now turned over
carefully that it may not shift; the other end is treated in
the same manner. A weight should then be put on the top,
or if more than a single book, one should lie on the top of
the other, back and foredge alternately, each book to be half
an inch within the foredge of the book next to it, with a few
pressing boards on the top one. When dry the end papers
are to be pasted on.
CHAPTER VIII.
PUTTING
ON
THE
END
PAPERS.
Two single leaves of white paper, somewhat thicker than the
paper used for making the ends, are to be cut, one for each
side of the book. The end papers are to be laid down
on a board, or on a piece of paper on the press to keep them
clean, with the pasted or made side uppermost, the single
leaves on the top. They should then be fanned out evenly
to a proper width, about a quarter of an inch for an 8vo., a
piece of waste paper put on the top, and their edges pasted.
The slips or cords thrown back, the white fly is put on the
book, a little away from the back, and the made ends on
the top even with the back, and again left to dry with the
weight of a few boards on the top.
If, however, the book or books are very heavy or large,
they should have “joints” of either bookbinders’ cloth or
of leather of the same colour as the leather with which the
book is to be covered. Morocco is mostly used for the
leather joints. If the joints are to be of cloth, it may be
added either when the ends are being put on, or when the
book is ready for pasting down. If the cloth joint is to be
put on now, the cloth is cut from 1 to 3 inches, according
to the size of book, and folded quite evenly, the side of the
cloth which has to go on the book being left the width intended
to be glued; that is, a width of 1 inch should be
folded
3 ⁄ 4
one side, leaving
1 ⁄ 4
the other, the latter to be put
on the book. The smallest fold is now glued, the white fly
put on, and the fancy paper on the top; the difference
being, that the paper instead of being made double or
folded is single, or instead of taking a paper double the |39|
size of the book and folding it, it is cut to the size of the
book and pasted all over. It will be better if the marble
paper be pasted and the white put on and well rubbed
down, and then the whole laid between mill-boards to dry.
A piece of waste or brown paper should be slightly fastened
at the back over the whole, (turning the cloth down on
the book) to keep it clean and prevent it from getting
damaged.
The strongest manner is to overcast the ends and cloth
joint to the first and last section of the book, as it is then
almost impossible either for the cloth or ends to pull away
from the book.
If, however, the cloth joint is to be put on after the book
is covered, the flys and ends are only edged on with paste
to the book just sufficient to hold them while it is being
bound; and when the book is to be pasted down, the ends
are lifted from the book by placing a thin folding-stick
between the ends and book and running it along, when
they will come away quite easily. The cloth is then cut
and folded as before and fastened on, and the ends and flys
properly pasted in the back.
Morocco joints are usually put in after the book is
covered, but I prefer that if joints of any kind are to go in
the book they should be put in at the same time as the
ends. Take great care that the ends are quite dry after
being made before attaching them, or the dampness will
affect the beginning and end of the book and cause the
first few leaves to wrinkle.
When the ends are quite dry the slips should be unravelled
and scraped, a bodkin being used for the unravelling,
and the back of a knife for the scraping. The object of
this is, that they may with greater ease be passed through
the holes in the mill-board, and the bulk of the cord be more
evenly distributed and beaten down, so as not to be seen
after the book has been covered. |41|
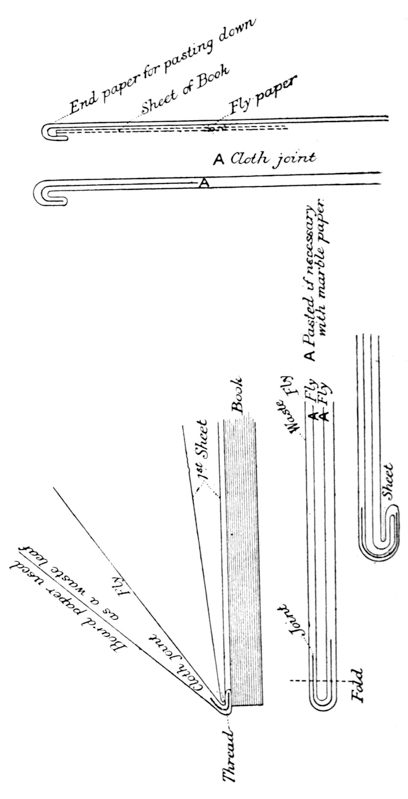
Method of sewing Ends on to Book that cannot
tear away.
First and last sheet are not overcasted
when treated in this manner.
Many houses cut away the slip entirely, in order that the
work may look better. This should never be done; with
large and heavy books it is better to allow the bulk of the
cord to be seen rather than sacrifice strength. To a certain
extent this may be avoided by cutting a small portion of
the mill-board away to allow the cord to lodge in.
There is another way of putting on the end papers, that
is, to sew the ends on with the book when sewing. The
paper is folded at the back with a small fold, the sheet
placed in the fold, and the whole sewn through. It is at
once apparent that under no circumstances can there be
any strain on the ends, and that there is hardly any possibility
of the ends breaking away from the sheets.
For books subjected to very hard wear (school books,
public library books, etc.) this method of placing the ends
is by far the best. See opposite page.
CHAPTER IX.
TRIMMING.
Is
the book to have a gilt top? marbled or gilt edges?
or is it to be left uncut? These questions must be
settled before anything further is done. If the book is to
be uncut or have a gilt top, the rough edges should be
taken away with a very sharp knife or shears: this process
is called “trimming.”
The book having been knocked up straight, is laid on a
piece of wood planed smooth and kept for this purpose,
called a “trimming board.” It is then compassed from
the back, a straight edge laid to the compass holes, and the
foredge cut with a very sharp knife. If the knife is not
|42|
sharp the paper will yield to the slight pressure required
and will not be cut. It is therefore absolutely necessary that
a good edge be given to the blade, and, if possible, to keep a
special knife for the purpose. Such knives, called trimming
knives, are sold, the probable cost being about two
shillings. They have a very broad blade.
The object of trimming is to make the edges true; the
amount taken off must be only the rough and dirty edges,
the book being thus left as large as possible.
The French put their books in the press between boards
and rasp the edges, but this method has not only the disadvantage
of showing all the marks of the rasp, but also of
leaving a roughness which catches and retains the dust in
proportion to the soft or hard qualities of the paper.
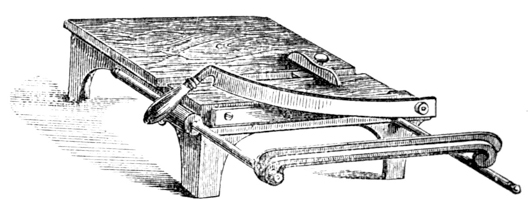
Cardboard Machine used for trimming.
Another method is to put the book into the cutting
press, and cut the overplus off with a plough, having a
circular knife, called a “round plough.” This is used
when a number of books are being done together. I prefer
to use the straight edge and knife for the foredge and tail,
and to cut the top when the book is in boards.
It is, however, not necessary to go to the expense of a
round plough, it is only advisable to have one when
“plough trimming” is of daily occurrence; an ordinary
plough knife, ground to a circular edge, will answer in most
cases.
Another excellent plan is to set the gauge of the |43|
mill-board machine, or a card-cutting machine, and to cut or
trim each section, foredge and tail, by the machine knife.
In a large number of books this plan is to be recommended;
the whole is cut more even and in less time; trimming by
this method must, however, be done before sewing. This
method is also adopted by some French houses.
Before leaving the subject of trimming, I will insert a
few lines from that well-known paper the “Athenæum,” as
to how a book should be trimmed; and so much do I agree
with its writer, that I have the quotation, in large type,
hung up in my shop as a constant caution and instruction
to the workmen:—
(No. 2138, Oct. 17th, 1868.)
“Mr.
EDITOR,—If you think that the ‘Athenæum’ is
read or seen by any members of that class of ruthless binders,
who delight in destroying the appearance of every pamphlet
and book that comes into their hands, by trimming or
ploughing its edges to the quick (and almost always
crookedly), I beg you to insert this appeal to the monsters
I have named, to desist from their barbarous practices, to
learn to reverence the margin of a book, and never to take
from it a hair’s breadth more than is absolutely needful.
The brutality with which the fair margins of one’s loved
volumes are treated by these mangling wretches with their
awful plough knives is shocking to behold. The curses of
book lovers are daily heaped on their backs, but they go on
running-a-muck, heedless of remonstrance, remorseless,
ever sacrificing fresh victims. Had we a paternal government,
one might hope for due punishment of some of these
offenders: one at least might be ploughed up the back,
another up the front, as an example and a terror to the
trade; but as this wholesome correction cannot unhappily
be administered, will you give expression to the indignation
of one amongst a million sufferers for years from these |44|
trimmers’ savageries, and let them know what feelings
their reckless cruelty awakens in many breasts? One of
the largest houses in London has just sent me home fifty
copies of an essay, intended as a present for a friend.
They have been trimmed, and been ruined. Would that
I could have the trimming of their trimmer’s hair and
ears; also his nose! I don’t think his best friend would
know him when I had done with him.
“But, Sir, we live in a philanthropic age, and are bound
to forgive our enemies and try to reform the worst criminals.
I therefore propose a practical measure to win these
book trimmers from their enormities; namely, that fifty at
least of your readers, who care for book margins, should
subscribe a guinea each for a challenge cup, to be competed
for yearly, and held by that firm which, on producing
copies of all books and pamphlets trimmed by it during
the year, shall be adjudged to have disfigured them least.
I ask you, Sir, if you will receive subscriptions for this
challenge cup? If you will, I shall be glad to send you
mine.
“M. A.
“P.S.—Any one who will cut out this letter, and get it
pasted up in any binder’s or printer’s trimming room, will
confer a favour on the writer.”
A very good trimming machine has been invented by
Messrs. Richmond and Co., of Kirby Street, Hatton Garden.
The bed rises and falls, with the books upon it, instead of
the knife descending upon the work, as in the cutting
machines; and the gauges are so arranged, that the foredge
of one pile of books, and the tails of another, can be cut at
one operation, and it is guaranteed by the makers that the
knife will leave a clean and perfectly trimmed edge.
CHAPTER X.
GLUEING
UP.
The book must now be glued up; that is, glue must be
applied to the back to hold the sections together, and make
the back firm during the rounding and backing. Knock the
book perfectly true at its back and head, and put it into
the lying press between two pieces of old mill-board; expose
the back and let it project from the boards a little, the
object being to hold the book firm and to keep the slips
close to the sides, so that no glue shall get on them;
then with glue, not too thick, but hot, glue the back,
rubbing it in with the brush, and take the overplus off
again with the brush. In some shops, a handful of shavings
is used to rub the glue in, and to take the refuse
away, but I consider this to be a bad plan, as a great
quantity of glue is wasted.
The Germans rub the glue into the back with the back
of a hammer, and take away the overplus with the brush;
this is certainly better than using shavings. The back
must not be allowed to get too dry before it is rounded, or
it will have to be damped with a sponge, to give to the
glue the elasticity required, but it should not be wet, this
being worse than letting it get too dry. The book should
be left for about an hour, or till it no longer feels tacky
to the touch, but still retains its flexibility. A flexible
bound book should first be rounded, a backing board being
used to bring the sheets round instead of a hammer, then
the back glued, and a piece of tape tied round the book to
prevent its going back flat. |46|
But all books are not glued up in the press; some workmen
knock up a number of books, and, allowing them to
project a little over their press, glue the lot up at once;
others again, by holding the book in the left hand and
drawing the brush up and down the back. These last
methods are, however, only practised in cloth shops, where
books are bound or cased at very low prices. The proper
way, as I have explained, is to put the book in the lying
press. The book is then laid on its side to dry, and if
more than one, they should be laid alternately back and
foredge, with the back projecting about half an inch, and
allowed to dry spontaneously, and on no account to be
dried by the heat of a fire. All artificial heat in drying in
any process of bookbinding is injurious to the work.
CHAPTER XI.
ROUNDING.
The
word “rounding” applies to the back of the book,
and is preliminary to backing. In rounding the back, the
book is to be laid on the press before the workman with
the foredge towards him; the book is then to be held with
the left hand by placing the thumb on the foredge and
fingers on the top of the book pointing towards the back,
so that by drawing the fingers towards the thumb, or by
pressing fingers and thumb together, the back is drawn
towards the workman at an angle. In this position
the back is struck with the face of the hammer, beginning
in the centre, still drawing the back over with
the left hand. The book is then to be turned over, and
the other side treated in the same way, and continually
|47|
changed or turned from one side to the other until it has
its proper form, which should be a part of a circle. When
sufficiently rounded, it should be examined to see if one
side be perfectly level with the other, by holding the book
up and glancing down its back, and gently tapping the
places where uneven, until it is perfectly true or uniform.
The thicker the book the more difficult it will be found to
round it; and some papers will be found more obstinate
than others, so that great care must be exercised both in
rounding and backing, as the foredge when cut will have
exactly the same form as the back. Nothing can be more
annoying than to see books lop-sided, pig-backed, and with
sundry other ailments, inherent to cheap bookbinding.
|48|
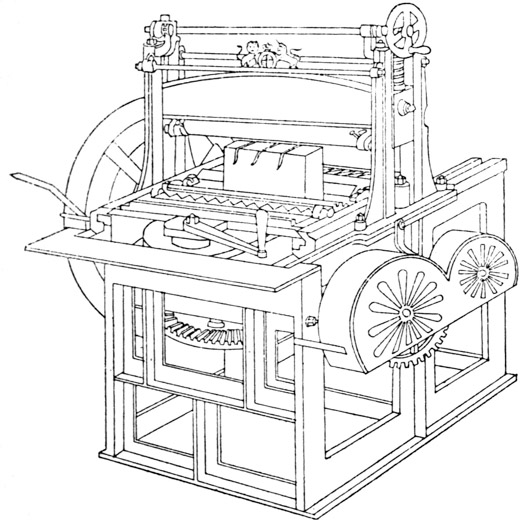
Rounding Machine.
The back when properly rounded should be about a third
of a circle, according to the present mode, but in olden times
they were made almost flat. They were not rounded as
now done, but the swelling caused by the thread used
made quite enough rounding when put in the press for
backing.
Flat back books have a certain charm about them, the
more so if in other respects they are properly forwarded.
The theory is altogether averse to practical binding. I
have always been given to understand that we round our
books in order to counteract the tendency of a book to sink
in and assume a convex back. Any old well-used book
bound with a flat back will show at once this defect.
Messrs. Hopkinson and Cope, of Farringdon Road,
London, manufacture a rounding machine. They claim that
this machine will round 600 books per hour, and that any
desired “round” may be given to the book with great
uniformity.
CHAPTER XII.
BACKING.
The boards required for backing, called backing boards,
should always be the same length as the book. They are
made somewhat thicker than cutting boards, and have
their tops planed at an angle, so that the sheets may fall
well over.
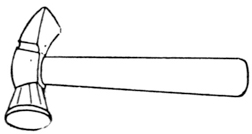
Backing Hammer.
Hold the book in the left hand, lay a board on one side,
a little away from the back, taking the edge of the top
sheet as a guide, the distance to be a trifle more than the
thickness of the boards intended to be used. Then |49|
turn over the book, with the backing board, holding
the board to the book by the thumb, so that it does not
shift, and lay the other board at exactly the same distance
on the other side. The whole is now to be held tightly by
the left hand and lowered into the press. The boards may
possibly have shifted a little
during the process, and any
correction may now be made
whilst the press holds the book
before screwing up tight, such
as a slight tap with the hammer
to one end of a board that may not be quite straight.
Should the boards however be not quite true, it will be
better to take the whole out and readjust them, rather than
lose time in trying to rectify the irregularity by any other
method. If the rounding is not quite true it will be seen
at once, and the learner must not be disheartened if he has
to take his book out of the press two or three times to
correct any slight imperfection.
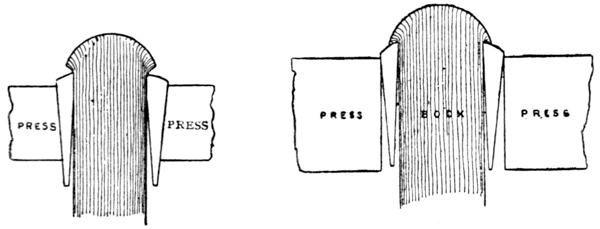
| Before Backing. |
After Backing. |
The book and boards having been lowered flush with the
cheeks of the press, screw it up as tightly as possible with the
iron hand-pin. The back of the book must now be gently
struck with the back of the hammer, holding it slanting
and beating the sheets well over towards the backing
boards. Commence from the centre of the back and do |50|
not hit too hard, or the dent made by the hammer will
show after the book has been covered. The back is to be
finished with the face of the hammer, the sheets being
brought well over on the boards so that a good and solid
groove may be made. Each side must be treated in the same
way, and have the same amount of weight and beating.
The back must have a gradual hammering, and the sheets,
when knocked one way, must not be knocked back again.
The hammer should be swung with a circular motion,
always away from the centre of the back. The book, when
opened after backing, should be entirely without wrinkles;
their presence being a sign that the workman did not know his
business, or that it was carelessly done. Backing and cutting
constitute the chief work in forwarding, and if these two
are not done properly the book cannot be square and solid—two
great essentials in bookbinding.
Backing flexible work will be found a little more difficult,
as the slips are tighter; but otherwise the process is exactly
the same, only care must be taken not to hammer the cord
too much, and to bring over the sections very gently, in
order not to break the sewing thread.
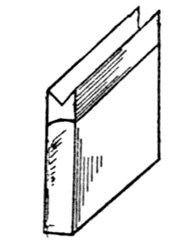
Two-edged Backing Boards.
The backing boards may be replaned
from time to time, as they become used,
but boards may be had having a double
face of steel to them; these may be used
from either side. The edges of the steel
must not be sharp, or they will cut the
paper when backing. The ordinary boards
may also have a face of steel screwed to
them, but I prefer to use the wood—one
can get a firmer back without fear of
cutting the sheets.
There are several backing machines by different makers
but they are all of similar plan. The book being first
rounded is put between the cheeks, and the roller at the
|51|
top presses the sheets over. I am sorry to say that a great
number of sheets get cut by this process, especially when a
careless man has charge of the machine.
CHAPTER XIII.
MILL-BOARDS.
There is no
occasion to wait for the book to be advanced
as far as the backing before the workman sees to his boards;
but he should take advantage of the period of drying to
prepare them, to look out the proper thickness of the board,
and to line them with paper either on one side or on both.
There are now so many kinds of mill-boards made that a
few words about them may not be out of place. The best
boards are made of old rope, and cost about £30 per ton.
The various mills make each a different quality, the prices
ranging down to £14 per ton; about this price the straw
boards may be said to commence, they going as low as £7,
and even less.
A new board has lately appeared called leather board;
it is exceedingly hard and durable. I made several experiments
with this board, but up to the present have not
succeeded in getting it to lay flat on the book.
Boards are made to the various sizes in sheets varying from pott
(17 1 ⁄ 4
×
14 1 ⁄ 4
inches) to double elephant (40 × 28 inches). The
thickness is known as 6d., 7d., 8d.; 8x, or eightpenny one cross;
8xx, eightpenny two cross; X for tenpenny. Here is a list in full of
all the boards likely to be
used:—|52|

| KEY: D=“Dozens in a Bundle.”;
W=“Weight Per Bundle, lb.” |
| DESCRIPTION. |
SIZE. |
6d. |
7d. |
8d. |
8x. |
8xx. |
X. |
| inches. |
D |
W |
D |
W |
D |
W |
D |
W |
D |
W |
D |
W |
| Pott |
17 1 ⁄ 4 × 14 1 ⁄ 4 |
6 |
28 |
6 |
40 |
5 |
48 |
5 |
56 |
4 |
60 |
3 |
58 |
| Foolscap |
18 1 ⁄ 2 × 14 1 ⁄ 2 |
6 |
32 |
6 |
44 |
5 |
50 |
5 |
58 |
4 |
62 |
3 |
58 |
| Crown |
20 × 16 1 ⁄ 4 |
6 |
36 |
6 |
50 |
5 |
62 |
5 |
72 |
4 |
74 |
3 |
72 |
| Small Half Royal |
20 1 ⁄ 4 × 13 |
6 |
30 |
6 |
44 |
5 |
50 |
5 |
60 |
4 |
62 |
3 |
58 |
| Large Half Royal |
21 × 14 |
6 |
30 |
6 |
48 |
5 |
60 |
5 |
62 |
4 |
70 |
3 |
72 |
| Short |
21 × 17 |
6 |
38 |
6 |
55 |
5 |
70 |
5 |
78 |
4 |
78 |
3 |
78 |
| Sm. Half Imperial |
22 1 ⁄ 4 × 15 |
6 |
36 |
6 |
50 |
5 |
64 |
4 |
70 |
3 |
62 |
2 |
60 |
| Half Imperial |
23 1 ⁄ 2 × 16 1 ⁄ 2 |
6 |
40 |
6 |
60 |
5 |
66 |
4 |
70 |
3 |
66 |
2 |
64 |
| Mdle. or Sm. Demy |
22 1 ⁄ 2 × 18 1 ⁄ 2 |
6 |
45 |
6 |
60 |
5 |
66 |
4 |
74 |
3 |
72 |
2 |
66 |
| Large Middle or Large Demy |
23 3 ⁄ 4 × 18 1 ⁄ 2 |
6 |
48 |
6 |
68 |
5 |
66 |
4 |
76 |
3 |
74 |
2 |
60 |
| Large or Medium |
24 × 19 |
6 |
48 |
6 |
70 |
5 |
65 |
4 |
76 |
3 |
74 |
2 |
60 |
| Small Royal |
25 1 ⁄ 2 × 19 1 ⁄ 2 |
6 |
52 |
6 |
78 |
5 |
78 |
4 |
84 |
3 |
84 |
2 |
68 |
| Large Royal |
26 3 ⁄ 4 × 20 3 ⁄ 4 |
6 |
52 |
6 |
78 |
4 |
68 |
3 |
76 |
2 |
68 |
2 |
86 |
| Extra Royal |
28 1 ⁄ 2 × 21 1 ⁄ 2 |
6 |
56 |
6 |
82 |
4 |
74 |
3 |
80 |
2 |
74 |
2 |
92 |
| Imperial |
32 × 22 1 ⁄ 2 |
6 |
72 |
4 |
72 |
3 |
72 |
2 |
72 |
2 |
96 |
2 |
120 |

Mill-board Shears.
Having chosen the board, it is necessary to cut it up to
the size wanted. If the book is 8vo., the board is cut into
eight pieces; if 4to., into four; using a demy board
for a demy book, or a royal for a royal book. To cut up
the board, first mark up, as a guide for the mill-board
shears. These are very large shears, in shape somewhat
like an enlarged tin shears. To use the shears, screw up
one arm in the laying press, hold the board by the left
hand, using the right to work the upper arm, the left hand
meanwhile guiding the board. Some little tact is required
|53|
to cut heavy boards. It will be found that it is necessary
to press the lower arm away with the thigh, and bring the
upper arm towards the operator whilst cutting.
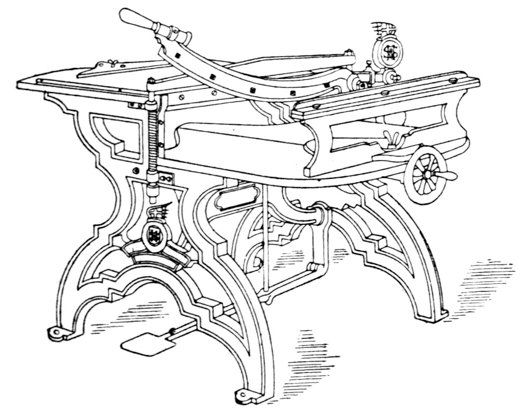
Mill-board Machine.
A mill-board cutting machine is now in all large shops.
The cut fairly well explains itself; the long blade descending
cuts the boards, which are held fast on the table by the
clamp. The gauges are set either on the table or in front.
The board is put on the table and held tight by pressure of
the foot on the treadle; the knife descending upon the exposed
board cuts after the principle of the guillotine blade.
Another kind, introduced by Messrs. Richmond, of Kirby
Street, Hatton Garden, is made for steam work, and is no
doubt one of the best that can be made. Instead of a
knife to descend, a number of circular cutters are made to
revolve on two spindles, the one cutter working against
the other (see woodcut); but I give Messrs. Richmond’s
own description, it being more explicit than any I could |54|
possibly give: “The machine accomplishes a surprising
amount of superior work in a very short time, and the
best description of the ordinary lever mill-board cutting
machine cannot be compared with it. The machine is
very strongly and accurately constructed. It is furnished
with an iron table having a planed surface, and is also
provided with a self-acting feed gauge. The gear wheels
are engine cut, and the circular cutters, which are of the
best cast steel, being turned and ground “dead true,” clean
and accurate cutting is insured. The machine will therefore
be found to be a most profitable acquisition to any
bookbinding establishment in which large quantities of
mill-board are used up.”
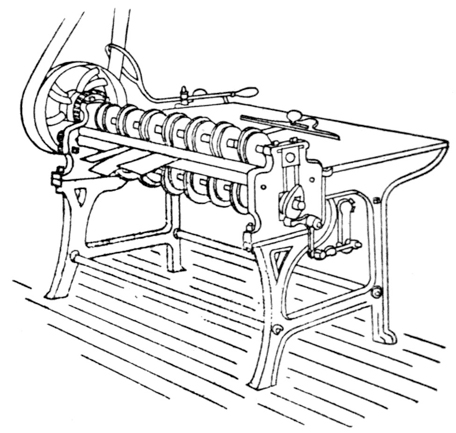
Steam Mill-board Cutting Machine.
The boards being cut, square the edge which is to go to
the back of the book. This must be done in the cutting
press, using a cutting board for one side termed a “runner,”
and another called a “cut-against” for the other side. |55|
These are simply to save the press from being cut; and a
piece of old mill-board is generally placed on the cut-against,
so that the plough knife does not cut or use up
the cut-against too quickly. The boards are now, if for
whole-binding, to be lined on both sides with paper; if for
half-binding only on one side. The reason for lining them
is to make the boards curve inwards towards the book.
The various pastings would cause the board to curve the
contrary way if it were not lined. If the boards are to
be lined both sides, paper should be cut double the size of
the boards; if only one side, the paper cut a little wider
than the boards, so that a portion of the paper may be
turned over on to the other side about a quarter of an inch.
The paper is now pasted with not too thick paste, and the
board laid on the paper with the cut edge towards the portion
to be turned over. It is now taken up with the paper
adhering, and laid down on the press with the paper side
upwards, and rubbed well down; it is then again turned
over and the paper drawn over the other side. It is
advisable to press the boards to make more certain of the
paper adhering, remembering always that the paper must
be pasted all over very evenly, for it cannot be expected
to adhere if it is not pasted properly.
When the books are very thick, two boards must be
pasted together, not only to get the proper thickness, but
for strength, for a made board is always stronger than a
single one. If a board has to be made, a thick and a
somewhat thinner board should be fastened together with
paste. Paste both boards and put them in the standing press
for the night. Great pressure should not be put on at first,
but after allowing them to set for a few minutes, pull
down the press as tight as possible. When placing made
boards to the book, the thinner one should always be next
the book. It may be taken as a general rule that a thinner
board when pasted will always draw a thicker one. |56|
When boards are lined on one side only it is usual to
turn half an inch of the paper over the square or cut edge,
and the lined side must be placed next the book.
Many binders line the mill-board all over with paper
before cutting; this may save time, but the edge of the
board at the joint is liable to be abraised, and the resulting
joint uneven.
The boards when lined should be laid about or stood up
to dry, and when dry, cut to the proper and exact size for
the book. As a fact, the black boards now sold are much
too new or green to be used direct by the binder, they
should be stocked for some months.
The requisite width is obtained by extending the compass
from the back of the book to the edge of the smallest
bolt or fold in the foredge. It is advisable not to measure
less than this point, but to leave a leaf or two in order to
show that the book is not cut down. The compasses being
fixed by means of the side screw, the boards are to be
knocked up even, compassed up, and placed in the lying
press, in which they are cut, using, as before, the “cut-against,”
and placing the runner exactly to the compass
holes. When cut they are to be tested by turning one
round and putting them together again; if they are the
least out of truth it will be apparent at once. The head
or top of the boards is next to be cut by placing a square
against the back and marking the head or top with a
bodkin or point of a knife. The boards being quite
straight are again put into the press and cut, and when
taken out should be again proved by reversing them as
before, and if not true they must be recut. The length is
now taken from the head of the book to the tail, and in
this some judgment must be used. If the book has already
been cut the measure must be somewhat larger than the
book, allowing only such an amount of paper to be cut off
as will make the edge smooth. If, however, the book is to |57|
be entirely uncut, the size of the book is measured, and in
addition the portion called squares must be added.
When a book has not been cut, the amount that is to be
cut off the head will give the head or top square, and the
book being measured from the head, another square or
projection must be added to it, and the compass set to one
of the shortest leaves in the book. Bearing in mind the
article on trimming, enough of the book only should be
cut to give the edge solidity for either gilding or marbling.
A few leaves should always be left not cut with the plough,
to show that the book has not been cut down. These few
leaves are called proof, and are always a mark of careful
work.
About twenty years ago it was the mode to square the
foredge of the boards, then lace or draw them in, and to
cut the head and tail of the boards and book together, then
to turn up and cut the foredge of the book.
CHAPTER XIV.
DRAWING-IN
AND
PRESSING.
The boards
having been squared, they are to be attached
to the book by lacing the ends of the cord through holes
made in the board. The boards are to be laid on the book
with their backs in the groove and level with the head;
they must then be marked either with a lead pencil or the
point of a bodkin exactly in a line with the slips, about
half an inch down the board. On a piece of wood the mill-board
is placed, and holes are pierced by hammering a short
bodkin through on the line made, at a distance from the
edge in accordance with the size of the book. About half
an inch away from the back is the right distance for an
|58|
octavo. The board is then to be turned over, and a second
hole made about half an inch away from the first ones.
The boards having been holed, the slips must be scraped,
pasted slightly, and tapered or pointed. Draw them tightly
through the hole first made and back through the second.
Tap them slightly when the board is down to prevent them
from slipping and getting loose. When the cords are drawn
through, cut the ends close to the board with a knife, and
well hammer them down on the knocking-down iron to
make the board close on the slips and hold them tight.
The slips should be well and carefully hammered, as any
projection will be seen with great distinctness when the
book is covered. The hammer must be held perfectly even,
for the slips will be cut by the edge of it
if used carelessly.
The book is now to be examined, and any little alteration
may be made before putting it into the standing press.
With all books, a tin should be placed between the mill-board
and book, to flatten the slips, and prevent their
adherence. The tin is placed right up to the groove, and
serves also as a guide for the pressing board. Pressing
boards, the same size as the book, should be put flush with
the groove, using the pressing tin as guide, and the book
or books placed in the centre of the press directly under
the screw, which is to be tightened as much as possible.
In pressing books of various sizes, the largest book must
always be put at the bottom of the press, with a block or
a few pressing boards between the various sizes, in order
to get equal pressure on the whole, and to allow the screw
to come exactly on the centre of the books.
The backs of the books are now to be pasted, and allowed
to stand for a few minutes to soften the glue. Then with
a piece of wood or iron, called a cleaning-off stick (wood
is preferable), the glue is rubbed off, and the backs are well
rubbed with a handful of shavings and left to dry. Leave
them as long as possible in the press, and if the volume is |59|
rather a thick one a coat of paste or thin glue should be
applied to the back. Paste is preferable.
If the book is very thick a piece of thin calico may be
pasted to the back and allowed to dry, the surplus being
taken away afterwards.
In flexible work care must be taken that the cleaning-off
stick is not forced too hard against the bands, or the thread
being moist will break, or the paper being wet will tear, or
the bands may become shifted. The cleaning-off stick may
be made of any piece of wood; an old octavo cutting board is
as good as anything else, but a good workman will always
have one suitable and at hand when required for use.
When the volumes have been pressed enough (a day’s
pressing is none too much) they are to be taken out, and the
tins and pressing boards put away. The book is then ready
for cutting. Of the numerous presses, excepting the hydraulic,
Gregory’s Patent Compound Action Screw Press
is to my mind the best, and I believe it to be one of the
most powerful presses yet invented; sixty tons pressure can
be obtained by it.
CHAPTER XV.
CUTTING.
In
olden times, when our present work-tools did not exist
and material aids were scarce, a sharp knife and straight
edge formed the only implements used in cutting. Now
we have the plough and cutting machine, which have
superseded the knife and straight edge; and the cutting
machine is now fast doing away with the plough. There
are very few shops at the present moment where a cutting
|60|
machine is not in use, in fact I may say that, without
speaking only of cloth books, for they must always be cut
by machinery owing to the price not allowing them to be
done otherwise, there are very few books, not even excepting
extra books, that have escaped the cutting machine.
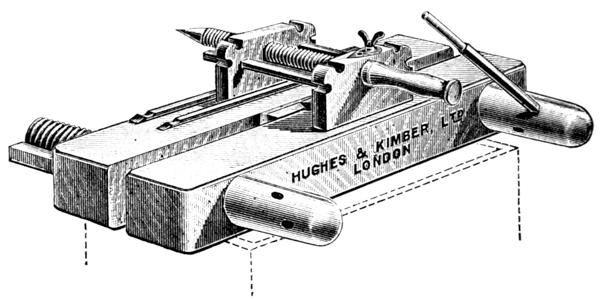
Cutting Press and Plough.

Sliding Knife.
All cutting “presses” are used in the same way. The plough running
over the press, its left cheek running between two guides fastened
on the left cheek of the press. By turning the screw of the plough
the right cheek is advanced towards the left; the knife fixed on the
right of the plough is advanced, and with the point cuts gradually
through the boards or paper secured in the press, as already described
in preparing the boards. There are two kinds of ploughs in use—in
one the knife is bolted, in the other the knife slides in a dovetail
groove—termed respectively |61|
“bolt knife” and “slide knife.” The forwarder will find that the latter
is preferable, on account of its facility of action, as any length of
knife can be exposed for cutting. But with a bolt knife, being fastened
to the shoe of the plough, it is necessarily a fixture, and must be
worn down by cutting or squaring mill-boards, or such work, before it
can be used with the truth necessary for paper.
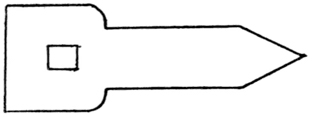
Bolt Knife.
To cut a book properly it must be quite straight, and the
knife must be sharp and perfectly true. Having this in
mind, the book may be cut by placing the front board
the requisite distance from the head that is to be cut off.
A piece of thin mill-board or trindle is put between the
hind board and book, so that the knife when through
the book may not cut the board. The book is now to
be lowered into the cutting press, with the back towards
the workman, until the front board is exactly on a level
with the press. The head of the book is now horizontal
with the press, and the amount to be cut off exposed above
it. Both sides should be looked to, as the book is very
liable to get a twist in being put in the press. When it is
quite square the press is to be screwed up tightly and
evenly. Each end should be screwed up to exactly the
same tightness, for if one end is loose the paper will be
jagged or torn instead of being cut cleanly.
The book is cut by drawing the plough gently to and
fro; each time it is brought towards the workman a slight
amount of turn is given to the screw of the plough. If
too much turn is given to the screw, the knife will bite too
deeply into the paper and will tear instead of cutting it. If
the knife has not been properly sharpened, or has a burr |62|
upon its edge, it will be certain to cause ridges on the
paper. The top edge being cut, the book is taken out of
the press and the tail cut. A mark is made on the top of
the hind or back board just double the size of the square,
and the board is lowered until the mark is on a level with
the cut top. The book is again put into the press, with
the back towards the workman, until the board is flush
with the cheek of the press; this will expose above the
press the amount to be taken off from the tail, as before
described, and the left hand board will be, if put level with
the cut top, exactly the same distance above the press as
the right band board is below the cut top. The tail is cut
in the same way as the top edge.
To cut a book properly requires great care. It will be
of great importance to acquire a methodical exactness in
working the different branches, cutting especially. Always
lay a book down one way and take it up another, and in
cutting always work with the back of the book towards
you, and cut from you. Give the turn to the screw of the
plough as it is thrust from you, or you will pull away a
part of the back instead of cutting it.
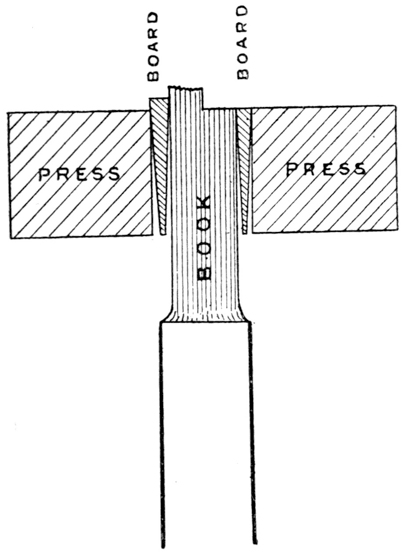
Section of Book and Press, book
partly cut.
In cutting the foredge, to which we must now come,
always have the head of the book towards you, so that if
not cut straight you know exactly where the fault lies.
The foredge is marked both back and front of the book by
placing a cutting board under the first two or three leaves
as a support; the mill-board is then pressed firmly into
the groove and a line is drawn or a hole is pierced head
and tail, the foredge of the board being used as a guide. The
book is now knocked with its back on the press quite flat,
and trindles (flat pieces of steel in the shape of an elongated
U, about 1 1 ⁄ 2 inch wide and 3 or 4 inches long, with
a slot nearly the whole length) are placed between the
boards and book by letting the boards fall back from the
book and then passing one trindle at the head, the other at |63|
tail, allowing the top and bottom slip to go in the grooves
of the trindles. The object of this is to force the back up
quite flat, and by holding the book when the cut-against
and runner is on it, supported by the other hand under the
boards, it can be at once seen if the book is straight or not.
The cut-against must be put quite flush with the holes on
the left of the book, and the runner the distance under the
holes that the amount of square is intended to be. The
book being lowered into the press, the runner is put flush
with the cheek of the press and the cut-against just the
same distance above the press as the runner is below the
holes. The trindles must be taken out from the book when |64|
the cutting boards are in their proper place, and the mill-boards
will then fall down. The book and cutting boards
must be held very tightly or they will slip and, if the
book has been lowered into the press accurately, everything
will be quite square. The press must now be screwed
up tightly, and the foredge ploughed; when the book is
taken out of the press it will resume its original rounding,
the foredge will have the same curve as the back, and if
cut truly there will be a proper square all round the edges.
This method is known as “cutting in boards.”
If the amateur or workman has a set of some good work
which he wishes to bind uniformly, but which has already
been cut to different sizes, and he does not wish to cut the
large ones down to the smaller size, he must not draw
the small ones in, as he may possibly not be able to
pull the boards down the required depth to cut the
book, but he must leave the boards loose, cut the head
and tail, then draw the boards in, and turn up and cut the
foredge.
“Cutting out of boards” is by a different method. The
foredge is cut before gluing up, if for casing, taking the
size from the case, from the back to the edge of the board
in the foredge. The book is then glued up, rounded, and
put into the press for half an hour, just to set it. The size
is again taken from the case, allowing for squares head
and tail. The book having been marked is cut, and then
backed. Cloth cases are made for most periodicals, and
may be procured from their publishers at a trifling cost,
which varies according to the size of the book and the
amount of blocking that is upon them.
This method of cutting out of boards is adopted in many
of the cheap shops (even leather shops). It is a method,
however, not to be commended.
To test if the book be cut true it is only necessary to
turn the top leaf back level to the back of the book and |65|
even at the head; if it be the slightest bit untrue it will at
once be seen.
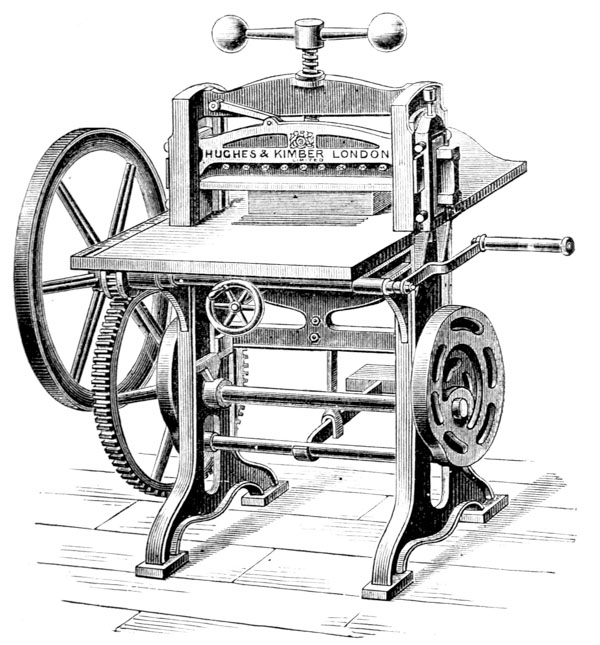
Cutting Machine.
A few words about the various cutting machines that
are in the market. Each maker professes his machine the
best. In some the knife moves with a diagonal motion, in
others with a horizontal motion.
The principle of all these machines is the same: the
books are placed to a gauge, the top is lowered and clamps |66|
the book, and, on the machine being started, the knife
descends and cuts through the paper.
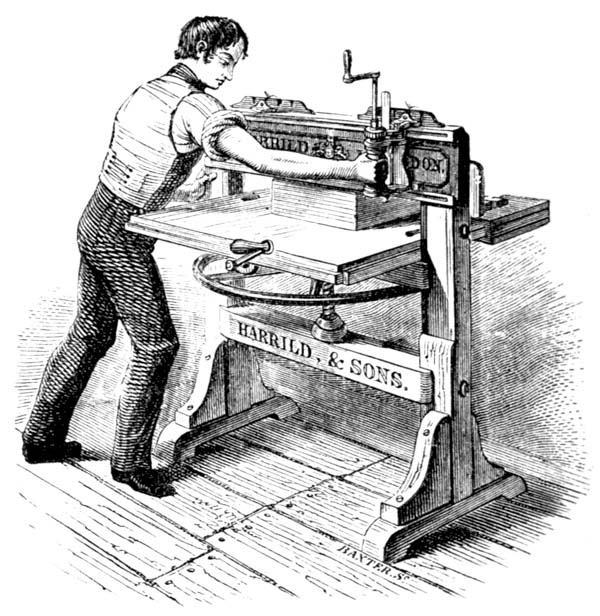
Registered Cutting Machine.
Another machine by Harrild and Son, called a registered
cutting machine, is here illustrated. Its operation is on
the same principle as a lying press, the difference being,
that this has a table upon which the work is placed; a
gauge is placed at the back so that the work may be placed
against it for accuracy, the top beam is then screwed down
and the paper ploughed. A great amount of work may be
accomplished with this machine, and to anyone that cannot
afford an ordinary cutting machine this will be found invaluable.
CHAPTER XVI.
COLOURING
THE
EDGES.
The edges of every book must be in keeping with the
binding. A half roan book should not have an expensive
edge, neither a whole bound morocco book a sprinkled edge.
Still, no rule has been laid down in this particular, and
taste should regulate this as it must in other branches.
The taste of the public is so changeable that it is impossible
to lay down any rule, and I leave my reader to his own
discretion.
Here are various ways in which the edges may be
coloured.
Sprinkled Edges.—Most shops have a colour always ready,
usually a reddish brown, which they use for the whole of
their sprinkled edge books. The colour can be purchased
at any oil shop. A mixture of burnt umber and red ochre
is generally used. The two powders must be well mixed
together in a mortar with paste, a few drops of sweet oil,
and water. The colour may be tested by sprinkling some
on a piece of white paper, allowing it to dry, and then
burnishing it. If the colour powders or rubs, it is either
too thick, or has not enough paste in it. If the former,
some water must be added; if the latter, more paste: and
it will perhaps be better if the whole is passed through a
cloth to rid it of any coarse particles. The books may be
sprinkled so as to resemble a kind of marble by using two
or three different colours. For instance, the book is put in
the lying press and a little sand is strewn upon the edge in
small mounds. Then with a green colour a moderate |68|
sprinkle is given. After allowing it to dry, more sand is
put on in various places, a dark sprinkle of brown is put on,
and the whole allowed to dry. When the sand is shaken
off, the edge will be white where the first sand was dropped,
green where the second, and the rest brown.
A colour of two shades may be made by using sand, then
a moderately dark brown sprinkled, then more sand, and
lastly a deeper shade of same colour.

Sprinkling Brush and Sieve.
There are a few of the “Old Binders” who still use what
is called the “finger brush,” a small brush about the size of
a shaving brush, made of stiff bristles cut squarely. They
dip it into the colour, and then by drawing the finger across
it jerk the colour over the edge. Another method is to use
a larger brush, which being dipped in the colour is beaten
on a stick or press-pin until the desired amount of sprinkle
is obtained. But the best plan is to use a nail brush and a
common wire cinder sifter. Dip the brush in the colour
and rub it in a circular direction over the cinder sifter.
This mode has the satisfactory result of doing the work
quicker, finer, and more uniformly. The head, foredge and
tail must be of exactly the same shade, and one end must
not have more sprinkle on it than the other, and a set of
books should have their edges precisely alike in tone and
colour.
Colours for Sprinkling.—To give an account of how the
various colours are made that were formerly used would
be only waste of time, as so many dyes and colours that |69|
answer all purposes may be purchased ready for instant use.
I may with safety recommend Judson’s dyes diluted with
water.
Plain Colouring.—The colour having been well ground
is to be mixed with paste and a little oil, or what is perhaps
better, glaire and oil. Then with a sponge or with a
brush colour the whole of the edge. In colouring the
foredge the book should be drawn back so as to form a
slope of the edge, so that when the book is opened a certain
amount of colour will still be seen. It is often necessary
to give the edges two coats of colour, but the first must be
quite dry before the second is applied.
A very good effect may be produced by first colouring
the edge yellow, and when dry, after throwing on rice,
seeds, pieces of thread, fern leaves, or anything else according
to fancy, then sprinkling with some other dark colour.
For this class of work body sprinkling colour should always
be used. It may be varied in many different ways.
Marbled Edges.—The edges of marbled books should in
almost every instance correspond with their marbled ends.
In London very few binders marble their own work, but
send it out of the house to the Marblers, who do nothing
else but make marbled edges and paper. One cannot do
better than send one’s books to be marbled; it will cost
only a few pence, which will be well spent in avoiding the
trouble and dirt that marbling occasions; nevertheless I
will endeavour to explain; it is, however, a process that
may seem very easy, but is very difficult to execute
properly.
The requisites are a long square wooden or zinc trough
about 2 inches deep to hold the size for the colours to float
on; the dimensions to be regulated by the work to be
done. About 16 to 20 inches long and 6 to 8 inches wide
will probably be large enough. Various colours are used,
such as lake, rose, vermilion, king’s yellow, yellow ochre, |70|
Prussian blue, indigo, some green, flake white, and lamp
black. The brushes for the various colours should be of
moderate size, and each pot of colour must have its own
brush. Small stone jars are convenient for the colours,
and a slab of marble and muller to grind them must be
provided. The combs may be made with pieces of brass
wire about two inches long, inserted into a piece of wood;
several of these will be required with the teeth at different
distances, according to the width of the pattern required
to be produced. Several different sized burnishers, flat
and round, will be required for giving a gloss to the work.

Marbling Trough.
The first process in marbling is the preparation of the
size on which the colours are to be floated. This is a solution
of gum tragacanth, or as it is commonly called, gum
dragon. If the gum is placed over night in the quantity
of water necessary it will generally be found dissolved by
the morning. The quantity of gum necessary to give
proper consistency to the size is simply to be learned by
experience, and cannot be described; and the solution
must always be filtered through muslin or a linen cloth
before use.
The colours must be ground on the marble slab with a
little water, as fine as possible; move the colour from time
to time into the centre of the marble with a palette knife,
and as the water evaporates add a little more. About
one oz. of colour will suffice to grind at once, and it will
take about two hours to do it properly.
Having everything at hand and ready, with the size in |71|
the trough, and water near, the top of the size is to be
carefully taken off with a piece of wood the exact width of
the trough, and the colour being well mixed with water
and a few drops of ox gall, a little is taken in the brush,
and a few very fine spots are thrown on.
If the colour does not spread out, but rather sinks down,
a few more drops of gall must be carefully added and well
mixed up. The top of the size must be taken off as before
described, and the colour again thrown on.
If it does not then spread out, the ground or size is of
too thick consistency, and some clean water must be added,
and the whole well mixed.
If the colour again thrown on spreads out, but looks
rather greyish or spotty, then the colour is too thick, and
a little water must be added, but very carefully, lest it
be made too thin. If the colour still assumes a greyish
appearance when thrown on, then the fault lies in the
grinding, and it must be dried and again ground.
When the colour, on being thrown on, spreads out in
very large spots, the ground or size is too thin and a little
thicker size should be added. Now, if the consistency or
the amount of gum water be noticed, by always using the
same quantity the marbler cannot fail to be right.
If the colours appear all right on the trough, and when
taken off on a slip of paper adhere to it, the size and
colours are in perfect working order.
The top of the size must always be taken off with the
piece of wood before commencing work, so that it be kept
clean, and the colours must always be well shaken out of
the brush into the pot before sprinkling, so that the spots
may not be too large. The marbler must always be guided
by the pattern he wishes to produce, and by a little thought
he will get over many difficulties that appear of greater
magnitude than they really are.
Spot Marble.—The size is first to be sprinkled with a |72|
dark colour, and this is always termed the “ground colour,”
then the other colours; bearing in mind that the colour
that has the most gall will spread or push the others away,
and this colour should in spot marbling be put on last.
With very little variation all the other kinds of marbling
are done; but in every case where there are more books or
sheets of paper to be done of the same pattern than the
trough will take at once, the same order of colours must
be kept, and the same proportion of each, or one book will
be of one colour and the second entirely different.
Comb or Nonpareil Marble.—The colours are to be thrown
on as before, but as fine as possible. Then if a piece of
wood or wire be drawn backwards and forwards across the
trough, the colours, through the disturbance of the size,
will follow the motion of the stick. A comb is then to be
drawn the whole length of the trough in a contrary direction.
The wire in the comb will draw the colour, and
thus will be produced what is termed comb or nonpareil
marble.
The size or width of the teeth of the comb will vary
the size of the marble.
Spanish Marble.—The ground colour is to be thrown on
rather heavily, the others lighter, and the wavy appearance
is caused by gently drawing the paper in jerks over the
marble, thus causing the colour to form small ripples.
A few drops of turpentine put in the colours will give
them a different effect, viz.,—causing the small white spots
that appear on the shell marble.
There are various patterns, each being known by name:
old Dutch, nonpareil, antique, curl, Spanish, shell. An
apprentice would do well to go to some respectable shop and
ask for a sheet or two of the various kinds mentioned, and
as each pattern is given to him, write the name on the
back, and always keep it as a pattern for future use and
reference. |73|
Edges are marbled, after making the desired pattern on
the trough by holding the book firmly, pressing the edge
on the colour and lifting it up sharply. The foredge must
be made flat by knocking the book on its back, but the
marbler had better tie his book between a pair of backing
boards, so that it may not slip, especially with large books.
Care must be taken with books that have many plates, or
if the paper is at all of a spongy nature or unsized. If a
little cold water be thrown on the edges it will cause the
colours to set better. In marbling writing paper, a sponge
with a little alum water should be used to take off the gloss
or shine from the edge, occasioned by the cutting knife,
and to assist the marbling colour to take better.
Paper is marbled in the same way by holding it at two
corners; then gently putting it on the colour and pressing
it evenly, but gently all over, so that the colour may take
on every part. It must be lifted carefully, as the least
shake by disturbing the size will spoil the regularity of the
pattern. Paper should be damped over night and left with
a weight on the top. When the paper has been marbled
and is dry, a rag with a little bee’s wax or soap should
be rubbed over it, so that the burnisher may not stick,
and may give a finer gloss; this applies also to the edges
in burnishing. Marble paper manufacturers burnish the
paper with a piece of polished flint or glass fixed in a long
pole working in a socket at the top, the other end resting
on a table which is slightly hollowed, so that the segment
of the circle which the flint takes is exactly that of the
hollow table. The paper is laid on the hollow table, and
the burnisher is worked backwards and forwards until
the desired gloss is attained. By the best and latest
method, the paper is passed between highly polished
cylinders. It is more expensive, on account of the cost
of the machinery, but insures superior effect.
A great deal of paper is now being made by means of a |74|
mechanical process. It has a very high gloss; it is used
on very cheap work.
Sizing.—Paper should be always sized after being marbled.
The size is made by dissolving one pound of best glue in
five gallons of water with half a pound of best white soap.
This is put into a copper over night, and on a low fire the
next morning, keeping it constantly stirred to prevent
burning. When quite dissolved and hot it is passed
through a cloth into a trough, and each sheet passed
through the liquor and hung up to dry; when dry, burnish
as above.
But it will be far cheaper to buy the paper, rather than
make it at the cost of more time than will be profitable.
The charge for demy size is at the rate of 20s. to 95s. per
ream, according to the quality and colour; but to those to
whom money is no object, and who would prefer to make
their own marbled paper, I hope the foregoing explanation
will be explicit enough.
The “English Mechanic,” March 17th, 1871, has the
following method of transferring the pattern from ordinary
marble paper to the edges of books:—
“Ring the book up tightly in the press, the edge to be
as flat as possible; cut strips of the best marble paper about
one inch longer than the edge, make a pad of old paper
larger than the edge of the book, and about a quarter inch
thick; then get a piece of blotting paper and a sponge with
a little water in; now pour on a plate sufficient spirits of
salts (muriatic acid) to saturate the paper, which must be
placed marble side downwards on the spirit (not dipped in
it); when soaked put it on the edge (which has been previously
damped with a sponge), lay your blot paper on it,
then your pad, now rap it smartly all over, take off the pad
and blot, and look if the work is right, if so, take the book
out and shake the marble paper off; when dry burnish.”
At a lecture delivered at the Society of Arts, January,
|75|
1878, by Mr. Woolnough, a practical marbler, the whole
process of marbling was explained. Mr. Woolnough has
since published an enlarged treatise on marbling,6
and one
that should command the attention of the trade. A copy
of the Society’s journal can be had, describing the process,
No. 1,314, vol.
XXVI., and will be of great service to any
reader, but his work is more exhaustive.
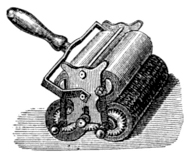
Leo’s Mechanical
Marblers.
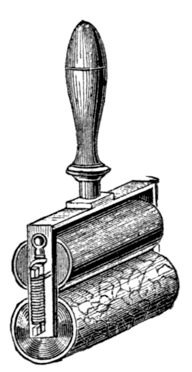
Leo’s Mechanical
Marblers.
A transfer marble paper may now
be had, and from examples sent me the
process seems fairly workable. The
following is the method of working
sent by the importers of the paper:—
“Place the book in the press. The
book edge which is to be marbled has
to be rubbed with pure spirits of wine;
the dry strip of transfer marble is then to be put on
the edge. The white back or reverse side, whilst being
pressed hard against the book edge, is to be moistened
carefully with boiling water, by dabbing
a saturated sponge on it; this dabbing
process to be continued so long till the
colour will show through the white back—a
proof that it is loosened from the
paper. Then remove the white paper,
and let the edge dry slowly. When quite
dry burnish.”
Another invention is to marble the
edges by means of one or more rollers.
The top roller or rollers holds the colour,
which is distributed on the under rollers;
these, in turn, ink the edge on being
passed over it. The books are naturally
held in the press whilst this is being
done. |76|
From a book, the “School of Arts,” third edition, 1750,
which has a chapter on marbling, the following, with cut,
is taken:—
“When thus you have your colours and all things in
good order, then take a pencil, or the end of a feather,
and sprinkle or put first your red colour; then the blue,
yellow, green, etc. Begin your red from No. 1, and go
along your trough to No. 2, also the blue from No. 3, all
along to No. 4; the yellow and green put here and there
in the vacant places. Then with a bodkin or a small skewer
draw a sort of a serpentine figure through the colours,
beginning from No. 1 to No. 2; when this is done, then
take your comb and draw the same straight along from |77|
No. 1 to No. 2. If you have some turnings or snail work
on your paper, then with a bodkin give the colours what
turns you please. (See the plate.)
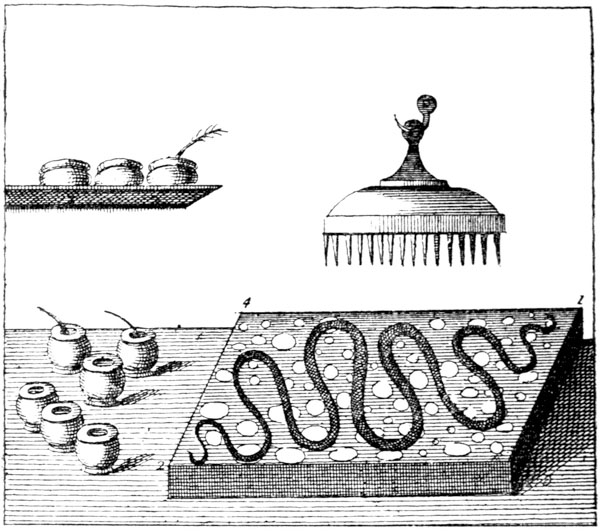
Cut from Book “School of Arts,” 1750.
“Thus far you are ready in order to lay on your paper,
which must be moistened the day before, in the same manner
as book-printers do their paper for printing; take a sheet at
a time, lay it gently upon your colours in the trough, press it
slightly with your finger down in such places where you
find the paper lies hollow; this done, take hold at one end
of the paper, and draw it up at the other end of the trough;
hang it up to dry on a cord; when dry, glaze it, and it is
done. You may also embellish your paper with streaks of
gold, by applying mussel gold or silver, tempered with
gum water, among the rest of the colours.”
This last paragraph shows that the gold vein which is
now in such demand is really over 150 years old.
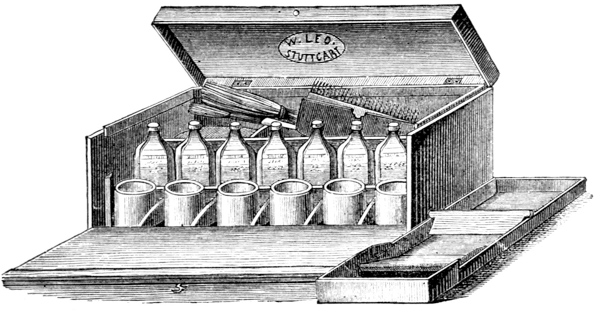
Leo’s Marbling Set.
Messrs. Leo, of Stuttgart, have put together a complete
marbling apparatus, containing colours, gall, cups, combs,
sticks, filter, brushes, etc., the whole in a box. To a small
country bookbinder this is indispensable.
CHAPTER XVII.
GILT
EDGES.
A gilt edge
is the most elegant of all modes of ornamenting
edges, and this branch of bookbinding has from time
to time been so greatly extended, that at the present day
there are many ways in which a book may have the edges
gilt; but some methods are not pursued, either from ignorance
on the binder’s part, or with a view to save expense.
First we have the “plain gilt,” then “gilt in the round”;
then again some colour under the gold, for instance, “gilt
on red,” or whatever the colour may be, red being mostly
used, especially for religious books. Some edges are
“tooled,” and some have a gilt edge with landscape or
scene appropriate to the book painted on the edge, only
to be seen when the book is opened. “Marbling under
gilt” may also be used with good effect; but still better
“marbling on gilt.”
The room where gilt edge work is done should be neither
dirty nor draughty, and the necessary materials are:—
1st. The Gold Cushion.—This may be purchased ready
for use, or if the binder wishes to make one, it may be
done by covering a piece of wood, about 12 inches by 6,
with a piece of white calf, the rough side outwards,
and padding it with blotting paper and cloth. The pieces
underneath should be cut a little smaller than the upper
one, so that it will form a bevel at the edge, but quite flat
on the top. The calf to be neatly nailed all round the
edge. If the pile of the leather is too rough, it can be
reduced with a piece of pumice stone, by rubbing the stone
on the calf with a circular motion. |79|
2nd. Gold Knife.—This should be a long knife of thin
steel, the blade about one to one and a half inch wide.
3rd. Burnishers.—These are made of agate stone, and can
be purchased of any size. A flat one, and two or three
round ones, will be found sufficient. They should have a
very high polish.
4th. Glaire Water or Size.—The white of an egg and a
tea-cup full of water are well beaten together, until the
albumen is perfectly dissolved. It must then be allowed
to stand for some hours to settle, after which it should be
strained through a piece of linen which has been washed;
old linen is therefore preferred to new.
5th. Scrapers.—Pieces of steel with the edge or burr
made to turn up by rubbing the edge flat over a bodkin or
other steel instrument, so that when applied to the edge a
thin shaving of paper is taken off. The beauty of gilding
depends greatly on proper and even scraping.
6th. The Gold Leaf.—This is bought in books, the price
according to quality; most of the cheap gold comes from
Germany. I recommend the use of the best gold that can
be had; it being in the end the cheapest, as cheap gold
turns black by the action of the atmosphere in course of
time.
The method of preparing the gold7
is by making an
alloy: gold with silver or copper. It is drawn out into a
wire of about six inches in length, and by being passed
again between steel rollers is made into a ribbon. This
ribbon is then cut into squares and placed between vellum
leaves, about four or five inches square, and beaten with a
hammer somewhat like our beating hammer, until the gold
has expanded to the size of the vellum. The gold is again
cut up into squares of about one inch, and again |80|
interleaved; but gold-beaters’ skin is now used instead of
vellum; and so by continual beating and cutting up, the
proper thickness is arrived at. If the gold is held up to
the light, it will be found to be beaten so thin that it is
nearly transparent, although when laid on any object it is
of sufficient thickness to hide the surface underneath. It
has been estimated that the thickness of the gold leaf is
only
1 ⁄ 280000
of an inch.
To gild the edges, the book should be put into the press
straight and on a level with the cheeks of the press between
cutting boards, the boards of the book being thrown back.
The press should be screwed up very tightly, and any projection
of the cutting boards should be taken away with a
chisel. If the paper is unsized or at all spongy, the edge
should be sized and left to dry. This may be ascertained
by wetting a leaf with the tongue: if spongy, the moisture
will sink through as in blotting paper. The edge should
be scraped quite flat and perfectly even, care being taken
to scrape every part equally, or one part of the edge will
be hollow or perhaps one side scraped down, and this will
make one square larger than the other. When scraped quite
smoothly and evenly, a mixture of black lead and thin glaire
water is painted over the edge, and with a hard brush it is
well brushed until dry.
The gold should now be cut on the gold cushion. Lift
a leaf out of the book with the gold knife, lay it on the
gold cushion, and breathe gently on the centre of the leaf to
lay it flat; it can then be cut with perfect ease to any size.
The edge is now to be glaired evenly, and the gold taken
up with a piece of paper previously greased by drawing it
over the head. The gold is then gently laid on the edge,
which has been previously glaired. The whole edge or end
being done, it is allowed to get perfectly dry, which will
occupy some two hours.
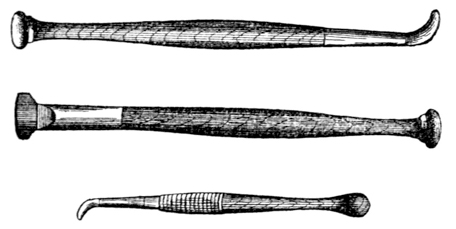
Book-edge Burnishers.
Before using the burnisher on the gold itself, some gilders |81|
lay a piece of fine paper on the gold and gently flatten it
with the burnisher. Books are often treated in this manner,
they then become “dull gilt.” When intended to be bright,
a waxed cloth should be gently rubbed over the surface two
or three times before using the burnisher. The beauty of
burnishing depends upon the edge presenting a solid and
uniform metallic surface, without any marks of the burnisher.
The manner of burnishing is to hold a flat burnisher, where
the surface is flat, firmly in the right hand with the end of
the handle on the shoulder, to get better leverage. Work
the burnisher backwards and forwards with a perfectly
even pressure on every part. When both ends are finished,
the foredge is to be proceeded with, by making it perfectly
flat. It is better to tie the book, to prevent it slipping
back. The foredge is to be gilt exactly in the same manner
as the ends; it will of course return to its proper round
when released from the press. This is done with all books
in the ordinary way, but if the book is to have an extra
edge, it is done “solid” or “in the round.” For this way the
book must be put into the press with its proper round,
without flattening it, and scraped in that position with
scrapers corresponding with the rounding. The greatest
care must be taken in this kind of scraping that the sides |82|
are not scraped away, or the squares will be made either
too large or lop-sided.
Gilt on Red.—The edges are coloured by fanning them
out as explained in colouring edges, and when dry, gilt in
the usual way; not quite such a strong size will be wanted,
through there being a ground in the colour; nor must any
black lead be used. The edges should in this process be
scraped first, then coloured and gilt in the usual way.
Tooled Edges.—The book is to be gilt as usual, then
while in the press stamped or worked over with tools that
are of some open character; those of fine work being
preferable. Some design should be followed out according
to the fancy of the workman. The tools must be warmed
slightly so that the impression may be firm; the foredge
should be done first. Another method is to tool the edge
before burnishing, or the different portions of the tooling
may be so managed in burnishing that some parts will be
left bright and standing in relief on the unburnished or
dead surface.
Painted Edges.—The edge is to fanned out and tied
between boards, and whilst in that position some landscape
or other scene, either taken from the book itself or appropriate
to the subject of it, painted on the foredge, and
when quite dry it is gilt on the flat in the usual manner.
This work of course requires an artist well skilled in
water-colour drawing. The colours used must be more
of a stain than body colour, and the edges should be scraped
first.
After the edges have been gilt by any of the foregoing
methods, the rounding must be examined and corrected;
and the book should be put into the standing press for two
or three hours, to set it. The whole of the edges should
be wrapped up with paper to keep them clean during
the remainder of the process of binding. This is called
“capping up.”
CHAPTER XVIII.
HEAD-BANDING.
Few
binders work their own head-bands in these times of
competition and strikes for higher wages. It takes some
time and pains to teach a female hand the perfection of head-band
working, and but too often, since gratitude is not
universal, the opportunity of earning a few more pence per
week is seized without regard to those at whose expense
the power of earning anything was gained, and the baffled
employer is wearied by constant changes. Owing to this,
most bookbinders use the machine-made head-band. These
can be purchased of any size or colour, at a moderate
price.
Head-banding done by hand is really only a twist of
different coloured cotton or silk round a piece of vellum or
cat-gut fastened to the back every half dozen sections. If
the head-band is to be square or straight, the vellum should
be made by sticking with paste two or three pieces together.
Damp the vellum previously and put it under a weight for
a few hours to get soft. Vellum from old ledgers and
other vellum bound books is mostly used. The vellum
when quite dry and flat is to be cut into strips just a little
under the width of the squares of the books, so that when
the book is covered, the amount of leather above the head-band
and the head-band itself will be just the size or height
of the square.
If, however, a round head-band is chosen, cat-gut is
taken on the same principle with regard to size, and this is
further advanced by using two pieces of cat-gut, the one |84|
being generally smaller than the other, and making with the
beading three rows. The round head-band is the original
head-band, and cord was used instead of cat-gut. The cords
were fastened to lay-cords on the sewing press, and placed
at head and tail, and the head-band was worked at the
same time that the book was sewn. I am now speaking of
books bound about the 15th century; and in pulling one of
these old bindings to pieces, it will compensate for the
time occupied and the trouble taken, if the book be examined
to see how the head-band was worked, and how the
head-band then formed the catch-up stitch; the head-band
cords were drawn in through the boards, and thus gave
greater strength to the book than the method used at the
present day. To explain how the head-band is worked is
rather a difficult task; yet the process is a very simple one.
The great difficulty is to get the silks to lie close together,
which they will not do if the twist or beading is not evenly
worked. This requires time and patience to accomplish.
The hands must be clean or the silk will get soiled; fingers
must be smooth or the silk will be frayed.
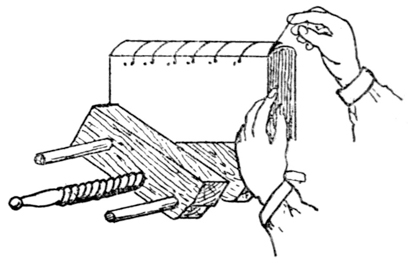
Head-banding.
Suppose, for instance, a book is to be done in two
colours, red and white. The head-band is cut to size, the |85|
book is, for convenience, held in a press, or a plough with
the knife taken out, so that the end to be head-banded is
raised to a convenient height. The ends of the silk or
cotton are to be joined together, and one, say the red,
threaded through a strong needle. This is then passed
through the back of the book, at about the centre of the
second section, commencing on the left of the book. This
must be passed through twice, and a loop left. The vellum
is put in this loop and the silk drawn tightly, the vellum
will then be held fast. The white is now to be twisted
round the red once, and round the head-band twice; the
red is now to be taken in hand and twisted round the
white once, and the head-band twice; and this is to be
done until the whole vellum is covered. The needle must
be passed through the back at about every eight sections
to secure the head-band. The beading is the effect of one
thread being twisted over the other, and the hand must be
kept exactly at the same tightness or tension, for if pulled
too tightly the beading will go underneath, or be irregular.
The fastening off is to be done by passing the needle
through the back twice, the white is then passed round
the red and under the vellum, and the ends are to be tied
together.
Three Colours Plain.—This is to be commenced in the
same way as with two, but great care must be taken that
the silks are worked in rotation so as not to mix or entangle
them. The silks must be kept in the left hand,
while the right twists the colour over or round, and as
each is twisted round the vellum it is passed to be twisted
round the other two. In fastening off, both colours must
be passed round under the vellum and fastened as with
the two colour pattern.
The head-bands may be worked intermixed with gold or
silver thread, or the one colour may be worked a number
of times round the vellum, before the second colour has |86|
been twisted, giving it the appearance of ribbons going
round the head-band.
With regard to stuck-on head-bands, the binder may
make them at little expense, by using striped calico for the
purpose. A narrow stripe is to be preferred of some bright
colour. The material must be cut into lengths of about
one-and-a-half inch wide, with the stripes across. Cords
of different thickness are then to be cut somewhat longer
than the calico, and a piece of the cord is to be fastened by
a nail at one end on a board of sufficient length. The
calico is then to be pasted and laid down on the board
under the cord, and the cord being held tightly may be
easily covered with the striped calico, and rubbed with a
folder into a groove.
When this is dry, the head and tail of the book is glued
and the proper piece of the head-band is put on. Or the
head-band may be purchased, as before stated, worked
with either silk or cotton ready for fastening on, from about
2s. 3d. to 4s. 6d. a piece of twelve yards,
according to the
size required: it has, however, the disadvantage of not
looking so even as a head-band worked on the book. I
have lately seen some specimens of as good imitations of
hand-worked ones as it is possible for machinery to manufacture.
After the head-band has been put on or worked, the
book is to be “lined up” or “made ready for covering.”
CHAPTER XIX.
PREPARING
FOR
COVERING.
Nearly all modern books are bound with hollow backs,
except where the books are sewn for flexible work or otherwise
meant to have tight backs.
Much of the paper used at the present day is so hard,
that the binder is almost forced to make a hollow back, in
order that the book may open.
The head-band is first set with glue, if worked, by
gluing the head and tail, and with a folder the head-band
is made to take the same form as the back. This is to be
done by holding the book in the left hand with its back
on the press, then a pointed folder held in the right hand
is run round the beading two or three times to form it;
the silk on the back is then rubbed down as much as
possible to make all level and even, and the book is allowed
to dry. When dry it is put into the lying press to hold it,
and the back is well glued all over; some paper, usually
brown, is now taken, the same length as the book, put on
the back, and rubbed down well with a thick folder: a
good sized bone from the ribs of beef is as good as anything.
The overplus of the paper is now to be cut away
from the back, except the part projecting head and tail.
A second coat of glue is now put on the top of the brown
paper and another piece is put on that, but not quite up to
the edge on the left hand side. When this is well rubbed
down it is folded evenly from the edge on the right side
over to the left, the small amount of glued space left will
be found sufficient to hold it down; the top is again glued
|88|
and again folded over from left to right, and cut off level
by folding it back and running a sharp knife down the
fold. This is what is generally termed “two on and two
off,” being of course two thicknesses of paper on the back
and two for the hollow; but thin or small books need only
have one on the back and two for the hollow. Thick or
large books should have more paper used in proportion to
their size. Books that have been over-cast in the sewing
should have rather a strong lining-up, so that there be not
such a strain when the book is opened. When the whole
is dry, the overplus of the paper, head and tail, is to be cut
off close to the head-band.
I need hardly say that the better the paper used the
more easy will be the working of it. Old writing or copy-book
paper will be found to be as good as any, but good
brown paper is, as I have said before, mostly used.
The book is now ready for putting the bands on. These
are prepared beforehand by sticking with glue two or three
pieces of leather together or on a piece of paper, well
pressing it, and then allowing it to dry under pressure. The
paper must then be glued twice, allowing each coat to dry
before gluing again. It should then be put on one side
for future use, and when wanted, the proper thickness is
chosen and cut into strips of a width to correspond with
the size of the book. The book is now to be marked up,
five bands being the number generally used, leaving the
tail a little longer than the other portions. The strips of
band are then to be moistened with a little hot water to
cause the glue upon the paper to melt. Each piece is then
to be fixed upon the back just under the holes made with
the compasses in marking-up. This will be found to be a
far better plan than to first cut the strips and then to glue
them. By the latter plan the glue is liable to spread upon
the side, where it is not wanted, and if the book has to be
covered with light calf, it will certainly be stained black: |89|
so the coverer must be careful that all glue is removed
from the back and sides before he attempts to cover any of
his books with calf. It is rather provoking to find some
favourite colour when dry, having a tortoiseshell appearance,
which no amount of washing will take out. When
dry the ends of the bands are to be cut off with a bevel,
and a little piece of the boards from the corners nearest
the back also taken off on the bevel, that there may not be
a sharp point to fret through the leather when the book is
opened. This is also necessary so that the head-band may
be properly set. A sharp knife should be inserted between
the hollow and should separate it from the back at head
and tail on each side so far as to allow the leather to be
turned in. Morocco may have the back glued, as it will
not show through, and will facilitate the adhesion of the
leather.
Flexible Work.—This class of work is not lined up. The
leather is fastened directly upon the book; the head-band is
set as before explained, and held tight by gluing a piece of
fine linen against it, and when quite dry, the overplus is to be
cut away, and the back made quite smooth. The bands are
then knocked up gently with a blunt chisel to make them
perfectly straight, being first damped and made soft with
a little paste to facilitate the working and to prevent the
thread from being cut. Any holes caused by sawing-in, in
previous binding, must be filled up with a piece of frayed
cord, pasted. Any holes thus filled up must be made quite
smooth when dry, as the least unevenness will show when
the book is covered.
In “throw up” backs, or in “flexible not to show,” a
piece of thin linen (muslin) or staff called mull is glued on
the back first, and one piece of paper on the top. For the
hollow, three, four, or even five pieces are stuck one on the
other, so that it may be firm; whilst the book itself will
be as if it had a flexible back. The bands, if any, are then |90|
to be fastened on, and the corners of the boards cut off. It
is then ready for covering. “Mock flexible” has generally
one piece of paper glued on the back, and when marked-up,
the bands are put on as before, and the book covered.
CHAPTER XX.
COVERING.
Books
are covered according to the fancy of the binder or
customer. The materials used at the present day, are—leather
of all sorts, parchment or vellum, bookbinder’s
cloth, velvet, needle-work, and imitation leather, of which
various kinds are manufactured, such as leatherette and
feltine.

French Paring Knife.
Each kind requires a different manner of working or
manipulation. For instance, a calf book must not be
covered in the same manner as a velvet one: I will take
each in the above order and explain how they are managed.
Under the class of leather, we have moroccos of all kinds;
russia; calf, coloured, smooth, and imitation; roan, sheep,
and imitation morocco.
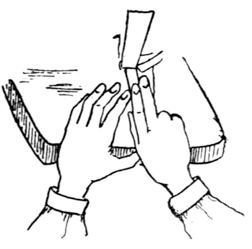
Method of Holding French Knife.

German Paring Knife.
The morocco cover, indeed any leather cover, is to be
cut out by laying the skin out on a flat board, and having
chosen the part or piece of
the skin to be used, the
book is laid on it and the
skin is cut with a sharp
knife round the book, leaving a space of about
3 ⁄ 4
of an inch
for an 8vo, and more or less according to the size of the
book and thickness of board for turning in. The morocco
|91|
cover should now have marked upon it with a pencil the
exact size of the book itself, by laying the book on the
cover, and running the point of a black lead pencil all
round it. The leather must then
be “pared,” or shaved round the
edges, using the pencil marks as
a guide. This paring process is
not so difficult, especially if a
French knife is used, such as
may now be purchased at most
material dealers. The chief point
being that a very sharp edge is
to be kept on the knife, and that
the burr is on the cutting edge.
The knife is to be held in the
right hand, placing two fingers on the top with the thumb
underneath. The leather must be placed on a piece of
marble, lithographic stone, or thick glass, and held tightly
strained between finger and thumb of the left hand. Then
by a series of pushes from the right hand, the knife takes
off more or less according to the angle given. The burr
causes the knife to enter
the leather; if the burr
is turned up the knife
will not cut but run off.
If the knife is held too much at an angle it will go right
through the leather, a rather unpleasant experience, and
one to be carefully avoided. The leather should from
time to time be examined, by turning it over, to see if any
unevenness appears, for every cut will show. Especial
attention should be given to where the edges of the board
go. The turning in at the head and tail should be pared
off as thin as possible, as there will be twice as much thickness
of leather on the back where turned in, the object of
this care being, that it must not be seen. The morocco
|92|
cover should now be wetted well, and grained up by using
either the hand or a flat piece of cork. This is to be done
by gently curling it up in all directions; and when the
grain has been brought up properly and sufficiently, the
leather should be pasted on the flesh side with thin paste,
and hung up to dry. Should the leather be “straight
grain,” it must only be creased in the one direction of
the grain, or if it is required to imitate any old book that
has no grain, the leather should be wetted as much as possible,
and the whole of the grain rubbed out by using a
rolling pin with even pressure.
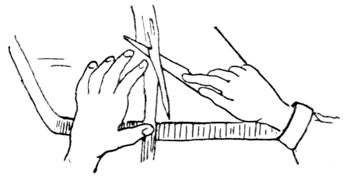
Method of Holding Ordinary Knife.
The Morocco leather first brought from that country, had
a peculiar grain, and was dyed with very bright colours.
It is now largely manufactured in London and Paris; the
French manufacture is the finest. Russia and calf require
no setting up of the grain, but russia should be well rolled
out with the rolling pin.
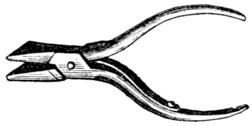
Band Nippers.
When the cover (morocco) is dry, it is to be well pasted,
the squares of the book set, so that each side has its proper
portion of board projecting. The book is then laid down
evenly on the cover, which must be gently drawn on;
the back is drawn tight by placing the book on its foredge
and drawing the skin well down over it. The sides
are next drawn tight, and the bands pinched well up with
a pair of band nippers. The four corners of the leather |93|
are cut off with a sharp knife in a slanting direction, a little
paste put on the cut edge, and the operation of turning in
may be commenced. The book must be held on its edge,
either head or tail, with a small
piece of paper put close to the
head-band to prevent any paste
soiling the edge or head-band,
and with the boards extended, the
hollow is pulled a little away from
the back and the leather neatly
tucked in. The leather is next to be tightly brought over
the boards and well rubbed down, both on the edge and
inside, with a folding stick, but on no account must the
outside be rubbed, or the grain will be taken away. The
foredge is to be treated in like manner, by tucking the
corners in for strength. The head-band is now to be
set, by tying a piece of thread round the book between
the back and the boards in the slots cut out from the
corners of the boards; this thread must be tied in a
knot. The book being held in the left hand, resting on its
end, the leather is drawn with a pointed folding-stick, as
it were, towards the foredge, and flattened on the top of
the head-band. When this is done properly it should be
exactly even with the boards, and yet cover the head-band,
leaving that part of the head-band at right angles with the
edge exposed. With a little practice the novice may be
able to ascertain what amount of leather is to be left out
from the turning-in, so that the head-band can be neatly
covered. The perfection in covering a book depends upon
the leather being worked sharp round the boards, but with
the grain almost untouched.
Paste should be always used for morocco, calf, russia and
vellum, in fact for all kinds of leather; but in my humble
opinion, all leather with an artificial grain should be glued;
the turning-in may be with paste. The glue gives more |94|
body to the leather, and thus preserves the grain. White
morocco should be covered with paste made without any
alum, which causes it to turn yellow, and if the leather is
washed with lemon juice instead of vinegar when finishing,
the colour will be much improved.
Russia is to be pared in the same way as morocco. It
should be damped, and rolled with a rolling-pin before
covering, or stretched out with a thick folding-stick.
Calf, either coloured or white, need be pared only round
the head-band. Calf should be covered with paste and the
book washed when covered with a clean damp sponge. In
putting two books together, when bound in calf of two different
colours, a piece of paper should be placed between, as
most colours stain each other, especially green. Care should
be taken to handle calf as little as possible whilst wet, and
touching it with iron tools, such as knives and band nippers,
will cause a black stain. Morocco will bear as much
handling as you like, but the more tenderly calf is treated
the better.
Vellum or Parchment.—The boards should be covered
with white paper, to avoid any darkness of the board showing
through. The vellum or parchment should be pared
head and tail, and the whole well pasted and allowed to
stand for a short time so that it be well soaked and soft.
The book should then be covered, but the vellum must not
on any account be stretched much, or it will, when dry,
draw the boards up to a most remarkable extent. It will
perhaps be better if the book be pressed, to make the vellum
adhere better. The old binders took great pains in
covering their white vellum books. The vellum was lined
carefully with white paper and dried before covering: this
in some degree prevented the vellum from shrinking so
much in drying, and enabled the workman to give the
boards a thin and even coat of glue, which was allowed to
dry before putting on the covering. |95|
Roan should be covered with glue and turned in with
paste. Head and tail only need be pared round the head-band.
Cloth is covered by gluing the cover all over and turning
in at once: gluing one cover at a time, and finishing
the covering of each book before touching the next.
Smooth cloth, cloth with no grain, may be covered with
paste: great care must be taken that no paste be on the
fingers, or the cloth will be marked very badly when
dry.
Velvet should be covered with clean glue not too thick;
first glue the back of the book and let that set before the
sides are put down. The sides of the book should next be
glued, and the velvet laid down, and turned in with glue.
The corners should be very carefully cut or they will not
meet, or cover properly when dry. When the whole is dry
the pile may be raised, should it be finger marked, by
holding the book over steam, and if necessary by carefully
using a brush.
Silk and Satin should be lined first with a piece of thin
paper cut to the size of the book. The paper must be glued
with thin clean glue, rubbed down well on to the silk, and
allowed to get dry, before covering the book. When dry,
cover it as with velvet.
Dr. Dibdin, whose knowledge of libraries and great
book collectors must stamp him as an authority, says
that:—
“The general appearance of one’s library is by no means
a matter of mere foppery or indifference: it is a sort of
cardinal point, to which the tasteful collector does well to
attend. You have a right to consider books, as to their
outsides, with the eye of a painter; because this does not
militate against the proper use of the
contents. . . . . Be
sparing of red morocco or vellum, they have each so |96|
distinct, or what painters call spotty, an appearance, that they
should be introduced but circumspectly.”
I cannot agree entirely with the Doctor with regard to
being sparing with the red morocco. A library without
colour is dark, dreary, and repulsive. The library should
be one of the most inviting and cheery rooms in a house,
and even if one cannot aspire to a room entirely devoted
to literature and study, let the bookcase, whatever its position
or however humble, be made as cheerful and inviting
as possible. What colour will do this so well as red? But
it should be judiciously dispersed with other colours.
If some standard colour were chosen for each subject,
one might recognize from some little distance the nature of
the book by its colour. For instance, all books relating to
Military matters might be in bright red; Naval affairs in
blue; Botany in green; History in dark red; Poetry in
some fancy colour, such as orange, light blue, light green,
or olive, according to its subject; Divinity in dark brown;
Archæology in dull red, and Law in white as at present.
This would give a pleasing variety, and a light and cheerful
appearance to a library.
An imitation russia leather is imported from America,
of far greater strength than the real. It is made from
buffalo skins, and tanned in the same way as the russia
hides. This fact, combined with the price, has doubtless
caused this material to be received with favour in the
English market. It is to be had from nearly all leather
sellers.
Half-bound Work.—The title speaks for itself, the book
has its back, a part of the sides, and the corners covered
with leather. The sides are, after the leather is perfectly
dry, covered either with cloth or paper according to fancy,
turned over the boards as with leather. The book is then
to be pasted down. Before the paper is put on the sides, |97|
all unevenness of the leather is to be pared away. This
style has gained its reputation very much on account of its
economy; the amount of leather required is less, and the
work is as strong and serviceable as in a whole-bound
book. It will be better if the back be finished before the
corners are put on, as there is great likelihood that the
corners may get damaged to some extent during the process
of finishing. The outside paper may either match
the colour of the leather, or be the same as the edge or
end papers. This, like many other rules in bookbinding, is
quite a matter of taste.
CHAPTER XXI.
PASTING
DOWN.
This
is to cover up the inside board by pasting down the
end papers to the boards.
The white or waste leaf, that has till this process protected
the end papers, must now be taken away or torn
out. The joint of the board must be cleaned of any paste
or glue that may have accumulated there during the course
of either gluing up or covering, by passing the point of a
sharp knife along it, so that when the end is pasted down,
the joint will be quite straight and perfectly square.
Morocco books should be filled in with a smooth board or
thick paper, the exact substance of the leather. This
thickness must be carefully chosen, and one edge be cut off
straight, and fastened to the inside of the board very slightly,
in fact only touching it in the centre with a little glue or
paste, just sufficient to hold it temporarily. It must be |98|
flush with the back-edge of the board. When dry, this
paper or board is to be marked with a compass about half
an inch round, and both paper and leather cut through at
the same cut with a sharp knife. The overplus board will
fall off and the outside of the leather may be easily detached
by lifting it up with a knife. The paper or board,
which will now fit in exactly, should be glued and well
rubbed down with a folding stick, or it may be pressed in
the standing press if the grain of the morocco is to be
polished, but not otherwise.
As morocco books only have morocco joints, I may as
well explain at once how they are made. Morocco of the
same colour is cut into strips the same length as the book,
and about one inch and a half in breadth for 8vo.; a line
is drawn or marked down each strip about half an inch
from one edge, either with a pencil or folder, as a guide.
The leather is now to be pared from the mark made to a
thin edge on the half inch side, and the other side pared
as thin as the leather turned in round the board, so that
there will be two distinct thicknesses on each piece, the
larger half going on the board to correspond with the
leather round the three sides, and the smaller and thinly
pared half going in the joint and edge on to the book.
The end papers, only held in with a little paste, are to be
lifted out from the book, and the leather well pasted is to be
put on the board, so that the place where the division is
made in the leather by paring will come exactly to the
edge of the board; the thin part should then be well
rubbed down in the joint, and the small thin feather edge
allowed to go on the book.
Great care must be taken to rub the whole down well,
that it may adhere properly; the grain need not be heeded.
With regard to the overplus at the head and tail, there
are two ways of disposing of it: first, by cutting both
leathers slanting through at once, and making the two |99|
meet; or, secondly, by cutting the cover away in a slant
and doing the same to the joint, so that the two slant cuts
cover each other exactly. This requires very nice paring,
or it will be seen in the finishing. The book should be
left till quite dry, which will take some five or six hours.
The boards are then to be filled in by the same method
as above described, and the end papers fastened in again
properly.
Cloth Joints.—If the cloth has been fastened in when the
ends were made, after cleaning all unevenness from the
joints, the boards are to be filled in as above, and the cloth
joint stuck down with thin glue, and rubbed down well.
The marble paper may now be put on the board by cutting
it to a size a little larger than the filling in of the board, so
that it may be well covered. When cloth joints are put
in, the board paper is generally brought up almost close to
the joint; but with morocco joints, the space left all round
should be even.
Calf, Russia, etc.—After having cleaned the joint, the
leather must be marked all round a trifle larger than the
size intended for the end papers to cover. Then with a
knife, the leather is cut through in a slanting direction by
holding the knife slanting. The boards should be thrown
back to protect the leather, and the book placed on a board
of proper size, so that both book and board may be moved
together, when turning round. When the leather is cut, a
piece of paper should be pasted on the board to fill up to the
thickness of the leather, and to curve or swing the board
back; the boards otherwise are sure to curve the contrary
way, especially with calf. When this lining is dry, the end
papers may be pasted down. As there are two methods of
doing this, I give the most exact but longest first. The
paper is to be pasted all over, and being held in the left
hand, is to be well rubbed down, particularly in the joint.
The paper is then marked all round—the head, foredge, |100|
and tail, with a pair of compasses to the width required for
finishing inside the board. With a very sharp knife the
paper is to be cut through to the depth of the paper only,
by laying the straight edge on the marks made by the compasses.
This has the advantage of procuring an exact
margin round the board, but it must be done quickly or
the paper will stick to the leather round the board from
the paste getting dry, the leather absorbing the watery
particles in the paste.
The other way is to lay the paper back, and down on the
board, and then to mark it. A tin is then to be placed
between the book and paper, and the paper cut to the marks
made. The paper is then pasted down as above. When
pasted down, the book should be left standing on its end,
with boards left open until thoroughly dry, which will be
about six hours. A tin should be kept especially for cutting
on, and the knife must be as sharp as possible. This latter
method is used for all half bindings.
CHAPTER XXII.
CALF
COLOURING.
Although
coloured calf-skins may be bought almost as
cheaply as smooth calf (the term given to uncoloured ones),
yet there are so many reasons why coloured calf should not
be used, that I give such instructions as will enable any
one to colour, sprinkle, and marble his own leather.
The skins may, however, be procured already sprinkled
or marbled at most leather shops. This plan of sprinkling
and marbling the whole skin is good enough for cheap or |101|
half-bound work, but for extra work it is far better to
sprinkle, marble, or otherwise colour the leather when on the
book. Hand-colouring is coming again into use, and by degrees
getting known more and more throughout the trade;
but a great many secrets in the art have been lost. Before
giving the names of the chemicals to be used, I must give
a general caution, that if any acid be used on the leather,
it is essential to wash as much as possible of it out with
water immediately after it has done its work, or after a few
months the surface of the leather will be found to be eaten
away and destroyed. It is a fault of some of our binders
at the present day, that if they use any chemical, either on
their leather or on their paper, they are not satisfied to use
their acid weak, and allow it to do its work slowly, and
when the proper moment has arrived stop its further action,
they frequently use the acids as strong as possible, and,
either to save time or through ignorance of their chemical
properties, do not wash out the residue. The consequence
is, the leather or the paper rots. In order to avoid this,
I will not recommend any chemicals that will destroy the
leather, but give instructions for harmless preparations, by
the use of which as great a variety of different styles may
be executed as will, I trust, satisfy any reasonable expectation.
Black.—Sulphate of iron or copperas is the chief ingredient
in colouring calf black. Used by itself, it gives a
greyish tint, but if a coat of salts of tartar or other alkali
be previously used it strikes immediately a rich purple
black. The name copperas is probably from the old and
mistaken idea that the crystals contain copper. They have
a pale greenish blue colour. It can be purchased at the
rate of one penny per pound from any drysalter.
1. Into a quart of boiling water, throw a
1 ⁄ 4-lb. of sulphate
of iron, let it re-boil, and stand to settle, and then bottle the
clear liquid for use. |102|
2. Boil a quart of vinegar with a quantity of old iron
nails or steel filings for a few minutes. Keep this in a
stone jar, and use the clear liquid. This can from time to
time be boiled again with fresh vinegar. An old iron pot
must be kept for boiling the black.
Brown.—1. Dissolve a
1 ⁄ 4-lb.
of salts of tartar in a quart
of boiling water, and bottle it for use.
This liquid is mostly used for colouring; it has a very
mellow tone, and is always used before the black when
a strong or deep colour is required. It is poisonous, and
must not be used too strong on the calf or it will corrode it.
2. For a plain brown dye, the green shells of walnuts
may be used. They should be broken as much as possible,
mixed with water, and allowed to ferment. This liquid
should then be strained and bottled for use. A pinch of
salt thrown in will help to keep it. This does not in any
way corrode the leather, and produces the best uniform tint.
Yellow.—1. Picric acid dissolved in water forms one of
the sharpest yellows. It is a pale yellow of an intense
bitter taste. It must not be mixed with any alkali in a dry
state, as it forms a very powerful explosive compound. It
is a dangerous chemical and should be carefully used. It
may be bottled for use.
2. Into a bottle put some turmeric powder, and mix
well with methylated spirit; the mixture must be shaken
occasionally for a few days until the whole of the colour is
extracted. This is a very warm yellow, and produces a
very good shade when used after salts of tartar.
For
all the following, a preparation or ground of paste-water
must be put on the calf, that the liquids may not
sink through too much. The calf must be paste-washed
all over equally, and allowed to get thoroughly dry. It
will then be ready for the various methods. Perhaps to
wash it over night and let it stand till next morning will |103|
be the best and surest plan. It matters very little whether
the calf is on the book or in the skin.
Sprinkles.—There are so many sprinkles, that it would
be useless for me to enumerate a number, they are all
worked in the same manner, by throwing the colour on
finely or coarsely, as it may be wanted light or dark.
Presuming that the paste or ground-wash be thoroughly
dry, take liquid salts of tartar and dilute with cold water,
one part salts to two of water, in a basin; wash the calf
with this liquid evenly, using a soft sponge. The calf will
require the wash to be applied two or three times, until a
proper and uniform tint be obtained. Each successive
wash must be allowed to get thoroughly dry before the
next be applied.
The next process will be to sprinkle the book, with the
boards extended or open. Two pieces of flat wood, about
three feet long, four inches in width, and half an inch thick,
will be found very useful for supporting the book. These
rods must be supported at each end, so that the book may
be suspended between them, with the boards resting on
the rods nearly horizontally. Now put into a round pan
some of the copperas fluid, and into another some of the
solution of salts of tartar. Use a pretty large brush for
each pan, which brush must be kept each for its own fluid.
The sprinkling may be commenced. The brushes being
well soaked in the fluids, should be well beaten out, using
a piece of broomstick or a hand pin to beat on before
beating over the book, unless a coarse sprinkle is desired.
Whilst beating over the book, the hands should be held up
high, and also moved about, so that a fine and equal spray
may be distributed; and this should be continued until the
desired depth of colour is attained.
This may be varied by putting some geometrical design,
cut out of thin mill-board, on the cover; or if the book is
on any special subject, the subject itself put on the cover |104|
will have a very pretty effect, and may be made emblematical.
A fern or other leaf for botanical work as an
instance. The sprinkle must in these cases be very fine
and dark for the better effect. The leaf or design being
lifted from the cover when the sprinkle is dry, will leave
the ground dark sprinkle with a light brown leaf or design.
Cambridge calf is done in this way by cutting a square
panel of mill-board out and laying it on the sides. The
square on the cover may be left brown or may be dabbed
with a sponge.
Marbles.—As the success of marbling depends upon the
quickness with which it is executed, it is important that the
colours, sponges, brushes and water, should be previously
disposed in order and at hand, so that any of them can
be taken up instantly. Another point to which attention
must be directed is the amount of colour to be thrown on,
and consequently the amount that each brush should
contain. If too much colour (black) is thrown on, the
result will be an invisible marble, or, as I once heard it
expressed by a workman, “it could not be seen on account
of the fog;” if too little, no matter how nicely the marble
is formed, it will be weak and feeble.
Marbling on leather is produced by small drops of colouring
liquids, drawn, by the flowing of water down an inclined
plane, into veins and spread into fantastic forms
resembling foliage—hence, often called tree-marble. It is
a process that requires great dexterity of hand and perfect
coolness and decision, as the least hurry or want of judgment
will ruin the most elaborate preparation.
To prepare the book paste-wash it evenly all over, and
to further equalize the paste-water, pass the palm of the
hand over the board after washing it. When dry, wash
over with a solution of salts of tartar two or three times to
get the desired tint. When dry, glaire the whole as even
as possible, and to diminish the froth that the sponge may |105|
occasion, put a few drops of milk into the glaire. Again
allow it to dry thoroughly. Put some fresh copperas into
a pan, and some solution of salts of tartar into another,
and soak each brush in its liquid. Place the book upon
the rods, the boards extending over and the book hanging
between. Should it be desired to let the marble run from
back to foredge the back must be elevated a little, and the
rods supporting the boards must be level from end to end.
If the marble is to run from head to tail, elevate the ends
of the rods nearest to the head of the book. The elevation
must be very slight or the water will run off too quickly.
Place a pail of water close at hand, in it a sponge to
wash off; and a bunch of birch to throw the water with.
A little soda should be added to soften the water. Charge
each brush well, and knock out the superfluous colour until
a fine spray comes from it. A little oil rubbed in the palm
of the hand, and the brush well rubbed into it, will greatly
assist the flow of colour from the brush, and also prevent
the black colour from frothing. Throw some water over
the cover in blotches with the birch, just sufficient to make
them unite and flow downwards together. Now sprinkle
some black by beating the black brush on a press pin, as
evenly and as finely as possible. When sufficient has been
thrown on, beat the brown in like manner over the extended
boards. When the veins are well struck into the
leather, sponge the whole well with clean water. Have no
fear in doing this as it will not wash off. Then set the book
up to dry.
Tree-marbles.—The cover is to be prepared and sprinkled
in the same manner as stated in marbling; the boards,
however, must be bent a little, and a little water applied
by a sponge in the centre of each board to give the necessary
flow of water; when the water is thrown on, it will
flow towards the centre or lowest part of the boards, and
when the sprinkle is thrown on, a tree, as it were, will be |106|
formed. The centre being white forms the stem, and from
it branches will be formed by the gradual flow of the
streams of water as they run down.
For marbling, every thing must be ready at hand before
any water is thrown on, so that the water may not have
time to run off before the colour is applied. The water
must run at the same time that the spray is falling, or a
failure will be the result.
It has been said that marbling was discovered by an
accident; that a country bookbinder was sprinkling some
books, when a bird, which was hung up in the shop, threw
or splashed some water down on his books; the water
running, took some of the colour with it and formed veins.
Liking the form it gave, the workman improved upon it
and thus invented marbling. There is, however, no doubt
that it had its origin in Germany.
Tree calf seems to be coming into general use again,
and to meet the demand for cheapness, a wood block has
been cut resembling as closely as possible one done by the
water process, and blocked in black on the calf; but, as
might have been expected, it has not found much favour.
Dabs.—This is a process with a sponge, charged with
the black or the brown liquid, dabbed on the calf either all
over the cover or in successive order. Give the proper
preparation to the calf, and be very careful that the ground
tint of brown be very even. Take a sponge of an open
nature, so that the grain is pleasant to the eye; fill it with
black and squeeze out again, now dab it carefully over the
calf. Repeat the operation with another sponge charged
with brown. Cat’s paw, French dab, and other various
named operations all emanate from the sponge. When
done properly this has a very good effect, and gives great
relief to the eye when placed with a number of other
books.
All these marbles and sprinkles require practice, so that |107|
a first failure must not be regarded with discouragement.
When one’s hand has got into the method with these two
or three colours it is astonishing how many different styles
may be produced. In all this manipulation a better effect
is obtained if a yellow tint be washed over the leather
after the sprinkle or marble has been produced. Again, by
taking coloured calf and treating it in the same manner as
white, some very pleasant effects are brought out; and
when the colours are well chosen the result is very good.
Take for instance a green calf and marble a tree upon it,
or take a light slate colour and dab it all over with black
and brown.
In all operations with the copperas care must be taken
that it does not get on the clothes, as it leaves an iron
stain that cannot be easily got rid of. Keep a bason for
each colour, and when done with wash it out with clean
water. The same with the sponges: keep them as clean
as possible; have a sponge for each colour, and use it only
for that colour. A piece of glass to put the sponges on
will be of great use, and prevent the work-table or board
from catching any of the colour. A damp book or damp
paper laid on a board that has been so stained will most
probably be damaged, even though it has waste paper
between the work-board and book. No amount of washing
will ever take away such a stain.
When the book has been coloured, the edges and inside
are to be blacked or browned according to taste, or in
keeping with the outside. The book is then ready for
finishing.
Some very good results may be obtained if the binder,
using coloured calf of a light brown, treats it as if it were
white calf, marbling with the usual colours; or a yellow
calf, splashing it all over with salts of tartar only, the
boards being placed in a slanting direction to allow the
colour to gently run down.
|108|
Or the whole of a cover may be blacked with tartar and
copperas, then with a diluted solution of acid it may be
sprinkled, this will give grey-white spots on black or slate
ground: if, after washing, the cover be sponged over with
some colouring liquid, such as analine dyes, the spots will
be of the colour used.
I do not
give many methods or receipts for producing
colours for calf, because, as before stated, the introduction
of fancy calf has rendered obsolete the old-fashioned way
of boiling and preparing the different woods for making
colours, and the above will be found useful for colouring
calf in many different ways.
PART II.
FINISHING.
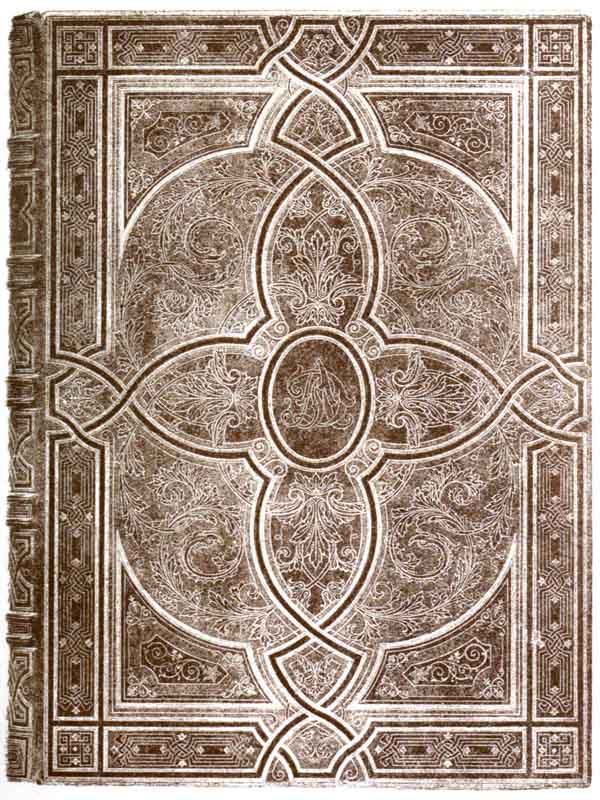
RENAISSANCE.
Roy folio.
T. Way, Photo-Lith.
CHAPTER XXIII.
FINISHING.
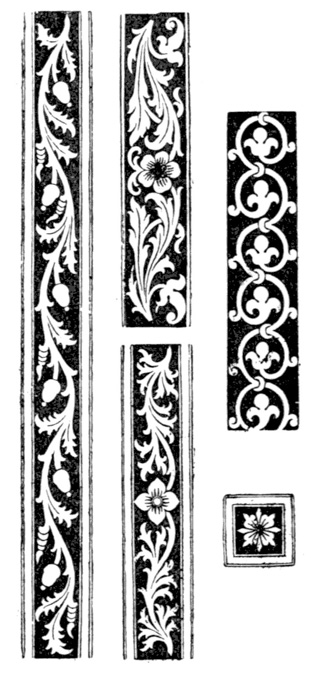
Monastic Tools.
Finishing is the art of embellishing the covers of books
with different designs. Finishing comprises the embellishment
of the covers either with blind work, gold, silver
or platina leaf, or with metal ornaments fastened through
the boards, or by only a lettering on the back of the book.
The art of finishing does not comprise any embellishment
done with the “blocking press.” Therein the art is more
that of the block or tool cutter, who, working in concert
with the artist who drew the design, cuts the metal accordingly.
The binder’s use of these blocks is mechanical
only.
The monks who cultivated all the arts, and enriched
their Hours and their Missals with marvellous
miniatures,
gave great zeal to the occupation of binding. So charmingly
were the bindings ornamented with tools and small
blocks reproduced from the text, that we must regret
that so few of these monastic bindings are now left to us.
A great number of these books were executed in Germany, where
this mode of decoration remained a long time in use; and we find
that other countries borrowed from the printer this primitive
mode of decoration. As the art progressed the binder’s mark was
impressed on the cover as an ornament, or as a distinction,
such as we find at the present day at the end or after the title of
books to denote by what printer the work was executed. Later on, when
the Renaissance shone in all its glory and beauty, we find that it
freed itself from this limited practice. A new mode |112| of decoration came into use, which we may
well study, even at the present day; a style at once rich and varied.
If we follow the bold interlacing lines which form the skeletons of
those infinite and varied designs, we catch the imaginative caprices of
their authors; and the details of their transformation gives us a guide
to the different schools and art of their time. The execution of these
linear designs is extremely difficult. It can be easily seen that they
have not been done by a block engraved in one piece, but with small
segments.8 The
art of putting together these small pieces, so as to form one complete
and artistic pattern, is the skill of the finisher. Many books are
now finished by means of the blocking press; but on close examination,
these imitations may be readily distinguished. A blocked cover never
has the life and spirit that a hand-finished one has. Of blocking I
must speak in subsequent pages.
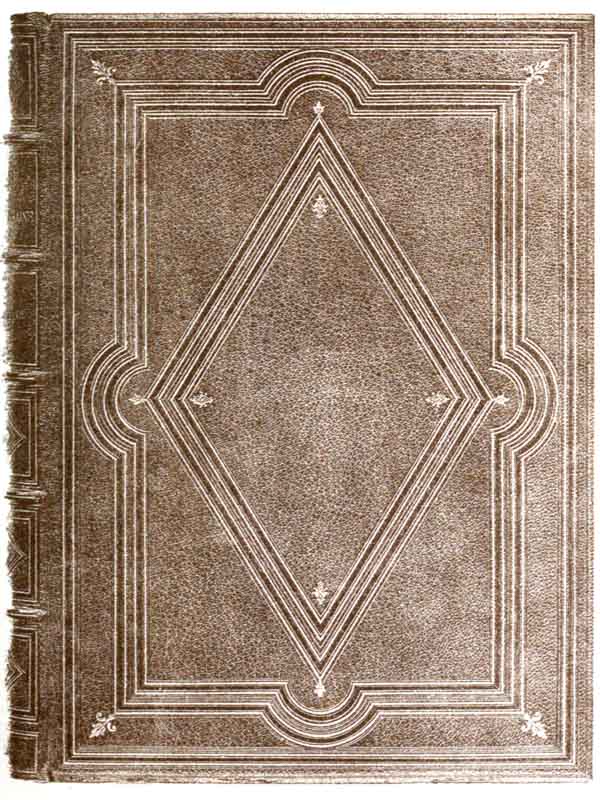
ANTIQUE WITH GOLD LINE.
Imperial 8vo.
T. Way, Photo Lith.
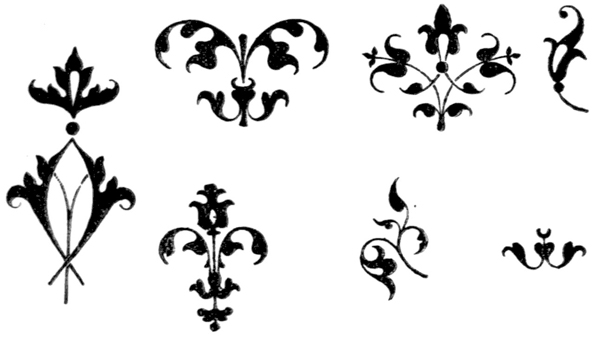
Venetian.
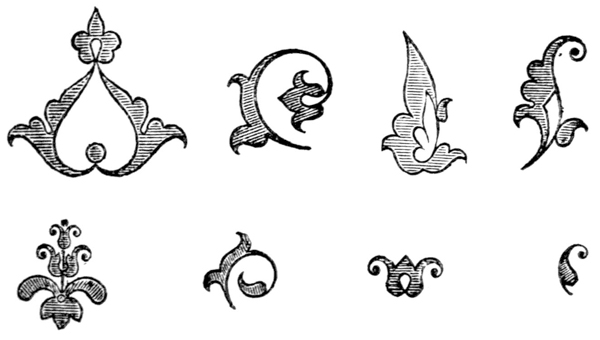
Grolier.
These intrinsic designs were very much used by the
|113|
binders contemporary with Grolier, and the use of lined or
azuré tools are a distinctive mark of the period. This is
the connecting link with the Italian bindings. It will be
observed that the Italian or Venetian tools are solid,
while in the other style the tools, although of the same
shape, are lined or azuré. A little later on other artists,
not satisfied with this modification, dispensed with the |114|
fine cross lines, and retained their outlines only. France,
during the reign of Henry II., left Italy far behind, and
executed those grand compositions of Diane bindings.
They are marvellous subjects, and are sometimes imitated
at the present day, but are never surpassed in their wonderful
originality.
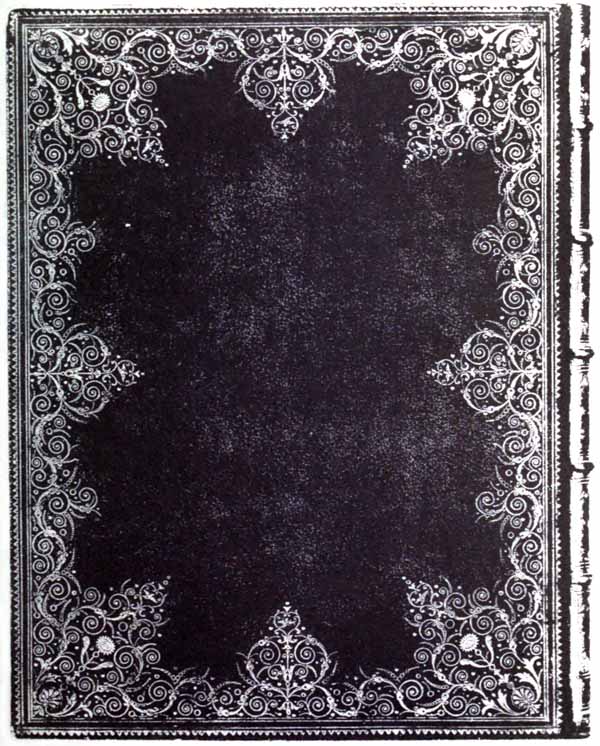
DEROME.
4to
T. Way, Photo-lith.
Le Gascon.
After these masterpieces we find the curious bindings of
Henry III., which instantly mark a distinct transformation.
The interlacings are less bold and free, but more geometrically
traced. The absence of filling in with small tools
gives a coldness, which is increased by a heavy coat of
arms on the sides. This form of decoration exercised a
great influence, and from this epoch another school sprung
up. Later on in time these interlacings served as a ground
plan only for the brilliant fantasies of Le Gascon, a master
who no doubt has had the least number of imitators.
Although he followed and to a certain extent kept the
shapes, the aspect of his bindings was very much changed
by the application of pointed tools. Le Gascon rests for
ever as the most renowned master of the 16th century.
The number of tools necessary for the execution of a
composition like one of Le Gascon’s is large; and when one
considers that these tools are repeated, perhaps a thousand |115|
times on each side of the book, a fair idea may be formed
of the magnitude of such a work. I am of opinion that
Le Gascon brought bookbinding to its highest point of
richness and finish. His drawings are always pure and
correct; his squares, lozenges, triangles, and ovals are so
brought together as to form a series of compartments interlacing
the one within the other, with an incomparable
boldness and perfect harmony; above all, one must remark
with what richness the compartments are filled. There is
no doubt the ground work of the style was Grolier, but he
never filled his panels with such richness or with such taste
as that displayed by Le Gascon. The difficulty of adapting
such designs to the different sizes of books has no doubt
deterred the various masters from imitating such works,
so that we see less of Le Gascon’s style than of any other
ancient master.
Derome.
From Le Gascon’s period the tools became thicker and
thicker, until we have the heavy tools of Derome, which are
much in keeping for books of a serious character. They
are original in shape, but their employment was only in
borders, leaving the centre of the book free from ornament. |116|
I do not pretend to give a history of the various masters,
but rather a practical description of the art of bookbinding.
Much has already been written about the various works
executed by these grand old masters; my endeavour has
been to show, that whilst the various masters of the art of
bookbinding worked with tools but little altered from
their original forms, they so modified and changed them
in their character and use, as to form a distinctive mark
of style for each artist, by which his work may be recognized.
A pamphlet, published in Paris, 1878, says: “One of
the branches of artistic industry in which France possesses
unquestionable superiority is certainly bookbinding; the
International Exhibitions, and still more the sales of
private or other collections, have each day given evident
proof of this. Italy, which initiated herself so perfectly in
the Renaissance style, and Holland, once her rival in the
17th century, have long ceased to produce any work worthy
of remark; everywhere books are being bound, but the
‘art’ of bookbinding is practised only in France.”
I cannot agree with its authors that one must go to
France now to have a book bound properly. The method
of bookbinding is quite differently managed and worked
there than it is here. I have witnessed both methods, and
prefer the English one as being more substantial.
HAND-FINISHING.—We were first taught to work the gold
leaf on books by a method not now employed, except,
perhaps, by a novice, who wishes to get his books done
before his glaire has dried. This method was to damp
the cover well with water, either with a wet sponge or by
other means. The gold leaf was then laid on, and the tool
worked rather warm on the gold. Through the heat or
steam generated the gold was burnt in, and the overplus
washed off with a damp sponge or rag, the gold being left
only in the impressions. If, however, any block or centre |117|
was used, it was impressed with heat upon the side in a
small lying press in use at the period. This press was
known then as an arming press, because used commonly
for impressing armorial bearings and monograms on the
sides. The term arming press is still used for the lighter
kinds of blocking presses.
Hand-finishing, as before stated, is really an art. The
finisher should be able to draw, or at least have some
knowledge of composition, and also know something about
the harmony of colours. The workman not having any
knowledge of drawing cannot expect to be a good finisher;
because he cannot possibly produce any good designs, or by
a combination of the small tools form a perfect and correct
pattern. Taste has no small influence in the success of
the workman in this branch of the art. It is better to
finish books plainly, rather than put on the least portion
of gold more than is necessary. If the intentions of the
books’ owner is to put some special style or design into
his bookcase, it will be well to think over the various
styles before deciding upon any particular one. Before
going thoroughly into the working details a few preliminary
words may be permitted.
Let the tools be always in keeping with the book, both
in size and character. Large ones should be used only on
a large book, and those of less size for smaller works. A
book on Natural History should have a bird, insect, shell,
or other tool indicative of the contents. A flower should
be used on works on Botany, and all other works be treated
in the same emblematical manner; so that the nature of
the book may be understood by a glance at the back. In
lettering, see that the letters are of a size proportionate to
the book—legible, but not too bold. They should neither
be so large as to prevent the whole of the title being read
at one view, nor so small as to present a difficulty in
ascertaining the subject of a book when on the shelf. |118|
Amongst a large number of books there should be an agreeable
variety of styles, so that the effect may be in harmony
with the colours around, and produce as pleasing a contrast
as possible.

Fillet.
Tools and Materials required for Finishing.—Rolls, fillets,
pallets, centre and corner tools of every possible class and
character; type of various sizes for the lettering of books
or labels. The type may be either of brass or of the usual
printer’s metal; if the latter be chosen, care must be taken
that it be not left at the fire too long, or it will melt. Type-holders
to hold the type, which are made to fit the respective
sizes are necessary, but one or two with a spring side, adjusted
by screw at the side, will be found convenient for any
sized type. In England it is the custom to letter books
with hand letters, each letter being separate and fixed in a
handle. I have, however, little doubt that these will in
time be laid aside, and that the type and type case will be
found in every bookbinder’s shop.
Polishing irons. Of these two are necessary—one for the
sides and one for the backs. There is generally a third |119|
kept for polishing the board end papers when pasted down,
which should be kept for this purpose only.

Polishing Iron.
A gold-rag, to wipe off the surplus gold from the back or
side of a book. It should have a little oil well worked into
it, so that when it has been wiped over the back or side the
gold may adhere and remain in it. This rag when full of
gold will be of a dirty yellow, and may then be melted
down by any of the gold-refiners and the waste gold
recovered.
India-rubber, cut up very small—the smaller the better—and
steeped in turpentine, so as to render it as soft as
possible, to be used for clearing away any gold not taken
off by the gold-rag. This should also be melted down
when full.9
Gold-cushion, for use as explained in Chapter XVII.
Gold leaf. The best should be used, it keeps its colour
better, and is much more easy to work than the commoner
metal usually sold.
Sponges, both large and small—the large ones for paste-washing,
the smaller for glairing and sizing.
Glaire may be purchased already prepared, or it may be
made from the white of egg, which must be very carefully
beaten up to a froth with an egg whisk. In breaking the
egg care must be taken not to let any of the yolk get
amongst the white. A little vinegar should be mixed with
the white before beating up, and a drop of ammonia, or a
grain or two of common table salt, or a small piece of camphor,
will in some measure prevent it from turning putrid, |120|
as it is liable to do. Some workmen always have a stock
of “good old glaire,” as they term it, by them, fancying
that it produces better work, but this is a mistaken notion,
often productive of annoyance, and destructive to the comfort
of the workmen. I advise the finisher to beat his glaire
from an egg as he may require it. When well beaten,
allow it to stand for some hours, and then pour the clear
liquid into a bottle for use. I have had some dried albumen
sent me, but its working has not given me such satisfaction
as that freshly prepared; it may answer the purpose
in other hands, but with me the gold appears to have been
burnt in.
Cotton wool, for taking up the gold leaf and pressing it
firmly on the leather.
Varnish should always be used on that part where glaire
has been applied, after it has been polished; the
object being to retain the brilliancy, and to preserve the
leather from the ravages of flies and other insects which
are attracted by the glaire; these pests do great damage
to the covers of books which have been prepared with glaire,
by eating it off. They also take away the surface of
the leather and spoil the good appearance
of the books. Varnish may be
purchased at all prices: use only the
best, and be very sparing with it.
A small pair of spring dividers, some
lard, sweet oil, and lastly, but most important,
the finishing stove. Before gas
was introduced the finishing stove in
use was the now almost extinct charcoal
fire. A bookbinder’s gas stove can
now be purchased at almost any gas-fitter’s
shop or bookbinders’ material
dealers. The price varies according to size.
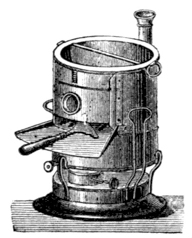
Leo’s Oil Finishing Stove.
A stove burning paraffin oil may now be had from Leo of |121|
Stuttgart, which he guarantees smokeless and free from soot;
where gas is not obtainable, this will be found very handy.
Many still prefer the charcoal fire. To such a stove a pipe
should be fixed to conduct the fumes away into the
open air or up a chimney. To make such a stove any old
tin may be utilized. Make a number of large holes through
the sides; fill it with some live charcoal, and place a perforated
tin plate on the top. It will keep alight for hours,
and impart quite enough heat for any purpose required.
This primitive stove, however, must be placed on a stand
or on a piece of thick iron, lest it become dangerous.
A finishing press is a small press, having two sides of
solid wood with wooden screws at each end, the cheeks
should be of width enough to allow the sides of a book to
be finished comfortably when the boards are extended, the
book itself being held by the press which is screwed up
tightly. The press should, however, be light enough to
enable the finisher to easily turn it round, as it frequently
must be, while finishing a book.
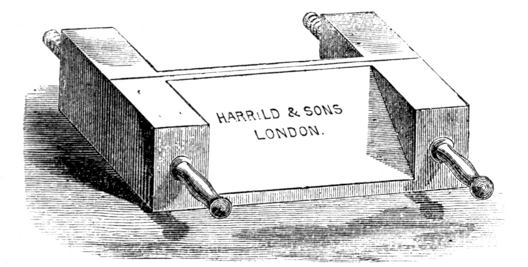
Finishing Press. The reverse side is quite flat, used
when sides of books are being finished.
Mr. Leo has a press (patented) which he claims gives
more freedom for finishing a book, but with it one can only
finish the back of a book; there are, however, many good
points that our English makers may well study. |122|
Finishing is divided into two classes—blind or antique,
or, as it is sometimes called, monastic and
gold-finished.
The term antique is mostly known in the trade; and
when morocco antique or calf antique is mentioned, it means
that the whole of the finishing is to be done in blind tooling.
Not only this, but that the boards should be very thick and
bevelled, and the edges either dull gilt or red, or gilt over
red. This class of work is used extensively for religious
books. A gold line introduced
and intermixed
with blind work
gives a great relief to
any class of antique
work.
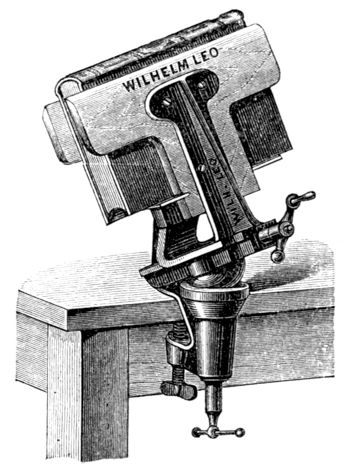
Leo’s Finishing Press.
It is not necessary that a special set of tools be kept for antique
work, although some would look quite out of keeping if worked in gold.
As a general rule antique tools are bold and solid, such as Venetian
tools, whilst those for gold work are cut finer and are well shaded.
The greater number work equally well in gold and in blind, but when a
special style has to be followed the various tools and their adaptation
to that style must be studied.
The general colour of the blind work is dark brown, and
the proper way of working these antique tools is to take
them warm and work them on the damp leather a number
of times, thus singeing or burning as it were the surface
only, until it has assumed its proper degree of colour. |123|
Antique work, as a decoration, requires quite as much
dexterity and care as gold work. Every line must be
straight, and the tools must be worked properly on the
leather, both in colour and depth; and as the tools have to
be worked many times on the same spot, it requires a very
steady hand and great care not to double them. Some
consider blind work as preparatory to gold work, and that
it gives experience in the method of handling and working
the various tools, and the degree of heat required for different
leathers without burning them through. The leather
on which this work is mostly executed is morocco and calf.
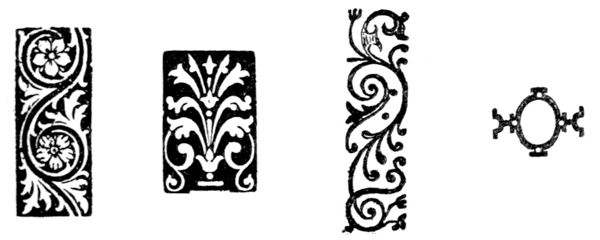
Antique Stamps.
In finishing the back of a book it must always be held
tightly in the “finishing press.” When in the press, mark
the head and tail as a guide for the pallets by running
a folding-stick along the edge of a piece of parchment
or vellum held by the finger and thumb of the
left hand against the sides of the volume across the back
at the proper place. When two or more books of the
same character and size are to range together, the backs
must be compassed up so that the lines head and tail may
run continuous when finished. In using the pallet, hold it
firmly in the right hand, and let the working motion proceed
from the wrist only, as if it were a pivot. It will be |124|
found rather difficult at first to work the pallets straight
over the back and even to the sides of the bands, but after
a little practice it will become easy to accomplish.
Morocco. Flexible work, as a rule, has blind lines, a
broad and a narrow one, worked close to the bands. Damp
the back with a sponge and clean water, and work the
moisture evenly into the leather with a hard clean brush.
Take a pallet of a size suitable to the book, warm it over
the stove, and work it firmly over the back. As the leather
dries, make the pallet hotter; this will generally be found
sufficient to produce the required dark lines. Sometimes it
will be necessary to damp the different places two or three
times in order to get the proper colour in the blind tooling.
The tools may have a tendency to stick to the leather
and possibly burn it. To obviate this, take 1 1 ⁄ 4 oz. of white
wax and 1 oz. of deer fat or lard, place them in a pipkin
over a fire or in a warm place, so that they may be well
mixed together; when mixed allow them to cool. Rub some
of this mixture upon the rough or fleshy side of a piece of
waste morocco, and when working any tools in blind, rub
them occasionally over the prepared surface. This mixture
will be found of great service in getting the tools to slip or
come away from the leather in working. Lard alone is
sometimes used, but this mixture will be found of greater
service to any finisher, and the advantage of adding the
wax will be apparent.
The lines impressed on the back must now have their
gloss given to them. This is done by giggering the pallets
over them. Make the pallet rather hot, rub it over the
greased piece of leather, and work it backwards and forwards
in the impression previously made. Great care must be
taken that the pallet be kept steadily in the impressions
already made, or they will be doubled. The back is now
ready for lettering. This will be found further on, classed
under gold work. |125|
To blind tool the side of a book it must be marked with
a folder and straight edge, according to the pattern to be
produced, and as a guide for the rolls and tools to be used.
These lines form the ground plan for any design that has
to be worked. Damp the whole of the side with a sponge,
and brush it as before directed; then work the fillets along
the lines marked. Run them over the same line two or
three times. When dry, make the fillet immovable by
driving a wooden wedge between the roll and fork, and
gigger it backwards and forwards to produce the gloss. If
tools are to be worked, make them slightly warm, and as
the leather dries make the tool hotter and hotter. This
must be repeated as often as is necessary, until the desired
depth of colour and gloss is obtained. In using a roll that
has a running or continuous pattern, a mark should be
made upon the side with a file, at the exact point that first
comes in contact with the leather, so that the same flower,
scroll, or other design, may always fall in the same place
in the repeated workings. It is impossible for a roll to be
cut so exactly that it may be worked from any point in the
circumference without doubling the design. All blind work
is done in the same manner, whether in using a small or a
large tool, viz., the leather must be damped and repeatedly
worked until the depth of colour is obtained. It is then
allowed to dry, and re-worked to produce the gloss. The
beauty of blind work consists in making the whole of the
finishing of one uniform colour, in other words, avoiding
the fault of having any portion of the work of lighter
tint than the rest.
Gold Work
is far more complicated than blind or antique
work, so that it will be better if one practises upon
some spare pieces of roan, calf, or morocco before one
attempts to finish a book. Gold work is not more difficult
than blind tooling, it is only more complicated. The |126|
different kinds of leather require such different degrees of
heat, that what would fail to make the gold adhere upon
one leather would burn through another. The various
colours each require their different degrees of heat; as a
rule, light fancy colours require less heat than dark ones.
The finisher has not only to contend with these difficulties,
but he must also become an adept in handling the gold
leaf and in using the proper medium by which the gold is
made to adhere to the leather. This medium is used in
two ways—wet and dry. The wet is used for leather, the
dry for velvet, satin, silk, and paper.
The wet medium is again divided into two classes, one
for non-porous and another for porous leather. Morocco
is the principal of the non-porous leathers, with roan
and all other imitation morocco.
The porous varieties consist of calf of all kinds, russia,
and sheep.
The non-porous leathers need only be washed with thin
paste-water or vinegar, and glaired once; but if the glaire be
thin or weak it will be necessary to give them a second coat.
The porous varieties must be paste-washed carefully,
sized all over very evenly, and glaired once or twice; care
being taken that the size and glaire be laid on as evenly as
possible.
All this, although apparently so simple, must be well kept
in mind, because the great difficulty that apprentices
have to contend with is, that they do not know the proper
medium for the various leathers, and one book may be
prepared too much, while another may have a deficiency,
and as a consequence, one book will be spoilt by the preparation
cracking, and the gold not adhere to the other.
By following the directions here given the finisher will
find that his gold will adhere without much trouble,
beyond the practice necessary in becoming accustomed to
an accurate use of the various tools. |127|
Suppose that a half morocco book is before us to be
neatly finished and lettered. Take a broad and narrow
pallet of a suitable and proper size, and work it against the
bands in blind as a guide for finishing in gold. As the
impression need be but very slight, warm the pallet on the
gas stove but very little. Choose some suitable tool as a
centre piece to go between the bands. Work this also
lightly on the back exactly in the centre of each panel.
This must be worked as truly as possible and perfectly
straight. A line made previously with a folding-stick
along the centre of the back will greatly assist in the
working of a tool in its proper position. Now wash the
back with vinegar, and brush it well with a hard brush to
disperse the moisture and drive it equally into the leather;
some use paste-water for this purpose instead of vinegar.
Paste-water has a tendency to turn grey in the course of
time, and this is avoided in using vinegar; vinegar also imparts
freshness to the morocco, and keeps it moist a longer
time, which is very desirable when finishing morocco.
The impressions made by the broad and narrow pallet
and the centre tool are now to be pencilled in with glaire;
when dry, pencil in another coat; allow this again to dry,
then rub them very slightly with a piece of oiled cotton
wool. Take a leaf of gold from the book and spread it out
evenly on the gold cushion; cut it as nearly to the various
shapes and sizes of the tools as possible. Now take up one of
the pieces of gold upon a large pad of cotton wool, previously
greased slightly by drawing it over the head. (There is
always a sufficient amount of natural grease in the hair to
cause the gold to adhere to the cotton when so treated.)
Lay the gold gently but firmly on the impressed leather. See
that the whole of the impression is covered, and that the gold
is not broken. Should it be necessary to put on another
piece of gold leaf, gently breathing on the first will make
the second adhere. When all the impressions are covered |128|
with gold leaf, take one of the tools heated to such a degree
that when a drop of water is applied it does not hiss but
dries instantly; work it exactly in the blind impressions.
Repeat this to the whole of the impressions, and wipe the
overplus of gold off with the gold rag. The impressions
are now supposed to be worked properly in gold; but if
there are any parts where the gold does not adhere, they
must be re-glaired and worked in again. A saucer should
be placed near at hand, with water and a piece of rag or a
sponge in it, to cool any tool and reduce it to its proper
heat before using. If the tool be used too hot, the gold
impression will be dull; if too cold, the gold will not
adhere. To use all tools of the exact degree of heat
required is one of the experiences of the skilled workman.
The back is now ready for the title. Set up the proper
words in a type-case, of a type sufficiently large and suitable
to the book. The chief word of the title should be in
somewhat larger size than the rest, the others diminishing,
so that a pleasant arrangement of form be attained. In
order to adjust the length of the words, it may be necessary
to space some of them—that is, to put between each
letter a small piece of metal called a space. Square the
type, or make the face of the letters perfectly level, by
pressing the face of them against a flat surface before
tightening the screw. They must be exactly level one
with another, or in the working some of them will be
invisible. Screw up the type-case, warm it over the finishing
stove, and work the letters carefully in blind as a
guide. Damp the whole of the lettering space with
vinegar. When dry, pencil the impressions in twice with
glaire. Then lay the gold on and work them in gold.
But with lead type and a spring type-case (a method
more suitable for some binders on account of its relative
cheapness and the convenience of the case fitting itself to
the different sizes of the type, of which the binder will want
|129|
a selection of various sizes), the type-case must be warmed
before the type is put in. The heat of the case should impart
sufficient heat for the type to be worked properly. If the
case and type be put on the stove, the type will probably be
melted if not watched very narrowly. Hand letters are
letters fixed in handles, each used as a single tool. The
letters should be arranged in alphabetical order round the
finishing stove, and as each letter is wanted it is taken
from the order, worked, and replaced. They are still very
much used in England, but where two or more books are
to have the same lettering, brass type is very much better.
It does its work more uniformly than hand letters, however
skillfully used.
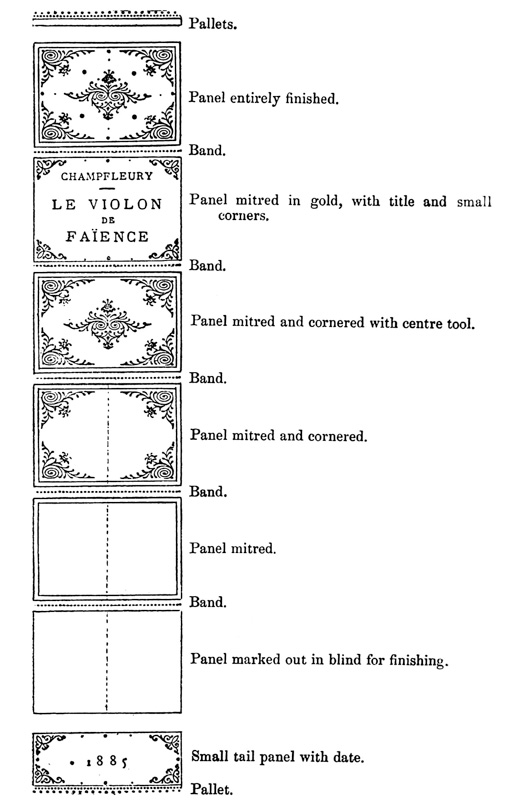
Showing progressive Stages of
Finishing.
Cut showing the use
of Mitrepiece.
When this simple finishing can be executed properly
and with ease, a more difficult task of finishing may be
attempted, such as a full gilt back. This is done in two
ways, a “run-up” back and a “mitred” back. As a
general rule morocco is always mitred. Place the book on
its side, lift up the mill-board, and make a mark head and
tail on the back, a little away from the hinge of the back.
Then with a folder and straight edge mark the whole length
of the back: this is to be done on both sides. Make another
line the whole length down the exact centre of the back.
With a pair of dividers take the measurement of the spaces
between the bands, and mark the size, head and tail, for the
panels from the top and bottom band; with a folder and
strip of parchment make a line across the back, head and
tail, at the mark made by the dividers. Work a thin broad
and narrow pallet alongside the bands in blind. Prepare
the whole of the back with vinegar and glaire, as above described,
but lay the glaire on with a sponge. When dry,
lay the gold on, covering the whole of the back with it,
mending any breaks. For mitreing, take a two-line pallet
that has the ends cut at an angle of 45°, so that the joint
at that angle may be perfect. Work this on the side at the |131|
mark made up the back, and up to the line made in blind
across the back. Repeat this to each panel. The two-line
pallet must be worked across the back and up to the
lines made in gold; the cutting of the pallet at the angle
will allow of the union or mitre, so that each panel is
independent of the other. There will be a space left, head
and tail, which may be filled up with any fancy pallet or
repetition of tools. The corners should be in keeping with
the centre, and large enough to fit the
panel. Work these from the sides of the
square made, or from the centre of the
panel, as will be found most convenient,
according to the thickness of the book
and style of finishing, and then fill in
any small stops. When the whole is
done, rub the gold off with the gold-rag,
and use the india-rubber if necessary.
The title has now to be put on, which is done in the
same manner as before described.
It is not always necessary that the finishing be done in
blind first. I have explained it, and advocate its being so
worked first as easier for a learner. One who is accustomed
to finishing finds that a few lines marked previously
with a folding-stick is all that is required. When working
the title, a thread of silk drawn tightly across the gold
produces a line sufficient, and is the only guide that an
experienced workman requires.
To finish a side, make a mark with the folder and straight
edge as a guide for any rolls or fillets. Prepare the leather
as before described where the ornamentation is to come;
but if the pattern is elaborate it must be worked first in
blind. As a greater facility, take a piece of paper of good
quality and well sized. Draw the pattern you wish to
produce on the paper, and if any tools are to be used, hold
them over the flame of gas; this will smoke them so that |132|
they may be worked on the paper in black. When the
pattern is complete in every detail, tip the four corners of
the paper with a little paste, then work the pattern through
the paper on to the leather, using the various sized gouges
as the scrolls require, and a single line fillet where there
are lines. Work thus the complete pattern in blind. This
being done completely, take the paper off from the four
corners, place it on the other side, and work it in the same
way. Prepare the leather with vinegar, and pencil out
with glaire the whole of the pattern. If the whole side be
glaired with a sponge it will leave a glossy appearance that
is very undesirable. The whole of the side is now to be
laid on with gold, and the pattern worked again with the
warm tools, in the previous or blind impressions.
The inside of a book is generally finished before the outside.
This should be done as neatly as possible, carefully
mitreing the corners when any lines are used. Most frequently
a roll is used, thus saving a great deal of time. A
style was introduced in France called “doublé,” the inside
of the board being covered with a coloured morocco different
to the outside, instead of having board papers. This inside
leather was very elaborately finished; generally with a
“dentelle” border, while the outside had only a line or two
in blind. It is a style which, although very good in itself,
is not now in great request, many prefer to have the finishing
outside rather than to have it covered up and not seen when
the book is shut.
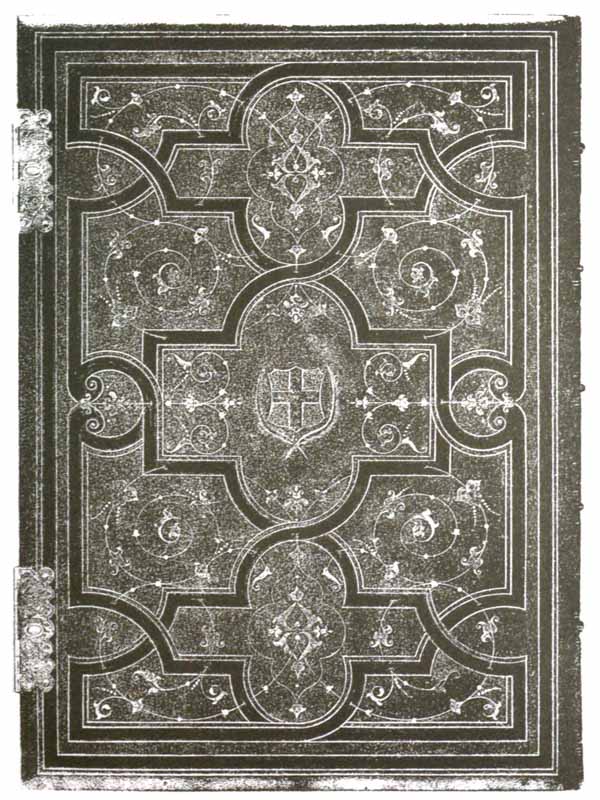
The edges of the boards and the headbands must be
finished either in gold or blind, according to fancy, but in
keeping with the rest of the embellishment. A fine line
worked on the centre of the edge of the board by means of
a fillet looks better, and of course requires more pains than
simply running a roll over it. If it is to be in gold, simply
glairing the edge is sufficient. Lay on the gold and work
the fillet carefully. Place the book on its ends in the |133|
finishing press to keep it steady, or it will shake and throw
the fillet off. If a roll is used, take the gold up on the roll,
but grease it first a little, by rubbing the gold rag over the
edge to make the gold adhere. Then run the roll along the
edge of the boards: the roll generally used for this purpose
is called a bar roll—that is, one having a series of lines
running at right angles with the edge of the roll.
Imitation morocco is generally used for publishers’ bindings,
where books are in large numbers and small in price,
and the finishing is all done with the blocking press: To
finish this leather by hand, it is advisable to wash it with
paste-water and glaire twice.
Roan is generally used for circulating library work, and
is very seldom finished with more than a few lines and the
title across the back. This leather is prepared with paste-wash
and glaire, and, when complete, varnished over the
whole surface.
Inlaid Work.—Inlaid, or mosaic work, is used only in the
higher branches of bookbinding. Formerly books were
not inlaid, but painted with various colours. Grolier used
a great deal of black, white, and green. Mr. Tuckett, the
late binder to the British Museum, took out a patent for
extracting one colour from leather and substituting another
by chemical action. This method, however, was in use
and known long before he turned his attention to the subject,
although he improved greatly upon the old practice.
As the patent has long expired, it may not be out of place
to give an extract from the specification: “Take dark
chocolate colour, and after the design has been traced
thereon, it is then to be picked out or pencilled in with
suitable chemicals, say diluted nitric acid; this will change
the chocolate, leaving the design a bright red on a chocolate
ground.” But to lay on the various colours with leather is,
no doubt, by far the better plan. Paint has a tendency in
time to crack, and, if acids are used, they will, to a certain |134|
extent, rot or destroy the leather; but if leather is used it
will always retain both colour and texture. To choose the
proper colours that will harmonize with the ground, give
tone, and produce a pleasing effect, requires a certain
amount of study. Morocco is the leather generally used,
but in Vienna calf has been used with very good results.
If the pattern to be inlaid be very small, steel punches of
the exact shape of the tools are used to punch or cut out
the patterns required. To do this, work the pattern in
blind on the side of the book; take morocco of a different
colour to the ground it is required to decorate, and pare it
down as thin as possible. Lay it on a slab of lead. Lead
is better than anything else on account of its softness; the
marks made by the punch can always be beaten out again,
and when quite used up it may be re-melted and run out
anew. Now take the steel punch of an exact facsimile of
the tool used that is to be inlaid, and punch out from the
leather the required number. These are to be pasted and
laid very carefully on the exact spot made by the blind-tooling;
press each down well into the leather, either with
a folding-stick or the fingers, so that it adheres properly.
When dry, the book should be pressed between polished
plates, in order that the pieces that have been laid on,
may be pressed well into the ground leather. When it has
been pressed, the whole of the leather must be prepared as
for morocco, and finished in gold. The tools in the working
will hide all the edges of the various inlaid pieces,
provided they are laid on exactly.
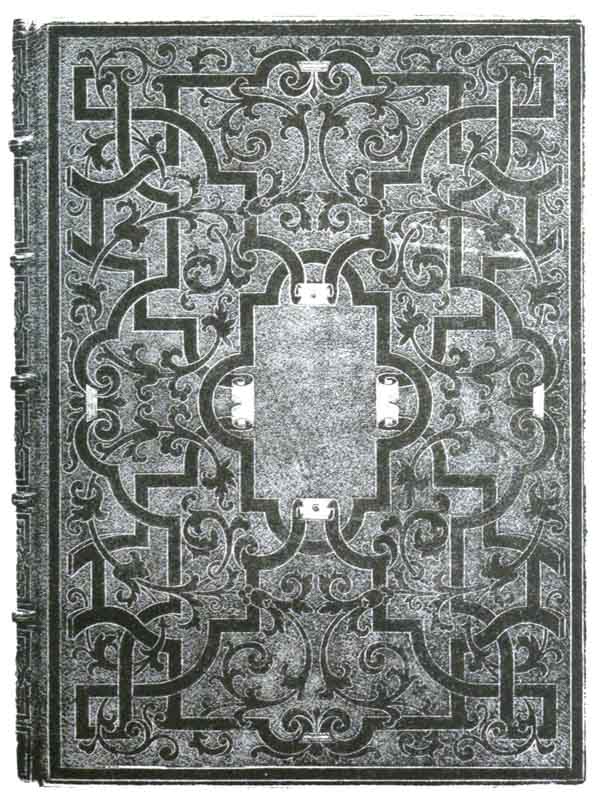
MAIOLI.
Royal folio.
T. Way, Photo Lith.
If interlacing bands are to be of various colours, the
bands must be cut out. Pare the leather thin, and after
working the pattern through the paper on to the sides of
the book, lay it on the thinly pared leather; with a very
sharp and pointed knife cut through the paper and leather
together on a soft board. Or the design may be worked
or drawn on a thin board, and the various bands cut out |135|
of the board as patterns. Lay these on the thin leather
and cut round them. Keep these board templates for any
future use of the same patterns. The various pieces are
to be well pasted, carefully adjusted in their places, and
well rubbed down. The leather is then to be prepared
and worked off in gold.
Another method is to work the pattern in blind on the
sides. Pare the morocco thin, and while damp place it upon
the portion of the pattern to be inlaid, and press it well
with the fingers, so that the design is impressed into it.
Lay the leather carefully on some soft board, and cut round
the lines made visible by the pressure with a very sharp
knife. When cut out, paste and lay them on the book and
prepare as before, and finish in gold. I do not recommend
this last method as being of much value; I give it only
because it is sometimes chosen; but for any good work,
where accuracy is required, either of the plans mentioned
previously are to be preferred.
The Viennese work their calf in quite a different manner,
in fact, in the same way that the cabinet-makers inlay their
woodwork. With a very sharp and thin knife they cut
right through two leathers laid the one on the other. The
bottom one is then lifted out and replaced by the top one.
By this method the one fits exactly into the other, so that,
if properly done, the junctions are so neatly made that no
finishing is required to cover the line where the two colours
meet.
The frontispiece to this treatise is a copy of a book bound
by my father for one of the Exhibitions. The ground is of
red morocco, inlaid with green, brown, and black morocco.
The pattern may be called “Renaissance.” The inside of
the boards are “Grolier,” inlaid as elaborately as the
outside. Seven months’ labour was expended on the outside
decoration of this volume.
Porous.—Calf, as before described, requires more and |136|
different preparation than morocco, on account of its soft
and absorbing nature. As a foundation or groundwork,
paste of different degrees of strength is used, according to
the various work required.
Calf books have generally a morocco lettering piece of a
different colour to the calf on the back for the title. This
is, however, optional, and may or may not be used, according
to taste. Leather lettering pieces have a great tendency
to peel off, especially if the book be exposed to a hot atmosphere,
or if the paste has been badly made, so that it is
perhaps better if the calf itself be lettered. There is no
doubt that a better effect is produced in a bookcase when
a good assortment of coloured lettering pieces are placed
on the variously coloured backs, and the titles can be more
easily read than if they were upon light or sprinkled calf;
but where wear and tear have to be studied, as in public
libraries, a volume should not have any lettering pieces.
All such books should be lettered on their natural ground.
For lettering pieces, take morocco10
of any colour, according
to fancy, and having wetted it to facilitate the work,
pare it down as thin and as evenly as possible. Cut it to
size of the panel or space it is intended to fit. When cut
truly, pare the edges all round, paste it well, put it on the
place and rub well down. Should the book require two
pieces—or one for the title, and one for the volume or
contents—it is better to vary the colours. I must caution
the workman not to allow the leather to come over on to the
joint, as by the frequent opening or moving of the boards
the edge of the leather will become loose. A very good
plan as a substitute for lettering pieces is to colour the
calf either dark brown or black, thus saving the leather at
the expense of a little more time. When the lettering
|137|
pieces are dry, mark the back, head and tail, for the pallets
or other tools with a folding-stick. Apply with a brush
paste all over the back. With a thick folding-stick, or
with the handle of an old tooth brush, which is better, rub
the paste into the back. Before it has time to dry, take
the overplus off with rather a hard sponge, dipped in thin
paste-water. The learner will perhaps wonder why paste of
full strength should be used for the back, and only paste-water
for the sides. The reason is, that through the
stretching of the leather over the back in covering, the
pores are more open, and consequently require more filling
up to make a firm ground. Much depends upon the
groundwork being properly applied; and a general caution
with regard to the working in general may not be here
amiss. Finishing, above all other departments, demands
perfect cleanliness. A book may have the most graceful
designs, the tools be worked perfectly and clearly, but be
spoiled by having a dirty appearance. See that everything
is clean—paste-water, size, glaire, sponges, and brushes.
Do not lay any gold on until the preparation be perfectly
dry, or the gold will adhere and cause a dirty yellow stain
where wiped off.
Should the calf book be intended to have only a pallet
alongside the bands, it is only necessary, when the paste-wash
is quite dry, to glaire that portion which is to be gilt:
this is usually done with a camel’s hair brush, by laying
on two coats. When dry, cut the gold into strips, and take
one up on the pallet and work it on the calf. This is
what is termed calf neat. The band on each side is gilt,
leaving the rest of the leather in its natural state. Some
binders polish their backs instead of leaving them dead or
dull. This, however, is entirely according to taste, whether
so large a space be left polished only.
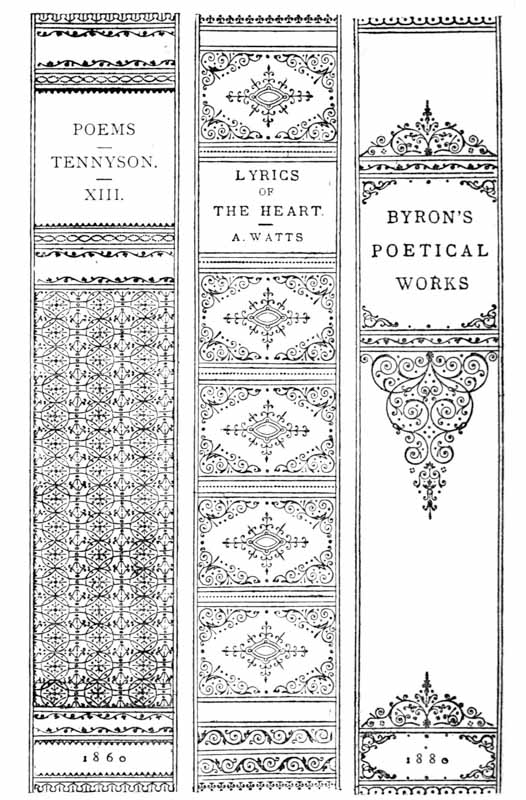
Samples of Backs suitable for Calf Work.
Full Gilt Back.—Run-up. Make a mark up the back on
both sides a little away from the joint with a folder and |139|
straight edge. Put on lettering piece. When dry, paste
and paste-wash the back. When again dry, take some of
Young’s patent size, melt it in a pipkin with a little water
and apply it with a sponge. Lay this on very evenly with
a very soft sponge, and be particular that it is perfectly
clean, so that no stains be left. When the size is done
with, put it on one side for future use. This size should
not be taken its full strength, and when warmed again
some more water should be added to make up for evaporation.
When the coat of size has dried, apply two coats of
glaire. The first must be dry before the second is applied,
and great care must be taken that the sponge is not passed
over the same place twice, or the previous preparation
will be taken off. It is now ready for finishing. Cut the
gold to proper size; rub a little lard over the whole of the
back with a little cotton wool. This requires great attention.
Very little must be put on light or green calf, as
these colours are stained very readily. Take the gold up
on a cotton pad; lay it carefully down on the back; breathe
on the gold, and press down again. If there be any places
where the gold is broken, they must be mended. Now take
a two-line fillet; heat it so that it hisses when placed in
the cooling pan or the saucer with the wet rag in it, and
run it the whole length of the back on the line made before
paste-washing. Do this on both sides, and rub the gold
off with the gold-rag up to the line on the outside. Take
a two-line pallet, and work it on each side of the bands.
Work the morocco lettering piece last, as it requires less
heat. The centre piece of each panel must now be worked.
Impress the tools firmly but quickly. The corner tools next;
work them from the centre or sides, using the right hand
corners as a guide, and judging the distance by the left
ones. The press must be turned when it is required to bring
the left side to the right hand in working the corners. The
requisite pallets may now be worked to finish the book |140|
head and tail. As a rule these are worked when the two-line
pallet is imprinted.
Calf requires very quick working. The tools should not
be held over the various places too long, or the heat will
destroy the adherent properties of the albumen. With
morocco time does not signify so much, as the heat used is
not so great.
Mitred back must be prepared the same way as for “run-up
back,” and the mitreing is to be done as explained in
working morocco. As before stated, this is superior work
and requires more skill; takes longer, but looks much
better: each panel should be an exact facsimile of the rest.
If the tools do not occupy precisely similar places in each
panel, the result will be very unsatisfactory, and an evidence
of a want of skill. When the backs are finished,
rub the gold off with the gold-rag, and clear off any residue
with the india-rubber. Be very careful that every
particle of the surplus gold be cleaned off, or the delicate
lines of the ornaments will be obscure and ragged in
appearance.
The book is now ready for lettering. Set the type up in
the case, and work it carefully in a perfectly straight line
over the back. The whole of the back is now to be polished
with the polishing iron, which must be perfectly clean and
bright before it is used. Prepare a board from an old calf
binding, by rubbing some fine emery or charcoal and lard
over the leather side of it. By rubbing the iron over this
prepared surface it will acquire a bright polish. It must
be used over the back by holding it lightly, and giving it an
oblong circular motion. Go over every portion of the back
with very even pressure, so that no part may be made more
glossy than another. The polishing iron should be used
rather warmer than the tools. If the iron be too hot the
glaire will turn white; if too cold the polish will be dull.
The grease upon the leather will be quite sufficient to make |141|
the polisher glide easily over the surface, but the operation
must be rapidly and evenly done. All light and green calf
require less heat than any other kinds. These will turn
black if the iron be in the least degree too hot.
It is in finishing the sides that the workman can show
his good taste and skill. The sides should be always in
keeping with the back; or, more strictly speaking, the
back should be in keeping with the sides. Before the sides
can be finished, the inside of the boards must occupy our
attention. With a “run-up” back, the edge of the leather
round the end papers is to be worked either in blind or
have a roll round it in gold. In any case it should be
paste-washed. If for blind, the roll is to be heated and
worked round it; if for gold, it must be glaired twice.
The gold, cut into strips, is to be taken up on the roll
and worked, and the overplus taken off with the gold-rag
as before directed. Extra work, such as mitred work,
should have some lines, or other neat design impressed.
Paste-wash the leather, and when dry glaire twice. When
again dry lay on the gold all round, and work the roll
or other fillets, or such other tool that may be in keeping
with the exterior work. When the gold has been wiped
off, the leather should be polished with the polishing
iron.
The outside must now be finished. Are the sides to be
polished, or left plain? If they are not to be polished,
paste-wash the whole of the side up to the edge of the back
carefully, then glaire only that portion which is to be gilt.
Generally a two-line fillet only is used round the edge, so
that the width of the fillet or roll must determine the width
to be glaired. When glaired twice and dry, take up the
gold on the fillet or roll and work it evenly and straightly
round the edge. The corners where the lines meet are next
to be stopped by working a small rosette or small star on
them. Clean off any gold that may be on the side, and |142|
work a small dotted or pin-head roll at the edge of the
glaire. This will cover and conceal the edge.
Extra calf books generally have the sides polished.
Paste-wash the sides all over, and when dry size them.
Hold the book, if small, in the left hand, if large, lay it
on the press and work the sponge over the side in a circular
direction, so that the size may be laid on as evenly
as possible. Be very careful that it does not froth; should
it do so, squeeze the sponge out as dry as possible, and fill
it anew with fresh size. Some workmen work the sponge
up and down the book, but if this be not done very evenly it
produces streaks. The finisher will find he can lay a more
even coating on by using the sponge in a circular direction.
Allow this to dry by leaving the book with boards
extended. When perfectly dry glaire once. This will be
found sufficient, as the size gives body to the glaire.
When sizeing and glairing, be assured that the book be
laid down with the boards extended on a level surface;
if the book be not level, the size or glaire will run down
to the lowest portion of the surface, and become unequally
distributed. The gold is now to be laid on the respective
places, either broad or narrow, according to the nature of
the finishing or width of the rolls. As a general rule, the
sides of the better class of calf books have nothing more
than a three-line round the edge and mitred in the corners.
This is, however, quite a matter of taste. Some have a
border of fancy rolls, but never any elaborate pattern as
in morocco work. To finish the sides, place the book in
the finishing press with the boards extended, so that they
may rest on the press. This will afford greater facility
for working the fillets, rolls, and tools necessary to complete
the design on each side. The finishing press being a small
one, can be easily turned round as each edge of the
border is finished.
To polish the sides, place the book on its side on some |143|
soft surface, such as a board covered with baize, and kept
for the purpose. Use the large and heavy polishing iron,
hot and clean. Rub or work the iron quickly and firmly
over the sides, first from the groove towards the foredge,
and then in a contrary direction, from the tail to the head,
by turning the volume. The oil or grease applied to the
cover previous to laying on the gold will be sufficient to
allow the polisher to glide easily over the surface. Polishing
has also the effect of smoothing down the burr formed
on the leather by the gilding tools, and bringing the impressions
slightly to the surface. The iron must be held very
evenly, so that the centre of the iron may be the working
portion. If held sideways the edge of the iron will indent
the leather. The heat must be sufficient to give a polish.
It must be remembered that if the iron is too hot it will
cause the glaire to turn white. The temperature must be
well tested before it be applied to the cover. A practised
finisher can generally tell the proper heat on holding the
iron at some little distance from his face, by the heat
radiated from the iron. Calf books should be pressed,
whether polished or not.
Pressing.—Plates of japanned tin or polished horn are
proper for this purpose. Put pressing tins between the
book and the mill-boards: the tins must be up to the joint.
Now place one of the japanned plates on the side level with
the groove; turn book and japanned plate over carefully
together, so that neither shifts; place another of the
polished plates on the top of the book, thus placing the
book between two polished surfaces. Put the book into the
standing press, and screw down tightly. Leave in for some
hours. When pressed sufficiently, take the book out, and if
the sides be polished, varnish them.
Make a little pad of cotton wool, saturate the lower
portion with varnish; rub it on a piece of waste paper to
equalize the varnish, then work the pad over the side as |144|
quickly as possible in a circular direction. Renew the
wool with varnish for the other side. Enough must be
taken on the pad to varnish the whole side, or the delay
caused by renewing the varnish on the cotton will cause a
streaked surface. When the varnish is perfectly dry—a
few minutes will suffice—the book must be again pressed.
To do this, rub the gold-rag, which is greased, over the
sides, this will prevent the sides from sticking to the
polished plates. Place the book between the plates as
before, leaving out the pressing tins, and place in the
standing press. Only little pressure must now be given;
if the press be screwed down too tightly the plates will
stick to the book. The varnish must be of good quality,
and perfectly dry, or the result will be the same. Half
an hour in the press will be found quite long enough.
Should the plates stick, there is no other remedy than
washing off the varnish with spirits of wine, and the glaire
and size with warm water, and carefully re-preparing the
surface as before. This is, however, an accident that
cannot happen if due care and judgment be exercised.
Graining.—Graining is now used very much on calf
books. It may be properly considered as a blind ornament.
It is done by means of wooden, or, better still,
copper plates cut out in various patterns, so as to form
small squares, scales of fish, or an imitation of morocco.
Place the volume between two of these plates, level to
the groove of the back, in the standing press; screw
down tightly. The pressure should be equal over the
whole surface. Nothing looks worse than a bold impression
in one place and a slight one in another, so that it is
rather important that it be evenly pressed; a second application
of the plates is impracticable. Graining has the advantage
of hiding any finger-marks that may accidentally
be on the calf, and also partly conceals any imperfections
in the leather. |145|
The state of the weather must in a great measure guide
the finisher as to the proper number of volumes he ought
to prepare at one time. The leather should always be a
little moist, or, in other words, rather fresh. In winter
double the number of books may be prepared, and the
gold laid on, than the dryness of a summer’s day will
permit. If books are laid on over night the tools must
be used very hot in working them the next morning, or
the gold will not adhere. During summer, flies will eat
the glaire from various places while the book is lying or
standing out to dry, so that constant vigilance must be
kept to avoid these pests.
Russia is prepared in the same way as calf, but is
usually worked with more blind tools than gold, and
the sides are not as a rule polished, so that the size and
glaire are dispensed with, except on those parts where it is
to be finished in gold; those portions need be only paste-washed
and glaired once, without any size.
Finishing with Dry Preparation.—The dry preparation is
used for silk, velvet, paper, or any other material that would
be stained by the employment of the wet process. There
are a number of receipts in the trade and in use.
Take the white of eggs, and dry by spreading it somewhat
thickly over glass plates, taking care to preserve it
from dust. When dry it will chip off readily, if the glass
has been previously very slightly oiled or greased. It must
not be exposed to more heat than 40° Reaum., or the
quality of the albumen will be destroyed. The dried mass
is to be well powdered in a porcelain mortar.
Or, take equal portions of gum mastic, gum sandrac,
gum arabic, and powder them well in a mortar. This
powder, if good work be desired, must be ground into an
impalpable powder. When powdered put it into a box or
bottle, and tie three or four thicknesses of fine muslin
over the mouth. By tapping the inverted box, or shaking |146|
it over the lines or letters, the dust will fall through in a
fine shower. The powder should fall only on the part to be
gilt. Cut the gold into strips, take it up upon the tool,
and work rather hot. The overplus of the powder can be
brushed away when the finishing is completed. Finishing
powder is now sold commercially.
Velvet is very seldom finished beyond having the title
put on, and this should be worked in blind first and with
moderately large letters, or the pile will hide them.
Silk is finished more easily, and can, if care be taken,
have rather elaborate work put upon it. In such a case,
the lines or tools, which must be blinded-in first, may be
glaired. For this purpose the glaire must be put in a
saucer or plate in the free air for a day or two, so that a
certain amount of water or moisture of the glaire may be
evaporated; but it must not be too stiff so as to prevent
the brush going freely over the stuff. Great care, however,
must be taken, or the glaire will spread and cause a stain.
A thin coat of paste-water will give silk a body and keep
the glaire from spreading to a certain extent, but I think
the best medium for silk is the dry one, and it is always
ready for instant use. In using glaire the gold is laid on
the silk, but on no account must any oil or lard be rubbed
on it for the temporary holding of the gold. Rub the parts
intended for the gold with the finger (passed through the
hair), or with a clean rag lightly oiled, and when the tools
are re-impressed a clean piece of flannel should be used to
wipe off the superfluous gold.
Blocking has been used lately on silk with some success
in Germany. The blocking plate is taken out of the press,
and the gold is laid on it, and then replaced in the press.
The finishing powder is freely distributed over the silk
side, which is laid on the bed of the press. On pulling
the lever over, the block descends and imprints the design
in gold on the silk. This process may be applied to velvet, |147|
but velvet never takes the sharpness of the design on
account of the pile, so that as a rule it is left in its natural
state.
Vellum.—The Dutch, as a nation, appear to have been
the first to bind books in vellum. It was then a simple
kind of casing, with hollow backs. A later improvement
of theirs was that of sewing the book on double raised cords,
and making the book with a tight back, similar to the way
in which our flexible books are now done, showing the raised
bands. The ornamentation was entirely in blind, both on
the back and sides, and the tools used were of a very solid
character.
This art of binding in vellum seems to be entirely lost at
the present day; its imperishable nature is indeed its only
recommendation. It has little beauty; is exceedingly harsh;
and little variety can be produced even in the finishing.
There are two or three kinds of vellum prepared from
calf skins at the present day, thanks to the progress of
invention. First, we have the prepared or artist’s vellum,
with a very white artificial surface; then the Oxford vellum,
the surface of which is left in its natural state; the Roman
vellum, which has a darker appearance. Parchment is an
inferior animal membrane prepared from sheepskins after
the manner of vellum, and this is very successfully imitated
by vegetable parchment, made by immersing unsized paper
for a few seconds in a bath of diluted oil of vitriol. This
preparation resembles the animal parchment so closely that
it is not easy to distinguish the difference. It is used
very extensively in France for wrappering the better
class of literature, instead of issuing them in cloth as is the
custom here.
The method of finishing vellum is altogether different
to leather. On account of its very hard and compact
nature, it requires no other ground or preparation than
glaire for gold work. |148|
The cover should be very carefully washed with a soft
sponge and clean water, to clean off any dirt or finger-marks,
and to make the book look as fresh as possible.
This washing must be very carefully done by going over
the surface as few times as possible. This caution applies
particularly to the prepared or artist vellum, as each washing
will take off a certain amount of the surface, so that
the more it is damped and rubbed the more the surface
will be disturbed and the beauty destroyed. It requires
some experience to distinguish the flesh and leather surfaces
of prepared vellum, but this experience must be
acquired, because it is absolutely necessary that the leather
side should be outward when the book is covered, for two
reasons: the flesh side is more fibrous, and adheres better
to the boards than the leather side, and the leather side
is less liable to have its surface disturbed in the process of
washing.
The parts that are to be gilt must be glaired, but as the
glaire will show its presence, or, more strictly speaking,
leave rather a dirty mark, the tools should first be worked
in blind, and the glaire laid on carefully up to their outer
edge. When dry, lay the gold on and work the tool in.
Let the tools be only moderately warm; if too hot they
will go through to the mill-board, leaving their mark as if
they had been cut out with a knife.
As a rule no very heavy tooling is ever put on vellum,
the beauty lies in keeping the vellum as clean as possible.
The tooling being, comparatively speaking, on the surface,
owing to the thinness of the skin, requires a very competent
and clean workman to produce anything like good
work on vellum.
Vellum is of so greasy a nature that, if a title-piece of
leather has to be put on, it will be found that there is a
great difficulty in making it adhere properly unless some
special precaution be taken. The best plan is to scrape |149|
the surface where the leather is intended to be placed
with the edge of a knife. This will produce a rough and
fibrous ground on which to place the pasted leather. This
leather, when dry, must be prepared with paste-water and
glaire, in the same manner as with other books.
In the foregoing instructions for finishing a book, the
most that can be looked for towards teaching either the
apprentice or the unskilled workman is to give him an idea
how it is accomplished by practised hands. Pure taste, a
correct eye, and a steady hand, are not given to all in
common. The most minute instructions, detail by detail,
cannot make a workman if Nature has denied these gifts.
I have known men whose skill in working a design could
not be excelled, but who could not be trusted to gild a back
without instructions. Others, whose ideas of design were
not contemptible, could not tool two panels of a back in
perfect uniformity. Some also have so little idea of harmony
of colour, that without strict supervision they would
give every volume the coat of a harlequin. In a word, a
first-rate bookbinder is nascitur non fit, and although the
hints and instructions I have penned may not be sufficient to
make a workman, I trust they will be found of some value
to the skilled as well as to the less practised craftsman.
Blocking.—The growing demand for books that were at
once cheap and pretty, became so strong, that mechanical
appliances were invented to facilitate their ornamentation;
and thus we have the introduction of the present blocking
press.
I will not follow too closely the various improvements
introduced at different periods, but roughly describe the
blocking press, without which cheap bookbinding cannot
be done at the present day. There can be no doubt that
this press owes its extensive use to the introduction of
publishers’ cloth work.
Formerly, when the covers of books were blocked, a |150|
small lying or other press was used. The block, previously
heated, was placed on the book, and the screw or screws
turned to get a sufficient pressure. It often happened
that the pressure was either too much or too little: the
block either by the one accident sank into the leather too
deeply, or by the other the gold failed to adhere, and it
required a good workman to work a block properly.
The first press to be noticed is a Balancier, having a
moveable bed, a heating box, heated by means of red-hot
irons, two side pillars to guide the box in a true line, and
attached to it a screw connected at the top with a bar or
arm, having at each extremity an iron ball. The block,
having been fixed to a plate at the bottom of the heated
box, the side of the book was laid down on the bed, and
by swinging the arm round the block descended upon the
book. The arm was then swung back, and the next book
put into place. It will be seen that this incurred a great
loss of time.
The next improvement consisted in having a press that
only moved a quarter circle, with almost instantaneous
action; and another improvement connected with the bed
was, that by means of screws and gauges, when the block
was once set, a boy or an inexperienced hand might with
ease finish off hundreds of copies, all with equal pressure.
By referring to the woodcut opposite, the press and its
action will be seen and understood. The box may be
heated with gas, and kept at a constant and regulated
temperature the whole time of working. It can be adjusted
to any amount of pressure, as it is regulated by the
bed underneath.
The next step in progress was the introduction of printing
in different colours upon the cloth, and intermixing
them with gold. Messrs. Hopkinson and Cope’s machines
may be mentioned. They are made to be driven by steam,
and will print and emboss from 500 to 600 covers per
|151|
hour, and are heated by steam or gas. The inking
apparatus is placed at the back of the press, so that
while the workman is placing another cover, the ink
roller, by automatic action, inks the block ready for the
next impression. The inking or printing of the covers is
done without heat, so, to avoid loss of time, an arrangement
is made that the heating box can be cooled immediately
by a stream of water passed through it.
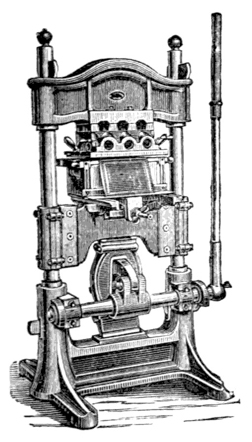
Messrs. Kampe and Co. have just brought out a blocking machine,
which they claim to be superior to any in the trade. It will block at
the rate of 700 to 800 covers per hour. The pressure is obtained by one
of the most powerful of mechanical appliances, and it can be adjusted
to block either paper or leather.
The tools required for blocking are
called blocks or stamps. These may
be composed of very small pieces, or
may be of one block cut to the size of
the book. In any case, the block
has to be fastened to the moveable
plate at the bottom of the heating box. To block the
sides of a book, take a stout piece of paper and glue it
upon a moveable plate.11
Then take the book, and having
set the blocks upon the side in exact position, place the
side or board upon which are placed the blocks upon the
bed of the blocking press, leaving the volume hanging
down in front of the press. The bed is now to be fixed,
so that the centre of the board is exactly under and in
the centre of the heating box. When quite true, the
sides and back gauges are fixed by screws. Pull the lever
so that a slight pressure upon the plate be given: release |152|
the press, and take out the book and examine if all be
correct. Some of the blocks may require a small piece of
paper as a pad, so as to increase the pressure, others to be
shifted a little. Now glue the back of the stamps and
replace them in their respective places. Place the whole
under the top plate in the press, heat the box, and pull
the lever over; and let the book remain for some little time
to set the glue. Take out the book, examine if perfectly
square and correct, but replace it with a soft mill-board
under the stamps, and pull down the press. The lever
must remain over, and the blocks be under pressure until
the glue is hardened.
Another method is to glue upon the plate a piece of
thick paper and mark upon it the exact size of the book
to be blocked. Strike upon the plate from the size the
centre, and from that any other lines that may assist in
placing the blocks. Arrange the blocks upon the plate so
as to form the design; when correct, paste the blocks on
their backs and replace them on the plate. When the
paste adheres a little, turn the plate over and put it into
the press. Apply heat to the box; pull the lever over, and
when the paste is set, regulate the bed and gauges.
When the press is properly heated, throw back the lever;
take out the mill-board from under the stamp, and regulate
the degree of pressure required by the side-screw under or
over the bed. Place upon the bed the side to be stamped,
hold it firmly against the guides with the left hand, and
with the right draw the lever quickly to the front. This
straightens the toggels and forces down the heating box,
causing a sharp impression of the stamp upon the leather
or other material. Throw or let the lever go back sharply,
and take out the book. If the block be of such a design
that it must not be inverted, the whole of the covers must
be blocked on one side first, and the block turned round
for the other side, or the design will be upside down. |153|
Work for blocking in gold does not require so much
body or preparation as if it were gilt by hand. Morocco
can be worked by merely washing the whole surface with a
little urine or weak ammonia, but it is safer to use a coat
of glaire and water mixed in proportion of one of the
former to three of the latter. The heat should not be
great, and slowly worked.
Calf should have a coat of milk and water or thin paste-water
as a ground, and when dry another of glaire. Both
should be laid on as evenly as possible; but if only portions
are to be gilt, such as a centre-piece, and the rest
dead, the centre-piece or other design should be pencilled
in with great care. The design should be first slightly
blocked in blind as a guide for the glairing. The edge of
the glaire generally leaves a black or dark stain. The heat
required for calf is greater than for morocco, and the
working must be done more quickly.
Cloth requires no preparation whatever, the glue beneath
and the coloured matter on the cloth gives quite enough
adhesiveness when the hot plate comes down for the gold
to adhere.
A great deal of taste may be displayed in the formation
of patterns in this branch, but as publishers find that
books that are tawdrily gilt are better liked by the public,
they are, of course, very well satisfied if their books are
well covered with gold. It would be well if those who
have the principal charge of this work would strive, by the
cultivation of elegant design, to correct the vitiated taste
of the public, and seek by a study of classic ornamentation
to please the eye and satisfy the judgment rather than
to attract the vulgar by glitter and gaudy decoration.
However, of late years a great advancement has been made
with publishers’ block work; the samples given in the trade
paper (“The Bookbinder” now “Bookmaker”) will prove
this.
GENERAL INFORMATION.
CHAPTER XXIV.
WASHING
AND
CLEANING.
The
binder is often called upon to clean books; to many he
is a sort of Aladdin, who makes old books into new; the
consequence is that he often has placed in his hands a lot
of dirty, miserable-looking books, and is expected to turn
them into first-class copies. To renovate such books requires
time and experience, and unfortunately very little is known
among binders as a body about cleaning. Outside the
trade, I am sorry to say, even less is known, for if a book be
received from a binder bleached, it seems to satisfy the
owner, and to be all that is desired. By such treatment of
bleaching a quantity of lime is generally left in the paper,
the goodness is destroyed, and naturally the paper must
suffer in a short time. To test such treatment one has only
to apply the tongue to the paper, it will at once absorb any
moisture, as blotting paper does, and often the lime can be
distinctly tasted.
But books are often washed and given out to the binder
to rebind in this state. In such a case it remains with the
binder not to associate himself with the book; for if he
rebinds such a book the stigma will attach itself to him
when the period of rotting, falling to pieces, and other misfortunes
has arrived.
It is the practice of many who profess to wash books or
prints to use chlorine at every washing; this is not necessary;
often a simple bath of hot water, with perhaps the |158|
addition of a little alum, is all that is required. An important
thing is to know the different kinds of stains when looking
through the book; there may be many in one book, each from
a different cause. In such a case it will be best to go for the
majority, and to use the bath that will move them. Often
the one bath is sufficient, but should there be any stains
that are not touched, these leaves must be treated again.
When there are stains of different character in the one
book, such as oil stains on a few leaves, and, say, coffee
stains in other parts, the oil must be first removed; the one
bath will not touch both stains.
Often when the bath is used wrongly it will fix the stain
in the paper, and not remove it, the chemical used acting as
a mordant.
It is impossible for me to describe the various stains, the
intelligence of the workman must be brought to bear on
the subject; and I advise a small memo. book be used to jot
down the difficulties that may occur from time to time, and
so to act as a guide for future work; to the use of such a
book I am enabled to lay before my readers the methods of
working with the various receipts collected in France and
Germany, and used by me in my business.
To wash a book it is absolutely necessary to pull it to
pieces. Should there be much glue on the back, and
difficulty arise in the pulling, the book may be treated as given
in Chapter II.: or sections of six or eight sheets may be
left together; the hot water and soaking to which the book
will be subjected in the washing will dissolve the glue or
paste that may be on the back, and the sheets will readily
part whilst in the solution. Washing must be conducted
with great care; the handling of the wet sheets will demand
the most delicate touch, for one can reasonably understand
that paper left in water for twelve or more hours is likely
to be very tender. In nearly every case when a book has
been washed it will be found necessary to size it: the size |159|
gives back the body or goodness that the hot water and
chemical has extracted. Often the virtue is extracted by
damp, through the book being left in some damp situation,
or by imperfect sizing the paper has first received; in such
cases, although the book may not require washing, sizing
will be of benefit.
Requisites.—The necessary articles required for washing,
etc., are dishes. Those of porcelain are perhaps the best;
they may be bought at any photographic material dealers.
If much work is done, it is advantageous to have a set or
sets of two or three sizes. In using the various dishes,
ample room should be given to allow the hands to enter the
water and pick up the sheets or leaves without any danger of
tearing. Should the pans be of such a size as to be too
heavy to move when full of water, they may be emptied
by means of a syphon, the short end of the syphon placed,
in preference, at one of the corners of the dish, so as not to
touch the sheets. The dishes may also be made of wood,
lined with zinc or lead: for very large work these must be
used, the porcelain are not made above a certain size.
A kettle for boiling water in.
A gas-stove, or substitute, for heating purposes.
A peel, made of wood, to hang the sheets on the lines.
The sheets are placed on the peel, from which they are
transferred to the lines.
Chloride of lime for solution of chloride of lime.—Make a
saturated solution of chloride of lime by mixing intimately
the lime with water in a large jar. When clear the solution
may be used. To every gallon of hot water take from this
stock solution two or three ounces.
NOTE.—Chlorine bleaches all vegetable matter.
Hydrochloric acid, also known as muriatic acid or spirits
of salts (poison).
Oxalic acid (poison).
Powdered alum. |160|
A hair sieve. This is not absolutely necessary, as a fine
piece of linen will answer as well.
Size:—
Simmer the whole for about one hour, then pass through
a fine hair sieve or piece of linen. Use this whilst warm.
Simmer and use as above.
Simmer the whole for about one hour, strain as above.
It must be remembered that a size too strong in glue or
isinglass is liable to make the paper too brittle; again, some
papers require a stronger size than others.
(4). A size that may be used cold, and is recommended
in France, to keep at hand and to use when only a single
leaf requires sizing, such as when a name has been erased
from a title-page, is as follows:—Boil about a quart of water
in a saucepan. Whilst boiling, add about two oz. of shellac
and
1 ⁄ 2
oz. of borax; the borax will dissolve the shellac, which
will be held in suspension; the whole must then be passed
through a fine hair sieve, or piece of linen, to rid it of all pieces
or impurities. This will keep a very long time, and may be
used over and over again.
Great care must be exercised that not too much shellac
is used, or the paper will be rendered transparent. |161|
MANIPULATION.
Dust.—The careful application of india-rubber or bread
will generally take away all dust. In using india-rubber,
hold the sheet or leaf down by the left hand, and rub gently
away from it. If the rubber is used in a to and fro motion,
there is great danger of the sheet doubling back and
breaking. The bread may be used in a circular motion; and
if a book be cleaned from dust by this means without
pulling to pieces, all crumbs must be brushed away from
the back very carefully before closing the book.
Water stains.—If the stains be from water, the application
of boiling water and alum will take them out. This stain
is the one most usually found in books, it may be distinguished
from other stains by leaving a mark having a sharp
edge.
To take such a stain away, pull the book to pieces, strew
on the bottom of the pan a handful of powdered alum, on
this pour a quantity of boiling water. Immerse each section
leaf by leaf in the liquid, and allow to remain for some
hours. It may be found rather difficult to get the sheets
to go under the water; and as one cannot press them under
by hand, on account of the heat, make a substitute by
wrapping strips of linen on the end of a piece of wood;
keep this handy, it will be found very useful; being round
at the end, and soft, it does not tear or go through the
paper, as will anything sharp.
The alum water will, after a time, become very discoloured;
this is only the stain and other dirt extracted from
the paper; throw this away by tipping the dish, or by the use
of the syphon; add fresh water, either warm or cold, but preferably
warm, to dissolve any excess of alum that may have
soaked into the paper, and to further clear it. After a time
the whole book may be taken out, placed between pressing
boards, and excess of water pressed away by the laying |162|
press. The sections are then carefully opened, and hung
upon lines or cords stretched across the workshop to dry.
When dry, should the paper require it, pass the whole book,
section by section, or leaf by leaf, through a size, press, and
again hang up to dry. When dry, it will be ready for re-binding.
It may happen that only a single leaf is stained;
do not cut this out as is usually done, but wet a piece
of fine string, which lay on the leaf as far in the back
as possible; close the book and allow to remain a few
minutes; the leaf may then be readily drawn out, the
moisture of the string having made the paper soft where
it was placed. It may then be cleaned, and when dry and
pressed, replaced.
Damp stains may be treated as for water stains, but, as
a rule, a book damaged by damp has little or no chance of
being made good again. A book so damaged can only be
strengthened by re-sizing or some artificial means. To re-size
leaves that cannot be plunged into the solution, the sizing
may be done with a soft brush. Place the leaf on a piece
of glass or marble, and use the brush to the leaf as one
would do in pasting; when sized, lift the leaf up very gently
and lay it out on paper to dry; when dry, the reverse side
is treated in like manner; or a thin paper of a transparent
character may be pasted over the pages, either on one or
both sides.
Mud.—Luckily a book stained with mud is not of frequent
occurrence. Mud seems to be a combination of all that is
objectionable, generally it is a mixture of iron and grease.
Wash the leaf well in cold water, then in a weak solution of
muriatic acid, after which, plunge in a weak solution of
chloride of lime. Rinse well, dry, and size. Sometimes it
will be necessary to wash the leaf with soap water. Make a
soap solution, and gently go over the whole sheet with a
soft brush, a shaving brush for instance; this may be done
by laying the leaf on a slab of glass: use great care with |163|
the brush, or the surface of the paper will be abraised; after
which, rinse well with water.
Very often such stains, if fresh, will disappear if a fine
jet of water be allowed to play on the parts dirtied, the
water being ejected through a fine rose jet.
Fox-marks.—Books so stained may generally be cleaned
by immersing the leaves into a weak solution of hydrochloric
acid; one must not make the bath too strong,
1 ⁄ 2
ounce of the acid to 1 pint of water, using the bath hot, will
be found about right. Should the marks not give to this
treatment, plunge the book, sheet by sheet, into a weak bath
of chlorine water. The book may be left in for some hours,
taken out and replaced in the hydrochloric bath; after a
half hour it may be rinsed with cold water, hung up to dry,
and sized.
Finger-marks, commonly called “thumb-marks.”—These
are the most difficult to erase, the dirt being generally of a
greasy nature, and forced into the fibres of the paper. Make
a jelly of white or curd soap, apply to the stain, and leave it
on for some time, then wash away gently by means of a
soft brush while the leaf is in cold water; this will, as a rule,
take all, or nearly all, away. A slight rinsing in very
weak acid water, again with cold water, and when dry size.
Blood stains.—The leaves stained must be plunged into
cold water; when thoroughly soaked, the stains may be
washed with a soft brush charged with soap, then well rinsed
with water again. Dry.
If hot water be used, the heat renders the albumen of the
blood insoluble, and the stain will be difficult to erase.
Ink stains (writing).—Some inks are more difficult to
erase than others. As a rule ink gives way if the writing
be treated with a solution of oxalic acid, and afterwards to
a weak solution of chloride of lime. It is perhaps better to
immerse the whole leaf in the solution, as the lime is
likely to bleach and leave a mark; the leaf should in any |164|
case be plunged in warm water afterwards, to wash away
the lime and acid, and, after drying, it should be sized.
Ink stains (marking ink, silver) may be removed by
a solution of tincture of iodine; nitrate of silver, the basis
of the ink, is changed into iodide of silver, this is then
treated with a solution of cyanide of potassium. It may perhaps
be necessary to repeat this two or three times; when
quite dissolved out, it must be well washed. As the cyanide
is a deadly poison, one may substitute hyposulphite of sodium.
Fat stains.—(1.) Place a piece of blotting-paper on each
side of the stain, apply a hot polishing iron very carefully
to the paper; this will, in most cases, melt the fat, which
will be absorbed by the blotting-paper.
(2.) Scrape pipe clay, or French chalk, which place on
the stain, then use the hot iron. The iron must not be
used too hot, or the paper will be scorched; a piece of
paper should always be placed between the iron and
the leaf stained. The powder may be afterwards brushed
away.
(3.) May be removed by washing the leaf with ether,
or benzoline, placing a pad of blotting-paper under and over
the leaf, dabbing the benzoline or ether on the spot with a
piece of cotton wool. This process must not be conducted
near a flame, both are highly inflammable.
(4.) A mixture of 1 part nitric acid, 10 parts water, is
useful in many instances for oil stains. When erased,
plunge the whole sheet or leaf into water, changing the
water several times. Dry and size.
Ink.—When the writing-paper has been made from
inferior rags bleached with excess of chlorine the best ink
becomes discoloured.
Reviving old writings.—(1.) Brush the paper over carefully
with a solution of sulpho-cyanide of potassium (1 in 20).
Then, while still damp, hold over a dish containing hot
muriatic acid; the writing will develop deep red. |165|
(2.) Wash the writing with a very weak solution of
hydrochloric acid, then carefully apply infusion of galls.
(3.) For letters that have been in sea water, wash with
warm water to remove the salt, then soak in weak solution
of gallic acid, about 3 grains to the ounce. If this does not
make the writing legible enough, wash thoroughly in clean
water, and soak in a solution of protosulphate of iron, 10
grains to the ounce.
To restore writing effaced by chlorine.—(1.) Expose the
writing to the vapour of sulphuret of ammonia, or dip it
into a solution of the sulphuret.
Dissolve and immerse the paper in the fluid, then slightly
acidulate the solution with sulphuric acid.
Guitaud discovered that sulphuret of ammonia and prussiate
of potash revives writing effaced by oxymuriatic acid.
To restore MSS. faded by time.—A moderately concentrated
solution of tannin washed over the paper. The MS.
to be carefully dried.
To preserve drawings or manuscripts.—Mix with every 100
parts of collodion 2 parts of sterine. Place the paper in
question on a perfectly level and even surface, such as a
marble table or large slab of glass. Give the paper a
thin coat of this collodion, and in about twenty minutes it
will be protected by a transparent, brilliant, and imperishable
envelope.
To fix drawings or pencil marks.—Pass the paper through
a bath of thin size, made either from gelatine or isinglass;
or a bath of skim milk.
To render paper waterproof.—Take of borax 100 parts,
water 2,250 parts; boil, and while stirring, gradually add
powdered shellac 300 parts. When the whole is dissolved,
strain through muslin. This will keep a long time and
may be bottled. |166|
To render paper incombustible.—Pass the paper through
a strong solution of alum, and hang up to dry.
The following, taken from the “English Mechanic,” June
19th, 1874, is, I think, of great use to the professional
restorer of old books, and will give the binder an idea of
what has to be done sometimes:—
“DECIPHERING BURNT DOCUMENTS.
“M. Rathelot, an officer of the Paris Law Courts, has
succeeded in an ingenious manner in transcribing a number
of the registers which were burnt during the Commune.
These registers had remained so long in the fire that each
of them seemed to have become a homogeneous block,
more like a slab of charcoal than anything else; and when
an attempt was made to detach a leaf it fell away into
powder.
“He first cut off the back of the book; he then steeped
the book in water, and afterwards exposed it, all wet as it
was, to the heat at the mouth of a warming pipe (calorifère).
The water as it evaporated raised the leaves one by
one, and they could be separated, but with extraordinary
precaution. Each sheet was then deciphered and transcribed.
The appearance of the pages was very curious—the
writing appeared of a dull black, while the paper was
of a lustrous black, something like velvet decorations on a
black satin ground, so that the entries were not difficult to
decipher.”
Insects.—A library has generally three kinds of enemies
to be guarded against, viz.: insects, dampness, and rats or
mice.12
Everyone is supposed to know how to guard against
dampness and rats or mice. Several means are known
how to keep insects at a distance. The first consists in the |167|
proper choice of woods for the book-case: these are cedar,
cypress, mahogany, sandal, or very dry and sound oak.
All these are compact or of very strong aroma, and are such
as insects do not like to pierce. Another source of danger
is the use of chemicals in the binding of books.
The insects that make ravages in books multiply very
rapidly, and very few libraries are free from them. The
microscopic eggs that are left by the female give birth to
a small grub, which pierces the leather boards and book
for its nourishment, and to get to the air. These are
familiarly called bookworms, but by the scientific world
they are known as hypothenemus eruditus which eats the
leather, and anobium striatum which bores through the
paper. The larvæ of the dermestes also attack wood as well
as books.
An instance of how these insects were once managed:—M.
Fabbroni, Director of the Museum of Florence, who
possessed a magnificent library, found, after a year’s absence,
in the wood and furniture, great havoc made by
insects, and his books spoilt by the larvæ, so much so that
it gave a fair promise of the total destruction of the whole,
unless he could find a method to exterminate the pests.
He first painted the holes over with wax, but shortly after
he found new worms which killed every particle of wood
they touched. He plunged the ordinary wood in arsenic
and oil, and other portions he anointed once every month
with olive oil, in which he had boiled arsenic, until the
colour and odour announced that the solution was perfect.
The number then diminished. But a similar method could
not be employed for books. M. Fabbroni resolved to
anoint the back and sides with aquafortis; in an instant
the dermestes abandoned their habitation, and wandered to
the wood; the oil having evaporized they commenced to
develop again, and again began their attacks on the newly
bound books. He saw amongst the many spoilt books one |168|
remaining intact, and on inquiry found that turpentine
had been used in the paste. He then ordered that for the
future all paste should be mixed with some such poison.
This precaution had the beneficial result.
It is not only in Europe that these worms make such
ravages in libraries. In the warmer climes they appear to
be even more dangerous. And it is a fact that certain
libraries are almost a mass of dust, by the books (and
valuable ones) falling to pieces. Nearly all authors on
this subject agree that the paste which is used is the first
cause, or a great help, to all the waste committed by these
dangerous bibliophobes. Then something must be put into
the paste which will resist all these insects and keep them
at a distance. The most suitable for this is a mineral salt,
such as alum or vitriol; vegetable salts, such as potash,
dissolve readily in a moist air and make marks or spots in
the books. From experience, it is most desirable to banish
everything that may encourage worms, and as it is very
rare that persons who occupy themselves with books are
not in want of paste, for some repairs or other, either to
the bindings or to the books, subjoined is a method of
preserving the paste and keeping it moist and free from
insects.
Alum, as employed by binders, is not an absolute preservative,
although it contributes greatly to the preservation
of the leather. Resin as used by shoemakers is
preferable, and in effect works in the same way; but oil
of turpentine has a greater effect. Anything of strong
odour, like aniseed, bergamot, mixed perfectly but in small
quantities, preserves the paste during an unlimited time.
Or, make the paste with flour, throw in a small quantity
of ground sugar and a portion of corrosive sublimate. The
sugar makes it pliant and prevents the formation of crust
on the top. The sublimate prevents insects and fermentation.
This salt does not prevent moisture, but as two or |169|
three drops of oil are sufficient to prevent it, all causes of
destruction are thus guarded against. This paste exposed
to the air hardens without decomposition. If it is kept in
an air-tight pot or jar, it will be always ready, without any
other preparation.
Books placed in a library should be thoroughly dusted
two or three times a year, not only to keep them in all
their freshness, but also to prevent any development of
insects and to examine for signs of dampness. The interior
of a book also asks that care, which unfortunately is
neglected very often. After having taken a book from
the shelves it should not be opened before ascertaining if
the top edge be dusty. If it is a book that has had the
edge cut, the dust should be removed with a soft duster,
or simply blown off. If it is a book which has uncut
edges it should be brushed with rather a hard brush.
By this method in opening the volume one need not be
afraid that the dirt will enter between the leaves and soil
them.
Glue.—The best glue may be known by its paleness, but
French glue is now manufactured of inferior quality, made
pale by the use of acid, but which on boiling turns almost
black. Good glue immersed in water for a day will not
dissolve, but swell, while inferior will partly or wholly do
so, according to quality.
In preparing glue, a few cakes should be broken into
pieces and placed in water for twelve hours, then boiled and
turned out into a pan to get cold; when cold, pieces may
be cut out and placed in the glue-pot as wanted. This
naturally refers to when large quantities are used, but
small portions may be boiled in the glue-pot after soaking
in water.
Glue loses a great deal of its strength by frequent re-melting.
It should always be used as hot as possible.
Rice glue or paste.—By mixing rice flour intimately with |170|
cold water, and then gently boiling it, a beautifully white
and strong paste is made. It dries almost transparent, and
is a most useful paste for fine or delicate work.
Paste.—For ordinary purposes paste consists simply of
flour made into a thin cream with water and boiled.
It then forms a stiffish mass, which may be diluted
with water so as to bring it to any required condition.
It is sometimes of advantage to add a little common
glue to the paste. Where paste is kept for a long time,
various ingredients may be added to prevent souring
and moulding. A few cloves form perhaps the best preservative
for small quantities; on the larger scale carbolic
acid may be used; salicylic acid is also a good preservative,
a few grains added to the freshly prepared paste will
entirely prevent souring and moulding.
Paste is now made on a commercial scale by various
Paste Cos., who send it out to all parts. The paste is
exceedingly good, and keeps a long time.
Photographs.—A few words respecting the treatment of
photographs may not be out of place here.
To remove a photograph from an old or dirty mount, the
surplus of the mount should be cut away; it should then
be put into a plate of cold water and be allowed to float off.
A little warm water will assist in its coming away more
easily, but should it not do so, the photograph has probably
been mounted with a solution of india-rubber, and in that
case, by holding it near the fire, the rubber will soften, and
the print may easily be peeled off.
Very hot water is likely to set up a reaction if the prints
were not well washed by the photographer when first sent
out.
In mounting photographs, white boards should, as a rule,
be avoided, because the colour of the boards is more pure
than the lights of the photograph, and deaden the effect.
A toned or tinted board is more suitable. |171|
They should be damped, and evenly trimmed and pasted
all over with thin best glue or starch, and well rubbed
down with a piece of clean paper over the print. If any of
the glue or starch oozes out from the sides, it should be
wiped off with a clean damp sponge. As photographs lose
their gloss in mounting, they must be rolled afterwards in
order to restore it. A special machine is used for this.
But it may be wished to introduce the silver print without
mounting on a board. To do so, and to keep the print
straight, paste a very thin paper on the back, stretching
the paper well; this will counteract the pulling power
albumen has, and the print will, if this be done properly,
remain perfectly straight and not curl up.
Albumen.—Desiccated egg-albumen is now well known
in the market in the form of powder. Three teaspoonfuls of
cold water added to every
1 ⁄ 2
teaspoonful of powder represents
the normal consistency of egg-albumen.13
The manufacture of egg-albumen in the neighbourhood
of Moscow is carried on in the houses of the country people.
The albumen however is generally roughly prepared and of
bad appearance, and often spoils. But egg-albumen is also
produced on a manufacturing scale in the neighbourhood
of Korotscha, the largest establishment there numbering
sixty to seventy workwomen, using about eight million
eggs yearly, other establishments using less in proportion.
Albumen is also largely manufactured from blood; 5
oxen or 20 sheep or 34 calves are said to yield the same
quantity of dry albumen, viz., 2 lbs. In producing blood-albumen
for commerce, the objects borne in mind are the
attainment of a substance whose solution is free from
colour, possesses coagulation, and which is cheap.
To prevent tools, machines, etc., from rusting.—Boiled
linseed oil, if allowed to dry on polished tools, will keep them |172|
from rusting; the oil forms a coat over them which excludes
contact from air.
Dissolve
1 ⁄ 2
oz. of camphor in 1 lb. of lard; take off the
scum, and mix as much blacklead as will give the mixture
an iron colour. All kinds of machinery, iron or steel, if
rubbed over with this mixture, and left on for 24 hours, and
then rubbed with a linen cloth, will keep clean for months.
To clean silver mountings.—To restore the colour of tarnished
silver clasps, etc., boil the goods, either silver or
plated, in enough water to cover them. For every pint of
water put into it 2 ounces of carbonate of potash and a
1 ⁄ 4
lb. of whiting. After boiling them for about a quarter of
an hour, clean with a leather, brush, and whiting. They
will then look as good as new.
To clean sponges.—Soak the sponge well in diluted
muriatic acid for twelve hours. Wash well, then immerse
in a solution of hyposulphate of soda to which a few drops
of muriatic acid has been added a few moments before.
When sufficiently bleached, wash well, and dry in a current
of air.
GLOSSARY
OF THE
TECHNICAL TERMS
AND IMPLEMENTS USED IN BOOKBINDING.
ALL-ALONG.—When a volume
is sewed, and the thread
passes from kettle-stitch to
kettle-stitch, or from end to
end in each sheet, it is said
to be sewed “all-along.”
ARMING
PRESS.—A species of
blocking press used by hand;
so called from the use of it to
impress armorial bearings on
the sides of books.
ASTERISK.—A star used by
printers at the bottom of the
pages meant to supply the
places of those cancelled (see
also
CANCEL).
BACKING
BOARDS.—Used when
backing and for forming the
groove. They are made of
very hard wood, and sometimes
faced with iron; are
thicker on the edge intended
to form the groove than upon
the edge that goes towards
the foredge, so that the whole
power of the lying press may
be directed towards the back.
BACKING
HAMMER.—The hammer
used for backing and
rounding; it has a broad flat
face similar to a shoemaker’s
hammer.
BACKING
MACHINE.—A machine
for backing cheap work.
BANDS.—The cord whereon the
sheets of a volume are sewn.
When a book is sewn “flexible”
the bands appear upon
the back. When the back is
sewn so as to imbed the cord
in the back, the appearance
of raised bands is produced
by gluing narrow strips of
leather across the back before
the volume is covered.
BAND
DRIVER.—A blunt chisel
used in forwarding, to correct
any irregularities in the bands
of flexible backs.
BAND
NIPPERS.—Flat pincers
used for nipping up the band
in covering.
BEADING.—The small twist
formed when twisting the silk
or cotton in head-banding.
BEATING
HAMMER.—The heavy
short-handled hammer used
in beating (generally about
10 lbs.).
BEATING
STONE.—The bed on
which books are beaten.
BEVELLED
BOARDS.—Very
heavy boards with bevelled
edges; used for antique work.
BLEED.—When a book has been
cut down into the print it is
said to have been bled.
BLIND-TOOLED.—When a book
has been impressed with tools |174|
without being gilt, it is said
to be “blind-tooled” or “antique.”
BLOCKING
PRESS.—Another and
more general term for the
arming press; one of the chief
implements used in cloth
work. Used for finishing the
side of a cover by a mechanical
process.
BLOCKS
OR
BLOCKING
TOOLS.—An
engraved stamp used for
finishing by means of the
blocking press.
BOARDS.—Are of various kinds,
each denoting the work it is
intended for, such as pressing
boards, backing, cutting,
burnishing, gilding, etc.
BODKIN.—A strong and short
point of steel fixed in a wooden
handle, for making the holes
through the mill-boards. The
slips upon the back of the
book are laced through the
holes for attaching the mill-board
to the book.
BOLE.—A red earthy mineral,
resembling clay in character,
used in the preparation for
gilding edges.
BOLT.—The fold in the head
and foredge of the sheets.
The iron bar with a screw
and nut which secures the
knife to the plough.
BOSSES.—Brass or other metal
ornamentations fastened upon
the boards of books; for ornament
or preservation.
BROKEN
OVER.—When plates
are turned over or folded a
short distance from the back
edge, before they are placed
in the volume, so as to facilitate
their being turned easily
or laid flat, they are said to
be broken over. When a leaf
has been turned down the
paper is broken.
BURNISH.—The gloss produced
by the application of the
burnisher to the edges.
BURNISHERS.—Pieces of agate
or bloodstone affixed to convenient
handles.
CANCELS.—Leaves containing
errors which are to be cut out
and replaced by corrected
pages (see
ASTERISK).
CAP.—The envelope of paper
used to protect the edges
while the volume is being
covered and finished.
CASE-WORK.—When the cover
is made independent of the
book, the book being afterwards
fastened into it. Refers
principally to cloth and
bible work.
CATCH-WORD.—A word used
and seen in early printed
books at the bottom of the
page, which word is the first
on the following page. To
denote the first and last word
in an encyclopædia or other
book of reference.
CENTRE
TOOLS.—Independent
tools cut for the ornamentation
of the centre of panels
and sides.
CLASP.—The hook or catch
used for fastening the boards
together when the book is
closed; used formerly on almost
every book.
CLEARING-OUT.—Removing the
waste-paper, and paring away
any superfluous leather upon
the inside, preparatory to
pasting down the end-papers.
CLOTH.—Prepared calico, sometimes
embossed with different
patterns, used for cloth bindings.
COLLATING.—Examining the
sheets by the signatures after
the volume has been folded, |175|
to ascertain if they be in correct
sequence.
COMBS.—Instruments with wire
teeth used in marbling.
CORNERS.—The triangular tools
used in finishing backs and
sides. The leather or material
covering the corners of
half-bound books. The metal
ornaments used usually in
keeping with clasps.
CROPPED.—When a book has
been cut down too much it is
said to be cropped.
CUT
DOWN.—When a plough-knife
dips downward out of
the level it is said to “cut
down”; on the contrary, if
the point is out of the level
upwards it is said to “cut
up.”
CUT
UP.—Same as the last explanation.
DIVINITY
CALF.—A dark brown
calf used generally for religious
books, and worked
in blind or antique.
DENTELLE.—As the word expresses.
A style resembling
lace work, finished with very
finely cut tools.
DOUBLED.—When in working
a tool a second time it is inadvertently
not placed exactly
in the previous impression,
it is said to be “doubled.”
EDGE-ROLLED.—When the
edges of the boards are rolled,
either in blind or in gold.
END-PAPERS.—The papers
placed at each end of the
volume and pasted down upon
the boards.
FILLET.—A cylindrical tool
used in finishing, upon which
a line or lines are engraved.
FINISHING.—The department
that receives the volumes
after they are put in leather.
The ornaments placed on the
volume. The person who
works at this branch is termed
a finisher.
FINISHING
PRESS.—A small
press, used for holding books
when being finished.
FINISHING
STOVE.—A heating
box or fire used for warming
the various tools used in
finishing.
FLEXIBLE.—When a book is
sewn on raised bands, and the
thread is passed entirely round
each band. It is the strongest
sewing done at the present
time. This term is often misused
for limp work, because
the boards are limp or flexible.
FOLDER.—A flat piece of bone
or ivory used in folding sheets,
and in many other manipulations;
called also a folding
stick. A female engaged in
folding sheets.
FOLDING
MACHINE.—A machine
invented to fold sheets,
generally used in newspaper
offices.
FOREDGE.—The front edge of a
book.
FORWARDING.—The branch
that takes the books after
they are sewed, and advances
them until they are put into
leather ready for the finisher.
The one who works at this
branch is called a forwarder.
FULL-BOUND.—When the sides
and back of a volume are
covered with leather it is said
to be full-bound.
GATHERING.—Collecting the
various sheets from piles when
folded, so that the |176| arrangement follows the sequence of
the signature.
GILT.—Applies to both the
edges and to the ornaments in
finishing.
GLAIRE.—The white of eggs
beaten up.
GOLD
CUSHION.—A cushion for
cutting the gold leaf on.
GOLD
KNIFE.—The knife for
cutting the gold; long and
quite straight.
GOUGE.—A tool used in finishing;
it is a line forming the
segment of a circle.
GRAINING
BOARDS.—Boards
used for producing a grain on
calf and russia books. Grain
of various form is cut in wood,
and by pressure the leather
upon which the boards are
laid receives the impression.
GRAINING
PLATES.—Metal
plates same as above.
GUARDS.—Strips of paper inserted
in the backs or books
intended for the insertion of
plates, to prevent the book
being uneven when filled;
also the strips upon which
plates are mounted.
GUIDES.—The groove in which
the plough moves upon the
face of the cutting press.
GUILLOTINE.—A machine used
for cutting paper.
GUINEA-EDGE.—A roll with a
pattern similar to the edge of
an old guinea.
HALF-BOUND.—When a volume
is covered with leather upon
the back and corners; and the
sides with paper or cloth.
HAND-LETTERS.—Letters fixed
in handles; used singly for
lettering.
HEAD
AND
TAIL.—The top and
bottom of a book.
HEAD-BAND.—The silk or cotton
ornament worked at the
head and tail of a volume, as
a finish and to make the back
even with the boards.
IMPERFECTIONS.—Sheets rejected
on account of being in
some respect imperfect, and
for which others are required
to make the work complete.
IN
BOARDS.—When a volume is
cut after the mill-boards are
attached, it is said to be cut
in boards.
INSET.—The inner pages of a
sheet, cut off in folding certain
sizes; to be inset in the
centre of the sheet.
JOINTS.—The projection formed
in backing to admit the mill-boards.
The leather or cloth
placed from the projection on
to the mill-board is called a
joint.
KETTLE-STITCH.—The chain-stitch
which the sewer makes
at the head and tail of a book.
A corruption of either chain-stitch,
or catch-up stitch.
KEYS.—Little metal instruments
used to secure the
bands to the sewing press.
KNOCKING-DOWN
IRON.—A
piece of iron having a small
leg in the centre by which it
is secured in the lying press.
When fastened there it is
used to pound or beat with a
hammer the slips into the
boards after they are laced in,
so that they do not show
when the book is covered.
LACED
IN.—When the mill-boards
are attached to the
volume by means of the slips
being passed through holes |177|
made in the boards, they are
said to be laced in or drawn
in.
LAW
CALF.—Law books are
usually bound in calf left
wholly uncoloured, hence the
term for white calf.
LETTERING
BLOCK.—A piece of
wood, the upper surface being
slightly rounded, upon which
side labels are lettered.
LETTERING
BOX.—A wooden
box in which hand-letters are
kept (see
HAND-LETTERS).
LINING-PAPERS.—The coloured
or marbled paper at each end
of the volume. Called also
end-papers.
MARBLER.—One who marbles
the edges of books and paper.
MARBLING.—The art of floating
various colours on a size, from
which it is transferred to
paper or book edges. To
stain or vein leather like
marble.
MARKING-UP.—When the back
of a book is being marked for
flexible sewing.
MILL-BOARD.—The boards that
are attached to the book.
Various kinds are in use now;
the most common is made of
straw, the best of old naval
cordage.
MITRED.—When the lines in
finishing meet each other at
right angles without overrunning
each other, they are said
to be mitred. Joined at an
angle of 45°.
MUTTON-THUMPING.—A term
used in bygone days, indicating
the common binding
of school books in sheep-skin.
MUTTON-THUMPER.—An old
term indicating a bad workman.
OFF-SET.—The impression made
by the print against the opposite
page, when a book has
been rolled or beaten before
the ink be dried. (Also
SET-OFF.)
OUT
OF
BOARDS.—When a
volume is cut before the
boards are affixed, it is done
out of boards. Nearly the
whole of common work is
done out of boards.
OUT
OF
TRUTH.—When a book
is not cut square.
OVERCASTING.—An operation
in sewing, when the work
consists of single leaves or
plates. Over-sewing.
PALLET.—The tools used for
finishing across backs.
PANEL.—The space between
the bands.
PAPERING-UP.—Covering the
edges after they are gilt, to
protect them while the volume
is being covered and finished
(see
CAP).
PARING.—Reducing the edges
of the leather by forming a
gradual slope.
PARING
KNIFE.—The knife used
for paring.
PASTE-WASH.—Paste diluted
with water.
PEEL.—A wooden instrument
used to hang up damp sheets
for drying.
PENCIL.—A small brush of
camel’s hair used for glairing.
PIECED.—Any space that has
another leather upon it, as a
lettering piece.
PLOUGH.—The instrument used
for cutting the edges when
the book is in the lying
press.
PLOUGH
KNIFE.—The knife attached
to the plough. |178|
POLISHER.—A steel instrument
for giving a gloss to the leather
after finishing.
PRESS.—Of various kinds, viz.:
lying, cutting, standing,
blocking, finishing, etc.
PRESS
PIN.—A bar of iron used
as a lever for standing presses;
a smaller kind for lying
presses.
PRESSING
BLOCKS.—Blocks of
wood used for filling up a
standing press when there are
not enough books.
PRESSING
BOARDS.—Boards
used for pressing books between.
PROOF.—The rough edges of
certain leaves left uncut by
the plough, are “proof” that
the book is not cut down (see
also
WITNESS).
RASPED.—The sharp edge taken
off mill-boards.
REGISTER.—The ribbon placed
in a volume for a marker. A
list of signatures attached to
the end of early-printed books
for the use of the binder. In
printing—when on looking
through a leaf the print on
the recto and verso is not exactly
opposite, it is said to be
out of register.
ROLLING
MACHINE.—A machine
introduced to save the
labour of beating, the sheets
being passed between two
revolving cylinders.
ROLLS.—Cylindrical ornamental
tools used in finishing.
RUNNER.—The front board
used in cutting edges.
RUN-UP.—When the back has
a fillet ran from head to tail
without being mitred at each
band, it is said to be “run-up.”
SAWING-IN.—When the back is
sawn for the reception of the
cord in sewing.
SAWING
MACHINE.—A machine
for sawing the backs of books
quickly.
SETTING
THE
HEAD-BAND.—Adjusting
the leather in
covering so as to form a kind
of cap to the head-band.
SEWER.—The person who sews
the sheets together on the
sewing press—generally a female.
SEWING
MACHINE.—A recent
invention for the sewing of
books with wire and thread.
SHAVING
TUB.—The paper cut
from the edges of a volume
are called shavings. The receptacle
into which they fall
while the forwarder is cutting
is termed the shaving tub.
SHEARS.—Large scissors used
for cutting up mill-boards.
SHEEP.—An old term for all
common work covered in
sheep-skin.
SIGNATURE.—The letter or
figure under the footline of
the first page of each sheet, to
indicate the order of arrangement
in the volume.
SIZE.—A preparation used in
finishing and gilding, formerly
made with vellum, but can
now be bought ready for use.
When used on paper a thin
solution of glue.
SLIPS.—The pieces of twine that
project beyond the back of
the volume after it is sewn.
SQUARES.—The portions of the
boards that project beyond
the edges after the book is
cut.
STABBING.—The term used formerly
for piercing the boards
with a bodkin for the slips to
pass through; more generally |179|
known now as “holeing.”
The operation of piercing
pamphlets for the purpose of
stitching.
STABBING
MACHINE.—A small
machine used for making the
holes through the backs of
pamphlets.
STANDING
PRESS.—A fixed
heavy press with a perpendicular
screw over the centre.
START.—When any of the
leaves are not properly secured
in the back, and they
project beyond the others,
they are said to have started.
When the back has been
broken by forcing the leaves
they start.
STIFFENER.—A thin mill-board
used for various purposes.
STITCHING.—The operation of
passing the thread through a
pamphlet for the purpose of
securing the sheets together.
STRAIGHT-EDGE.—A small
board having one edge perfectly
straight.
STOPS.—Small circular tools,
adapted to “stop” a fillet
when it intersects at right
angles; used to save the time
mitringmitreing would occupy.
TENON
SAW.—A small saw used
by bookbinders for sawing
the books for sewing. More
strictly speaking a carpenter’s
tool.
TITLE.—The space between the
bands upon which the lettering
is placed. The leaf in
the beginning of a book describing
the subject.
TOOLS.—Applied particularly
to the hand stamps and tools
used in finishing.
TRIMMING.—Shaving the rough
edge of the leaves of a book
that is not to be cut.
TRINDLE.—A thin strip of wood
or iron.
TURNING-UP.—The process of
cutting the foredge in such a
manner as to throw the round
out of the back until the edge
is cut. All books that are
cut in boards have a pair of
trindles thrust between the
boards and across the back to
assist the operation.
TYING-UP.—The tying of a
volume after the cover has
been drawn on, so as to make
the leather adhere better to
the sides of the bands; also
for setting the head-band.
TYPE.—Metal letters used in
printing and lettering.
TYPE-HOLDER.—An instrument
for holding the type when
used for lettering.
VARNISH.—Used as a protection
to the glaire when polished
on the covers of books.
WHIPPING.—Another term for
overcasting, but when longer
stitches are made.
WITNESS.—When a volume is
cut so as to show that it has
not been so cut down, but
that some of the leaves have
still rough edges. These uncut
leaves are called “Witness”
(see
PROOF).
WRINKLE.—The uneven surface
in a volume, caused by not
being properly pressed or by
dampness, also caused by improper
backing.
INDEX.
Acids, effect of, on leather, 133.
Advantage, comparative, of paste and glue,
93.
—— of flexible binding, 28.
—— of graining calf, 144.
—— of vinegar over paste water when finishing, 127.
Albumen, 171.
Antique finishing, 122.
—— tools, method of working, 122.
Arming press, 117.
Artificial heat, 46.
Artists’ vellum, 147.
Athenæum letter on trimming, 43.
Azuré tools, 113.
Back, calf, polishing a, 140.
—— finishing a (cut), 130.
—— full gilt, 129.
—— mitred, 129–139.
—— run up, 129–140.
Backs, flat, 48.
—— suitable for calf work (cut), 138.
Backing, 48.
—— (cut), 49.
—— boards (cut), 48, 50.
—— flexible work, 50.
—— hammer (cut), 49.
—— machines, 50.
Band nippers (cut), 93.
Bands, putting on, 88.
Bar roll, 133.
Bath, effect upon stains of wrong, 158.
Beating, 9.
—— hammer (cut), 9.
—— gold books, 10.
Beating stone, 9.
Bibles, etc., edges of, 122.
—— end papers for, 33.
—— finishing of, 122.
Bindings, monastic, 111.
Blind finishing, 122.
—— —— beauty of, 125.
—— —— colour of, 122.
Blocking, 149.
—— calf, 153.
—— cloth, 153.
—— in gold, 153.
—— morocco, 153.
—— old method of, 116.
—— press, 150.
—— sides, 151.
—— silk, 146.
—— velvet, 146.
Blocks, 151.
Blood stains, removing, 163.
Board, backing, 48.
—— cutting, 54.
—— trimming, 41.
Boards, cutting in, 64.
—— cutting out of, 64.
—— made, 55.
—— for photographs, 170.
Bolt knife (cut), 61.
Books, enemies of, 166.
Book-worms, 167.
—— to keep away, 168.
Brass type, 129.
Bread, cleaning with, 161.
Bronze end paper, 34.
Brush, finger, 68.
—— sprinkling, 68.
Burnishers, 79.
—— edge (cuts), 81.
Burnishing edges, 81.
—— marbled paper, 73.
Burnt
documents, deciphering, 166.
Burr on knife, 79.
Calf, back polishing, 137.
—— blocking, 153.
—— Cambridge, 104.
—— colouring, 100.
—— colouring, preparing for, 102.
—— colouring, black, 101.
—— colouring, brown, 102.
—— colouring, yellow, 102.
—— covering in, 94.
—— dabbing, 106.
—— effect of glue on, 89.
—— extra, 142.
—— finishing, 135.
—— graining, 144.
—— graining, advantage of, 144.
—— green and light, 139–141.
—— handling, 94.
—— lettering, 140.
—— marbling, 105.
—— marbling, preparing for, 104.
—— neat, 137.
—— pasting down, 99.
—— sides, finishing, 141.
—— sides, polishing, 142.
—— work, backs suitable for (cut), 138.
—— sprinkling, 103.
—— sprinkling, emblematic, 103.
—— sprinkling, preparing for, 103.
Cambridge calf, 104.
Capping up edges, 82.
Cat’s paw, 106.
Charcoal fire for finishing, 121.
Chemical colouring of leather, 133.
Chloride of lime solution, 159.
Chlorine, restoring writing effaced by, 165.
Cleaning, 157.
—— off stick, 58–59.
—— removing single leaf for, 162.
Cleaning silver mountings, 172.
—— sponges, 172.
—— with india-rubber, 161.
—— with bread, 161.
Cloth blocking, 153.
—— covering with, 95.
—— joints, 38.
—— smooth, 95.
Cobb paper, 33.
Collating, 13.
Colour of blind work, 122.
Colours for books, suggested, 96.
—— for marbling, 69.
—— for sprinkling, 68.
Coloured edges, fancy, 69.
—— paste paper, 35.
—— plates, 17.
Colouring calf, 100.
—— calf preparing for, 102.
—— calf, black, 101.
—— calf, brown, 102.
—— yellow, 102.
Colouring edges, 67.
—— of leather, chemical, 133.
—— plain, for edges, 69.
Comb marble, 72.
Cord, sizes of, 22.
Cords, lay, 23.
Cotton wool, 120.
Covers, cutting leather, 90.
Covering, 90.
—— half bound work, 96.
—— preparing for, 87.
—— with calf, 94.
—— with cloth, 95.
—— with morocco, 90.
—— with parchment, 94.
—— with roan, 95.
—— with russia, 94.
—— with satin, 95.
—— with silk, 95.
—— with vellum, 94.
—— with velvet, 95.
Cut against, 54.
—— true, to tell if boards are, 56.
—— to tell if book is, 64.
Cushion, gold, 78.
Cutting, 59.
—— in boards, 64.
—— out of boards, 64.
—— board, 54.
—— foredge, 62.
—— gold leaf, 80.
—— head, 61.
—— leather covers, 90.
—— machines (cuts), 65, 66.
—— mill-board, 52.
—— press and plough (cut), 60.
—— tail, 62.
Dabbing calf, 106.
Damp stains, 162.
—— repairing books damaged by, 162.
Deciphering burnt documents, 166.
Dentelle border, 132.
Derome tools (cuts), 115.
Dibdin, Dr, 95.
Disadvantage of backing machines, 51.
—— flat backs, 48.
—— lettering pieces, 136.
—— wire sewing, 30.
Dishes for washing, 159.
Documents, deciphering burnt, 166.
Doublé, 132.
Down, pasting, 97.
Dragon, gum, 70.
Drawing in, 57.
Drawings, fixing, 165.
—— preserving, 165.
Dry preparation, 145.
—— making, 145.
Drying, artificial heat in, 46.
Duplicate sheets, 19.
Dust, removing, 161.
Dutch marble paper, 34.
Edge burnishers (cuts), 81.
Edges of bibles and religious books, 122.
—— of boards, finishing, 132.
—— burnishing, 81.
—— capping up, 82.
—— coloured, fancy, 69.
—— coloured, plain, 69.
—— colouring, 67.
—— gilding, 80.
—— gilt, 78.
—— gilt, dull, 81.
—— gilt, painted, 82.
—— gilt, on red, 82.
—— gilt, in the round, 81.
—— gilt, solid, 81.
—— gilt, tooled, 82.
—— marbled, 69.
—— marbled, paper, transferring to, 74–75.
—— marbling, 73.
—— marbled, on gilt, 78.
—— marbled, under gilt, 78.
—— sprinkled, 67.
—— sprinkled marble, 67.
—— transferring marbled paper to, 74–75.
—— uncut, 41.
Effaced by chlorine, restoring writing, 165.
—— by oxymuriatic acid, restoring writing, 165.
Emblematic sprinkling, 103.
—— tooling, 117.
End papers, 33.
—— papers, bronze, 34.
—— papers, cobb, 33.
—— papers, coloured paste, 35.
—— papers, making, 35.
—— papers, marbled, 33.
—— papers, printed and fancy, 34.
—— papers, putting on, 38.
—— papers, surface, 33.
—— papers, for bibles, etc., 33.
—— papers, for school and public library books, 41.
Ends, sewing (cut), 40.
Enemies of books, 166.
Extra, calf, 142.
Faded MSS., restoring, 165.
—— writing, restoring, 165.
Fat stains, removing, 164.
Fillet (cut), 118.
Filling up, 137.
—— up, saw cuts, 89.
Finger brush, 68.
Finger-marks, 163.
—— removing, 163.
Finishing, 111.
—— ancient, 117.
—— a back (cut), 130.
—— a back, calf, 135.
—— a back, full gilt, 137.
—— a back, run up, 139.
—— blind, antique or monastic, 122.
—— blind, tools for, 122.
—— calf sides, 141.
—— charcoal fire for, 121.
—— edges of boards, 132.
—— extra calf sides, 142.
—— flexible work, 124.
—— gold, 125.
—— gold, tools for, 122.
—— half morocco book, 127.
—— inside of a book, 132–141.
—— medium, 126.
—— medium, importance of proper, 126.
—— morocco sides, 131.
—— morocco imitation, 133.
—— paper, 144.
—— press (cuts), 121–122.
—— religious books, 122.
—— roan, 133.
—— russia, 145.
—— sides calf, 135.
—— sides calf extra, 142.
—— sides morocco, 131.
—— sides, morocco imitation, 133.
—— silk, 146.
—— stove (cuts), 120.
—— taste in, 117.
—— tools, 118–122.
—— tools, heat for, 128.
—— vellum, 147.
—— velvet, 146.
—— with dry preparation, 145.
Fixing drawings, 165.
Flat backs, 48.
Flexible binding, advantages of, 28.
—— how to tell, 29.
—— not to show, 29, 89.
Flexible work, backing, 50.
—— work, cleaning off, 59.
—— work, covering, preparing for, 89.
—— work, finishing, 124.
—— work, gluing up, 45.
—— work, marking up, 20.
—— work, mock, 90.
—— work, sewing, 23.
—— work, sewing (cut), 27.
Folding, 3.
—— stick, 4.
—— machine (cut), 7.
—— maps, 15.
Folio, 4.
Foredge, cutting, 62.
Forwarding, 33.
Fox-marks, 163.
—— marks, removing, 163.
French, dab, 106.
—— method of pressing, 19.
—— method of trimming, 42.
—— paring knife (cut), 90.
—— paring knife, method of using (cut), 91.
Full gilt back, finishing, 137.
Gall, ox, for marbling, 71.
Gascon, 115.
—— tools (cuts), 114.
Gathering, 8.
—— machine, 8.
German, method of gluing up, 45.
—— paring knife (cut), 91.
—— paring knife, method of using (cut), 91.
Giggering, 124.
Gilding edges, 80.
Gilt back, full, 129.
—— edges, 78.
—— edges, dull, 81.
—— edges, painted, 82.
—— edges, solid, 81.
—— edges, tooled, 82.
—— in the round, 81.
—— marbling on, 78.
—— marbling under, 78.
—— on red, 82.
—— top, 41.
Glaire, 119.
—— how to make, 119.
—— water, 79.
Glue, 169.
—— comparative advantages of paste and, 93.
—— effect on calf of, 89.
—— rice, 169.
—— to tell good, 169.
Gluing up, 45.
—— up flexible work, 45.
—— up, German method of, 45.
Gold, blocking in, 153.
—— cushion, 78.
—— finishing, 125.
—— finishing, tools for, 128.
—— knife, 79.
—— leaf, 79–119.
—— leaf, cutting, 80.
Grain, treatment of straight, 92.
—— treatment of leather with no, 92.
Graining calf, 144.
—— advantage of, 144.
Graining up, 92.
Grolier tools (cuts), 113.
Groove, 7.
Guarding plates, etc., 15.
Guards, object of, 16.
Gum Tragacanth (Gum Dragon), 70.
Half binding, 96.
—— binding, covering, 96.
—— binding, lining for, 53.
—— binding, pasting down, 100.
Hammer, beating (cut), 9.
Hand finishing, 116.
—— letters, 118.
Handling calf, 94.
Head band, setting, 93.
—— bands, stuck on, 80.
—— banding, 83.
—— banding (cut), 84.
—— banding on old books, 84.
—— of book cutting, 61.
Heat, artificial, 46.
—— for finishing tools, 128.
—— for polishing tools, 140.
Henry III., bindings of, 114.
Holes in back, filling up, 89.
Hollow backs, 87.
Imitation morocco, finishing, 133.
Importance of proper finishing medium, 126.
Incombustible, to render paper, 166.
India rubber, 119.
—— rubber, how to use, 161.
Ink stains, removing, 163.
—— stains, marking, 164.
Inlaid work, 133.
Inlaying, 134.
—— Viennese method of, 135.
Insects, 166.
—— poison for, 168.
Inside of book, finishing, 132–141.
Interleaving, 18.
Iron, knocking-down (cut), 6.
—— polishing (cut), 119.
Joint, 7.
Joints, cloth, 38–99.
—— morocco, 98.
Kettle stitch, 25–28.
Keys (sewing), 23.
Knife, bolt (cut), 61.
—— burr on, 79.
—— gold, 79.
—— paring, French (cut), 90.
—— paring, method of holding, (cut), 91.
—— paring, German (cut), 91.
—— paring, German, method of holding (cut), 92.
—— sliding (cut), 60.
—— trimming, 42.
Knocking down iron (cut), 6.
Lard, 124.
Lay cords, 23.
Lead type, 129.
Leaf, gold, 79.
—— gold, cutting, 80.
—— gold, thickness of, 80.
—— removing single, 162.
Leather covers, cutting, 90.
—— kinds of, 90.
—— non-porous, 126.
—— porous, 126.
Leaves, re-sizing, 162.
Lettering, 117.
—— calf, 140.
—— pieces, 136.
—— pieces, disadvantages of, 136.
—— pieces, for vellum books, 148.
—— pieces, substitute for, 136.
Letters, hand, 129.
Lining boards, 55.
—— boards, half binding, 55.
—— boards, whole binding, 55.
—— paper for, 88.
—— up, 87.
Machine, backing, 50.
—— cutting (cuts), 65, 66.
—— folding (cut), 7.
—— gathering, 8.
—— mill-board cutting (cuts), 54.
—— mill-board cutting, steam, (cut), 54.
—— rolling (cut), 11.
—— rounding, (cut), 47.
—— sawing in (cut), 22.
—— sewing (cut), 31.
—— sewing, 32.
—— sewing wire, 32.
Machines, to prevent, rusting, 171.
Making end papers, 35.
Maps, mounting (cut), 14.
—— throwing out, 13.
Marble comb, 72.
—— edges, sprinkled, 67.
—— nonpareil, 72.
—— shell, 72.
—— Spanish, 72.
—— spot, 72.
—— tree, 105.
Marbled edges, 69.
—— paper, 33.
—— paper, burnishing, 73.
—— paper, old Dutch, 34.
—— paper, transferring to edges, 74–75.
Marblers, mechanical (cuts), 75.
Marbling, 34–71.
—— ancient instructions for, 76.
—— calf, 105.
—— colours for, 69.
—— edges, 73.
—— edges, on gilt, 78.
—— edges, under gilt, 78.
—— ox gall for, 71.
—— paper, 73.
—— preparing for, 104.
—— requisites for, 69.
—— set, 77.
—— size for, 70.
—— trough (cut), 70.
Margins, 3–43.
Marking ink stains, removing, 164.
—— up, 20.
Mechanical marblers (cuts), 75.
Medium for finishing, 126.
—— importance of proper, 126.
Mill-board, cutting, 52.
—— cutting machine (cut), 53.
—— cutting machine, steam, (cut), 54.
—— shears, 52.
Mill-boards, 51.
—— made, 55.
—— name of, 51.
—— sizes of, 52.
—— price of, 51.
Missing sheets, 19.
Mitre piece (cut), 131.
Mitred back, 129.
Mock flexible binding, 90.
Monastic, bindings, 111.
—— finishing, 122.
—— tools (cuts), 112.
Morocco, blocking, 153.
—— imitation, finishing, 133.
—— joints, 98.
—— pasting down, 97.
—— sides, finishing, 141.
Mosaic work, 133.
Mounting, maps, 15.
—— photographs, 171.
Mountings, cleaning silver, 172.
MSS., preserving, 165.
—— restoring faded, 165.
Mull, 89.
Mud stains, 162.
—— removing, 162.
Neat, calf, 137.
Nippers, band (cut), 93.
Nitric acid, effect upon leather, 133.
Nonpareil marble, 72.
Non-porous leathers, 126.
Object of guards, 16.
—— of trimming, 42.
Old books, beating, 10.
—— head-banding in, 84.
—— sewing, 25.
Old writing, reviving, 164.
Opening books, care in, 169.
Overcasting, 18.
Oversewing, 18.
Ox gall for marbling, 71.
Oxford vellum, 147.
Oxymuriatic acid, restoring writing effaced by, 165.
Painting covers, 133.
Pallet (cut), 118.
—— using the, 123.
Paper, bronze end, 34.
—— burnishing marbled, 73.
—— Cobb, 33.
—— finishing, 145.
—— for lining up, 88.
—— incombustible, to render, 166.
—— marbled, 33.
—— marbled, old Dutch, 34.
—— marbling, 73.
—— paste, 35.
—— printed and fancy end, 34.
—— surface, 33.
—— waterproof, to render, 165.
Papers, end, 33.
—— end, making, 35.
Parchment, 147.
—— covering with, 94.
—— vegetable, 147.
Paring, 91.
—— knife, French (cut), 90.
—— knife, French, method of using (cut), 91.
—— knife, German (cut), 91.
—— knife, German, method of using, 92.
Paste, 170.
—— and glue, comparative advantages, 93.
—— for white morocco, 94.
—— for paper, 35.
—— rice, 169.
—— to prevent, moulding and souring, 170.
—— water, effect upon leather, 127.
Pasting, 36.
—— calf, 99.
—— down, 97.
—— down half bindings, 100.
—— Russia, 99.
—— single sheets, 17.
—— up, 36.
Peel, 159.
Photographs, boards for, 170.
—— mounting, 171.
—— removing, 170.
Pieces, lettering, 136.
—— lettering, disadvantages of, 136.
—— lettering, substitute for, 136.
Plates, 14.
—— coloured, 17.
—— guarding, 15.
Plough, round, 42.
Polishing calf back, 140.
—— calf sides, 142.
—— heat for, 140.
Polishing iron (cut), 119.
Porous leathers, 126.
Preparation, dry, 145.
Preparing for covering, 87.
—— for covering flexible work, 89.
—— for covering flexible work, not to show, 89.
—— for covering mock flexible work, 90.
Preserving drawings, MSS., etc., 165.
Press, arming, 117.
—— blocking, 150.
—— cutting (cut), 60.
—— finishing (cut), 121–122.
—— lying, 7, 37.
—— sewing (cut), 24.
—— standing, 18.
—— standing, American (cut), 19.
Pressing, 58, 143.
—— Parisian, mode of, 19.
—— various sized books, 58.
Proof, 57.
Public library books, 41.
Pulling, 5.
Putting on bands, 88.
—— on end papers, 38.
Refolding, 5.
Register, 3.
Religious books, edges, 122.
—— books, end papers, 33.
—— books, finishing, 122.
Removing blood stains, 163.
—— damp stains, 162.
—— dust, 161.
—— fat stains, 164.
—— finger-marks, 163.
—— fox-marks, 163.
—— ink stains, 163.
—— marking ink stains, 164.
—— mud stains, 161.
—— single leaf for cleaning, 162.
—— photographs, 171.
—— water stains, 161.
—— writing, 163.
Repairing books damaged by damp, 162.
Re-sizing leaves, 162.
Restoring faded MSS., 165.
—— writing effaced by chlorine, 165.
—— writing effaced by oxymuriatic acid, 165.
—— writing effaced by sea water, 165.
—— writing faded by time, 165.
Reviving old writing, 164.
Rice glue or paste, 169.
Roan, covering with, 95.
—— finishing, 133.
Roll, bar, 133.
Rolling, 10.
Rolling machine (cut), 11.
Round plough, 42.
Rounding, 46.
—— machine, 47.
Roman vellum, 147.
Runner, 54.
Run up back, 129, 139.
Russia, finishing, 145.
—— imitation, 96.
—— pasting down, 99.
—— treatment of, 94.
Rusting, to prevent, tools, etc., 171.
Satin, covering with, 95.
Saw cuts, depth of, 22.
—— cuts, filling up, 89.
—— marks (cut), 21.
—— tennon, 21.
Sawing in, 21.
—— in machine (cut), 22.
School books, end papers for, 41.
Scrapers, 79.
Set, marbling, 77.
Set off, 12.
Setting head band, 93.
Sewing, 23.
—— disadvantage of wire, 30.
—— ends, mode of (cut), 40.
—— flexible (cut), 27.
—— flexible work, 23.
—— keys, 23.
—— machine, 32.
—— machine (cut), 31.
—— old books, 25.
—— ordinary (cuts), 26.
—— press (cut), 24.
—— thread, 27.
—— wire, 30.
—— machine, 32.
Shears, mill-board, 52.
Sheets, 3.
—— duplicate, 19.
—— missing, 19.
Shell marble, 72.
Sides, blocking, 151.
—— calf, finishing, 141.
—— calf, extra finishing, 142.
—— calf, polishing, 142.
—— morocco, finishing, 131.
—— siding, 142.
—— tooling, 125.
Sieve, sprinkling, 68.
Signatures, 4.
Silk blocking, 146.
—— covering with, 95.
—— finishing, 146.
Silver mountings, to clean, 172.
Single sheets, pasting, 17.
Size, 74–79, 160.
—— for marbling, 70.
Sizes of books, 4–5.
—— of cord, 22.
—— of mill-boards, 52.
Sizing, 74–159.
Siding sides, 142.
Sliding knife (cut), 60.
Smooth cloth, covering with, 95.
Spanish marble, 72.
Sponges, 119.
—— cleaning, 172.
Spot marble, 72.
Sprinkled edges, 67.
—— marble edges, 67.
Sprinkling brush, 68.
—— calf, 103.
—— calf, fancy, 103.
—— calf, preparing for, 103.
—— colours, 68.
—— sieve, 68.
Stains, blood, removing, 163.
—— damp, 162.
—— effect of wrong bath upon, 158.
—— fat, removing, 164.
—— ink, removing, 164.
—— mud, removing, 162.
—— removing, 158.
—— removing, different, 158.
—— water, how to tell, 161.
—— water, removing, 161.
Stamps, 151.
Standing press, 18.
—— press, American (cut), 19.
Steel-faced backing boards, 50.
Stick, folding, 4.
—— cleaning off, 58, 59.
Stone, beating, 9.
Stove, finishing (cut), 120.
Straight grain leather treatment, 92.
Stuck on head bands, 86.
Substitute for lettering pieces, 136.
Surface paper, 33.
Swelling, 27.
Tail, cutting, 62.
Taste in finishing, 117.
Tennon saw, 21.
Thread, sewing, 27.
Throw up backs, 89.
Throwing out maps (cut), 16.
Thumb marks, removing, 163.
Time, restoring writing faded by, 165.
Title, 128.
Tools, Derome, 115.
—— finishing, 118.
—— for antique finishing, 122.
—— for gold finishing, 122.
—— Grolier, 113.
—— Le Gascon, 114.
—— monastic, 112.
—— to prevent, rusting, 171.
—— Venetian (cuts), 113.
Tooled gilt edges, 82.
Tooling, emblematic, 117.
—— sides, 125.
Top, gilt, 41.
Tree marble, 105.
Trimming, 41.
—— board, 41.
——French method of, 42.
—— knife, 42.
—— letter on, 43.
—— machine, 44.
—— machine (cut), 42.
—— object of, 42.
Trindles, 62.
Trough, marbling (cut), 70.
—— two sheets on, 29.
Type, 118–128.
—— brass, 129.
—— holder (cut), 118.
—— lead, 129.
Uncut edges, 41.
Unsized paper, to tell, 80.
Varnish, 120.
Varnishing, 143.
—— object of, 120.
Vegetable parchment, 147.
Vellum artists, 147.
—— binding, lettering pieces, 149.
—— binding, old, 94.
—— covering with, 94.
—— finishing, 147.
—— Oxford, 147.
—— Roman, 147.
Velvet, blocking, 146.
—— covering with, 95.
—— finishing, 146.
Venetian tools (cuts), 113.
Viennese method of inlaying, 135.
Vinegar, advantage of, 127.
Washing, 158.
—— dishes for, 159.
—— requisites for, 159.
Water, glaire, 79.
—— stains, how to tell, 161.
—— stains, removing, 161.
Waterproof, rendering paper, 165.
White morocco, paste for, 92.
Whole binding, lining boards for, 55.
Wire sewing, 30.
—— sewing, disadvantage of, 30.
—— sewing, machine, 32.
Writing effaced by chlorine, restoring, 165.
—— effaced by oxymuriatic acid, restoring, 165.
—— faded by sea water, reviving, 165.
—— faded by time, reviving, 165.
—— removing, 164.
—— reviving old, 164.
Wrong bath, effect upon stains of, 158.
CHISWICK PRESS:—C. WHITTINGHAM AND CO.,
TOOKS COURT,
CHANCERY LANE.
TRANSCRIBER’S NOTE
Original printed spelling and grammar are retained, with a few
exceptions noted below. Many illustrations have been moved
from their original locations to nearby places between paragraphs.
Original printed page numbers look like this: “|81|”.
link to table of contents
Page 21. In “by sewing a small book on fine bands”,
changed “fine” to “five”.
Page 46. Changed “spontanenusly” to “spontaneously”.
Page 52. A new KEY has been added to the table, so that the table can be
displayed properly in this ebook edition. Furthermore, each pair of
columns with headings “6d.”, “7d.”, “8d.”, “8x.”, “8xx.”, and “X.”
was originally printed with an illustration of a black rectangle showing the
relative size referred to. These illustrations are
moved out of the table to a separate figure just above.
Page 107. Changed “bason” to “basin”.
Page 121. A new paragraph break was inserted between “become dangerous”
and “A finishing press is”.
Page 164. Changed “subsitute” to “substitute”.
Page 179, Glossary, Entry “Stops”. Changed “mitring” to “mitreing”.
Page 182, Index, Entry “Covering”. In “preparing f r, 87”, changed “f r” to
“for”.


